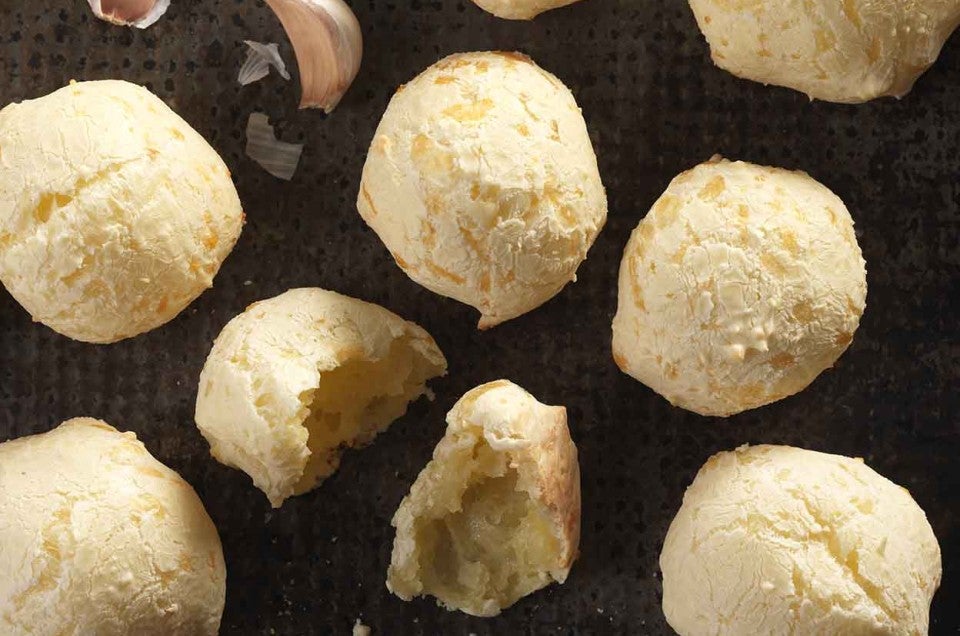


Are you living a gluten-free lifestyle? Do you LOVE cheese and garlic? If you answered yes to either (or both) of these questions, this is your lucky day. Because I'm going to show you how to make Brazils' Pão de Queijo, light-as-air, crusty/tender cheese and garlic buns.
They're fast. They're easy. They're certainly cheesy.
And they're absolutely, positively, 100% gluten-free.
How can this be, you ask? Read on.
One of the regular readers of this blog, Ricardo Gonzalez, writes us often from his home in Brazil, most recently to tell us about one of his favorite breads:
“Here in Brazil we have a nice and loved bread, all the Brazilians love ’em! I’m talking about Cheese Bread (Pão de Queijo) a nice soft delicious balls made of cheese and manioc starch. I promise to send recipe of this delicate bread to you PJ, but I think will not be easy to find manioc starch (we call it here POLVILHO) in USA markets. It’s the same that occur here in Brazil with Maple Syrup, difficult to find here. Anyway, these cheese soft ball breads, are common here freezed and sold in plastic bags. All of Brazilians and tourists who come visit Brazil loves a lot, Pão de Queijo!!! Hope you could visit Brazil and taste one of them in future!”
Since a trip to Brazil isn't in my near future, I asked Ricardo to send along the recipe. Which he quickly did – thanks again, Ricardo! I love having some vague idea of where I'm headed before taking off on any baking trip, so I Googled up a few pictures of Pão de Queijo.
Ah. I see. Round, puffy, light-gold rolls, looking very much like smooth-skinned cream puffs. (Try searching Google images for Pão de Queijo. You'll see a wonderful gallery of photos.)
Now I know where I'm going. Come along with me: let's bake Pão de Queijo – Gluten-Free Brazilian Cheese Buns – together.
Tapioca flour (a.k.a. tapioca starch, cassava flour, manioc flour; all the same thing) is “the tie that binds” here. Extracted from cassava root, this pure starch is gluten-free, and nearly protein-free. We've always used it to thicken puddings and pie fillings, but never knew it could make great buns.
One caveat: all tapioca flours are NOT created equal. I learned this when a friend baking gluten-free test-baked this recipe for me.
“They were delicious, everyone devoured them. But the dough wasn't scoopable; it was more like cake batter," she said. I know Dani is a good baker, and almost certainly hadn't measured wrong; so I quizzed her on what brand of tapioca she'd used. It wasn't the brand I'd used; I had to assume that was the difference. So caveat emptor; depending on which tapioca flour (or starch, same thing) you use, you may have to make a minor adjustment along the way.
But for now, let's get back to the recipe.
Preheat your oven to 375°F. These buns come together quickly, so give yourself enough time for the oven to come up to temperature.
Gather your ingredients:
8 tablespoons (113g) unsalted butter, cold
1/4 cup (57g) water
1/4 cup (57g) milk
3/4 teaspoon table salt or 1 teaspoon kosher salt
2 cups (227g) tapioca flour or tapioca starch
2 teaspoons minced garlic
3/4 cup (85g) grated Parmesan, Romano, or aged Asiago cheese
2 large eggs, lightly beaten
First, put the tapioca flour in a mixing bowl.
Cut the butter into pats. Put it in a saucepan with the water, milk, and salt. Heat until the butter melts, then bring to a boil. Pour into the bowl of tapioca flour.

Beat the mixture at high speed until it's cohesive and elastic; this won't take long, probably less than 30 seconds.
Beat in the grated cheese and garlic.
Drizzle in the eggs with your mixer running.

You'll have a viscous, fairly thick batter/dough.
We've found that tapioca starch/flour varies in its absorption capabilities. If you've gotten this far and the batter is thinner, more like cake or pancake batter, beat in additional tapioca flour/starch until it's thick enough to hold its shape when you scoop some onto a baking sheet. It should be the approximate consistency of cream puff batter: when you plop it onto the pan, it should settle slightly, but not spread into a puddle.

Scrape down the sides of the bowl, to gather everything into the center. This makes it easier to scoop.

Scoop golf ball-sized mounds of batter onto a lightly greased or parchment-lined baking sheet; you'll need two sheets. A tablespoon cookie scoop works well here.

The mounds will settle gently.
Bake the buns for 10 minutes. Rotate the pans – top to bottom, bottom to top — and bake for another 10 minutes, until the buns are barely beginning to brown. They'll be light gold, speckled from the cheese, and have an interesting “crackly” appearance.
Remove the buns from the oven.

Now for the good part. Grab a hot bun, and take a bite. No butter necessary – these are complete unto themselves.
Ahhhh.... SO good.
Offer them to your family, friends, or whoever happens to be with you in the kitchen. I promise you universal acclaim for these little gems. Share the recipe with your gluten-free-diet friends. They'll weep with joy.
It's unlikely you'll have any leftover buns. But if you do, wrap them in plastic and store at room temperature. Rewarm briefly in the microwave and be prepared for another one of those "ahhhh" moments.
Read, rate, and review (please) our recipe for Pão de Queijo, a.k.a. Gluten-Free Brazilian Cheese Buns.

