


Bakers are friendly people. So friendly, in fact, that they ping my phone at all hours. Sometimes it’s a question (Hey! Where can I get those proofing baskets!?) or a picture of a great bake (Check this out!!! Jealous?) or a request for a recipe (Send me that Rye Pretzel pls). The conversation is open — you don’t need an intro — just let the random texts fly!
Recently, one of these exchanges changed the way that I make bread at home.
Maura: I’m not using preferments. I just use starter from the fridge ...
Me: No preferment??!
Maura: Nope
Me: How much bulk fermentation?
Maura: 12 hours ... it works ...
Me: ???? Send me a picture
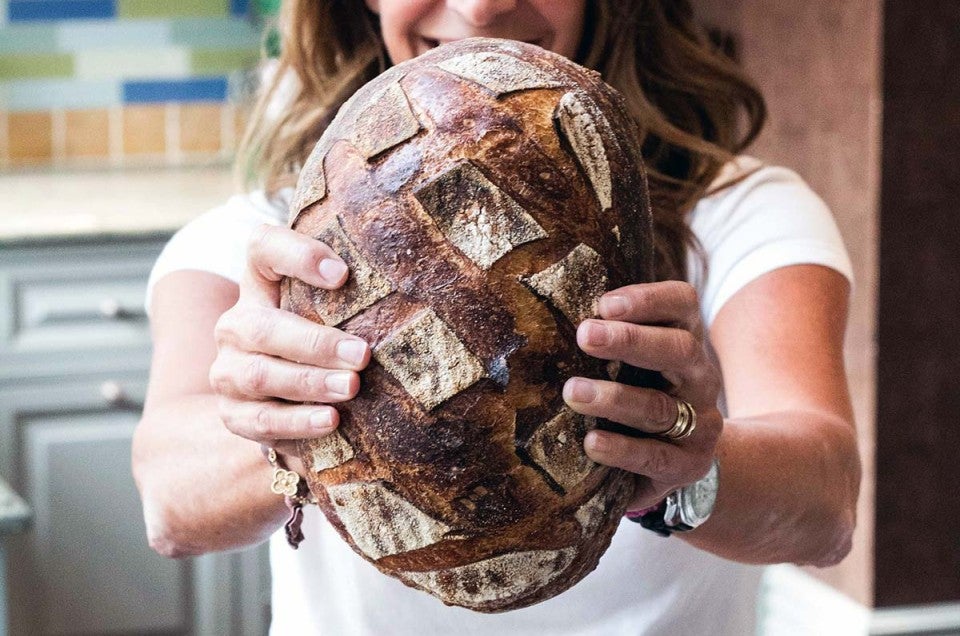
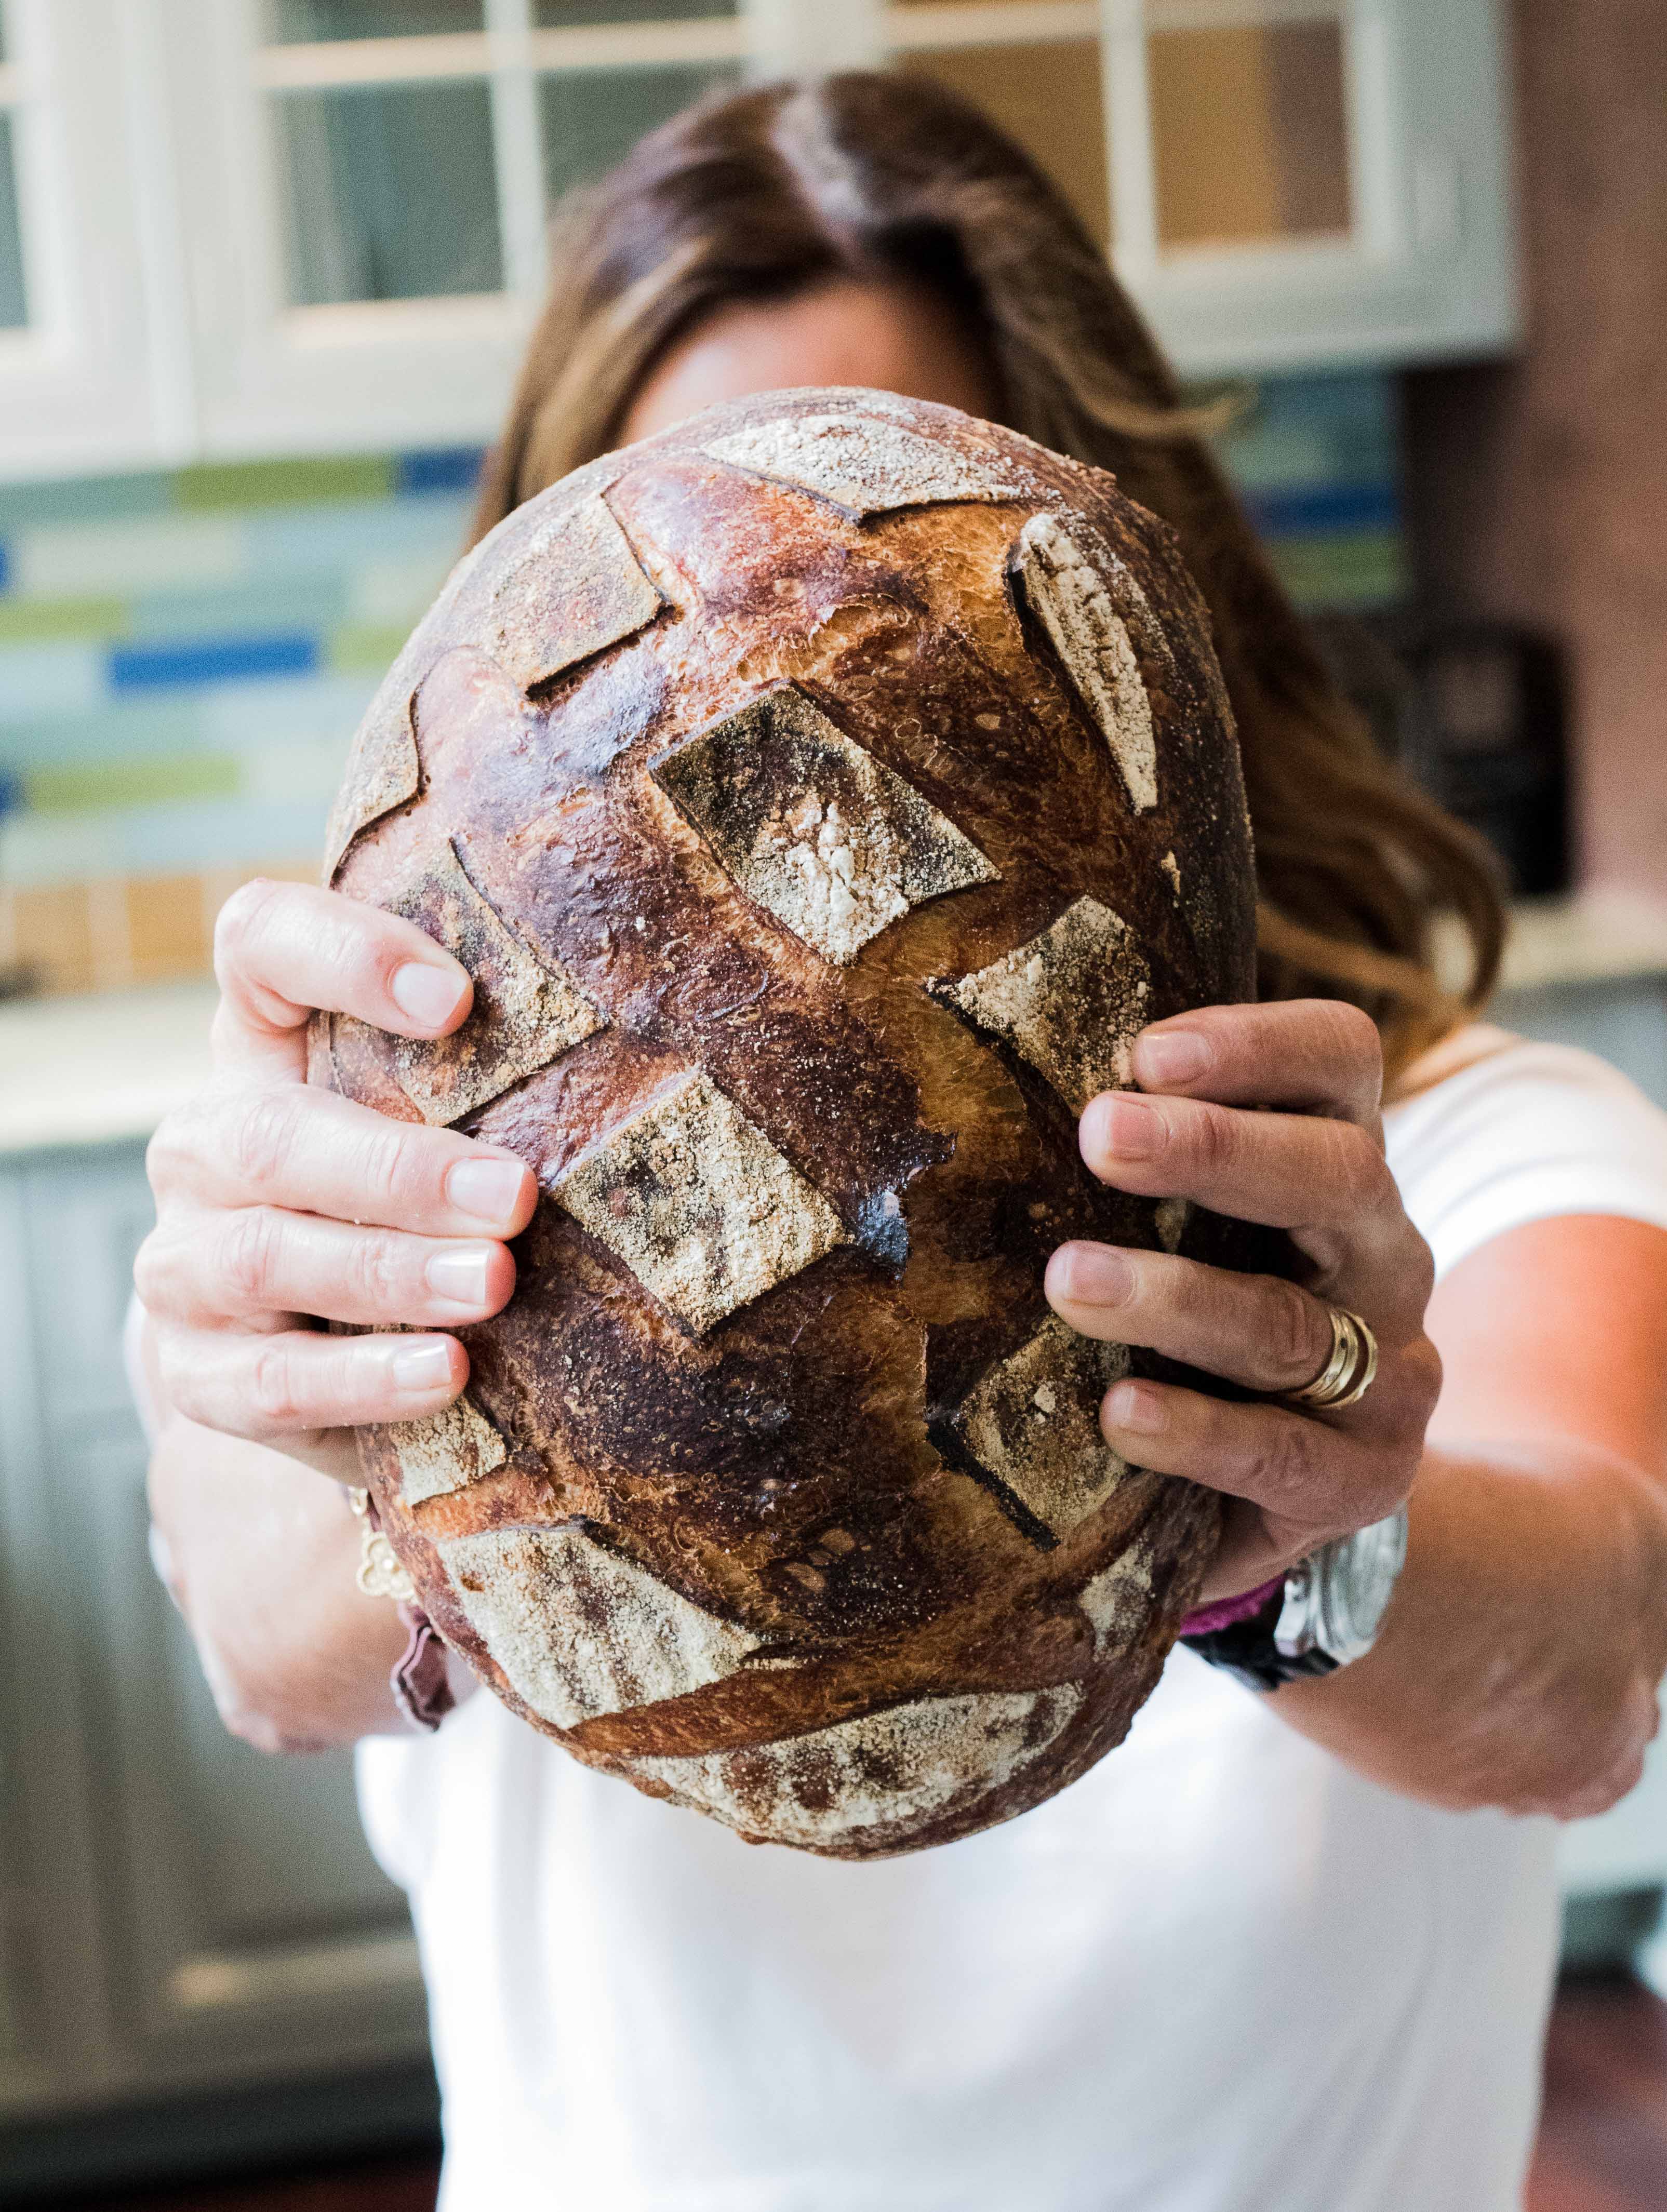
Maura Brickman, a serious home baker in Connecticut, followed up her text with a picture of a large crusty loaf with gorgeous color. It was bakery quality by anyone’s standard — and she made it with "unrefreshed starter," straight from the refrigerator.
As a baker, convention has been my path to reliable results. I trust what I have done before — I know how to produce reliable results.
Maura doesn't care about convention. Free of “should” and “ought to,” she bends her breadmaking process to fit her busy schedule. She doesn’t take any guff from her starter or loaves — she's the boss of her bread.
After some thought about her method and convinced that there must be a flaw, I decided to give the Boss’ method a shot.
Before I outline her process, let me quickly clarify standard procedure: the way things normally go.
Sourdough bread traditionally begins with a preferment — a dough set for 12 to 18 hours to develop flavor — followed by mixing and bulk fermentation. After bulk, we divide, shape, proof (either at room temperature or chilled until the next day), and bake.
Maura alters this process to fit her day. Remember: She’s the boss! Rather than setting a preferment, she skips directly to the final mix, using a small amount of starter that she feeds once a week and keeps in the refrigerator to leaven her sourdough bread. After the mix, her dough rises for approximately 12 hours before the divide and shape.

If you've read the piece that I wrote about preferments and flavor, you’ll know that I think they're the difference between run of the mill and a loaf you’ll remember. In this method, which skips the preferment, flavor comes from the long bulk fermentation. We’ve got flavor covered — just in an unorthodox way.
But why not just go with the normal process? Here’s the answer.
Have you ever been a bread hostage? Did you ever feel like, “I’d love to make bread but I don’t have a half day to do so.” Or, “I’d love to attend your wedding, but I might be making bread that day.” At my house, there's quite a bit of coming and going. While I enjoy the opportunity to slow down and make beautiful things, there are also days where I just need to put great sourdough bread on the table.
As a professional baker, the needy schedule of bread and pastry can rule my day. But when I’m on my own time, it can be a challenge to fit everything in. Does this ring a bell?
Maura’s system offers several points of relief. First, it allows me to limit my dough interactions to the beginning or end of the day (no more “take your dough to work” scenarios).
Second, I don’t have to plan too far ahead if I want to mix up a dough (remember, no preferment, just grab some starter and go).
And last, there's no discard. I can thumb past all the delicious recipes for discarded starter, which (although amazing!) I may or may not have time to try.
Here’s Maura's process.

Maura usually starts after dinner, around 8 p.m. Like many serious bread bakers, she measures her ingredients exclusively by weight, so I’m going to do the same in this article. She also tracks the temperature of her ingredients. In this case, all dry ingredients should be room temperature, 70 to 72°F.
In a 6-quart container, combine the following:
900g King Arthur Unbleached Bread Flour
100g King Arthur Whole Wheat or Golden Whole Whole Wheat
800g tepid water (75°F to 80°F )
20g salt
40g sourdough starter, unfed/discard
Use starter straight from the fridge, though it’s best if fed within the past week.
Mix the ingredients by hand until the dough forms a shaggy mass and the flour is hydrated.
Set a 15-minute timer and leave the dough in the container at room temperature with the lid on.

At 15 minutes, return to the container and fold by pulling the sides of the dough up with a wet hand, then pressing to the middle to seal. Repeat this on all four sides, then set the timer again for 15 minutes.
Wait and fold the dough two more times. As you perform the folds you’ll notice that the dough smooths out, gaining strength and becoming elastic (more like a rubber band).
Leave the dough covered tightly at room temperature (approximately 72°F) overnight (about 12 hours). If using a mixing bowl, place the bowl in a plastic bag. If using a 6-quart container, just put the lid on — the main point here is that the dough should be well-covered to keep the exposed surface moist.

At 8 a.m. the next day (don’t be too uptight here — it could be 7 a.m. or 9 a.m.), divide the dough into two pieces. Gently form them into rounds, seam-side down, and rest for 10 minutes, covered.
Generously and evenly dust two lined bannetons with whole wheat flour.

Shape the loaves into boules or batards. If your dough doubled on the overnight rise (the marked 6-quart container will help with judging this), put the loaves straight into the refrigerator. If it's risen by just 50%, leave the loaves out for a bit (30 to 60 minutes) and then put them in the fridge. Note that the loaves should be covered with a shower cap or plastic bag.
Maura’s baking schedule (which is essentially a daily habit — no wonder she’s so good at it!) aligns well with her generous nature. Some days she bakes in the morning and distributes loaves to friends or neighbors. When her kids are home from college, she adjusts; they can easily polish off a loaf with dinner.
To bake, preheat two Dutch ovens — approximately 4-quart size — in a 500°F oven for 45 minutes. (Make sure your Dutch ovens are tough enough to be preheated empty; not all are. Check the manufacturer's literature.)
Invert the risen loaves onto a sheet of parchment, score with a lame, and carefully place the dough in the preheated Dutch ovens. Replace the lids and return to the oven.

Reduce the oven temperature to 450°F and bake for 20 minutes with the lids in place.
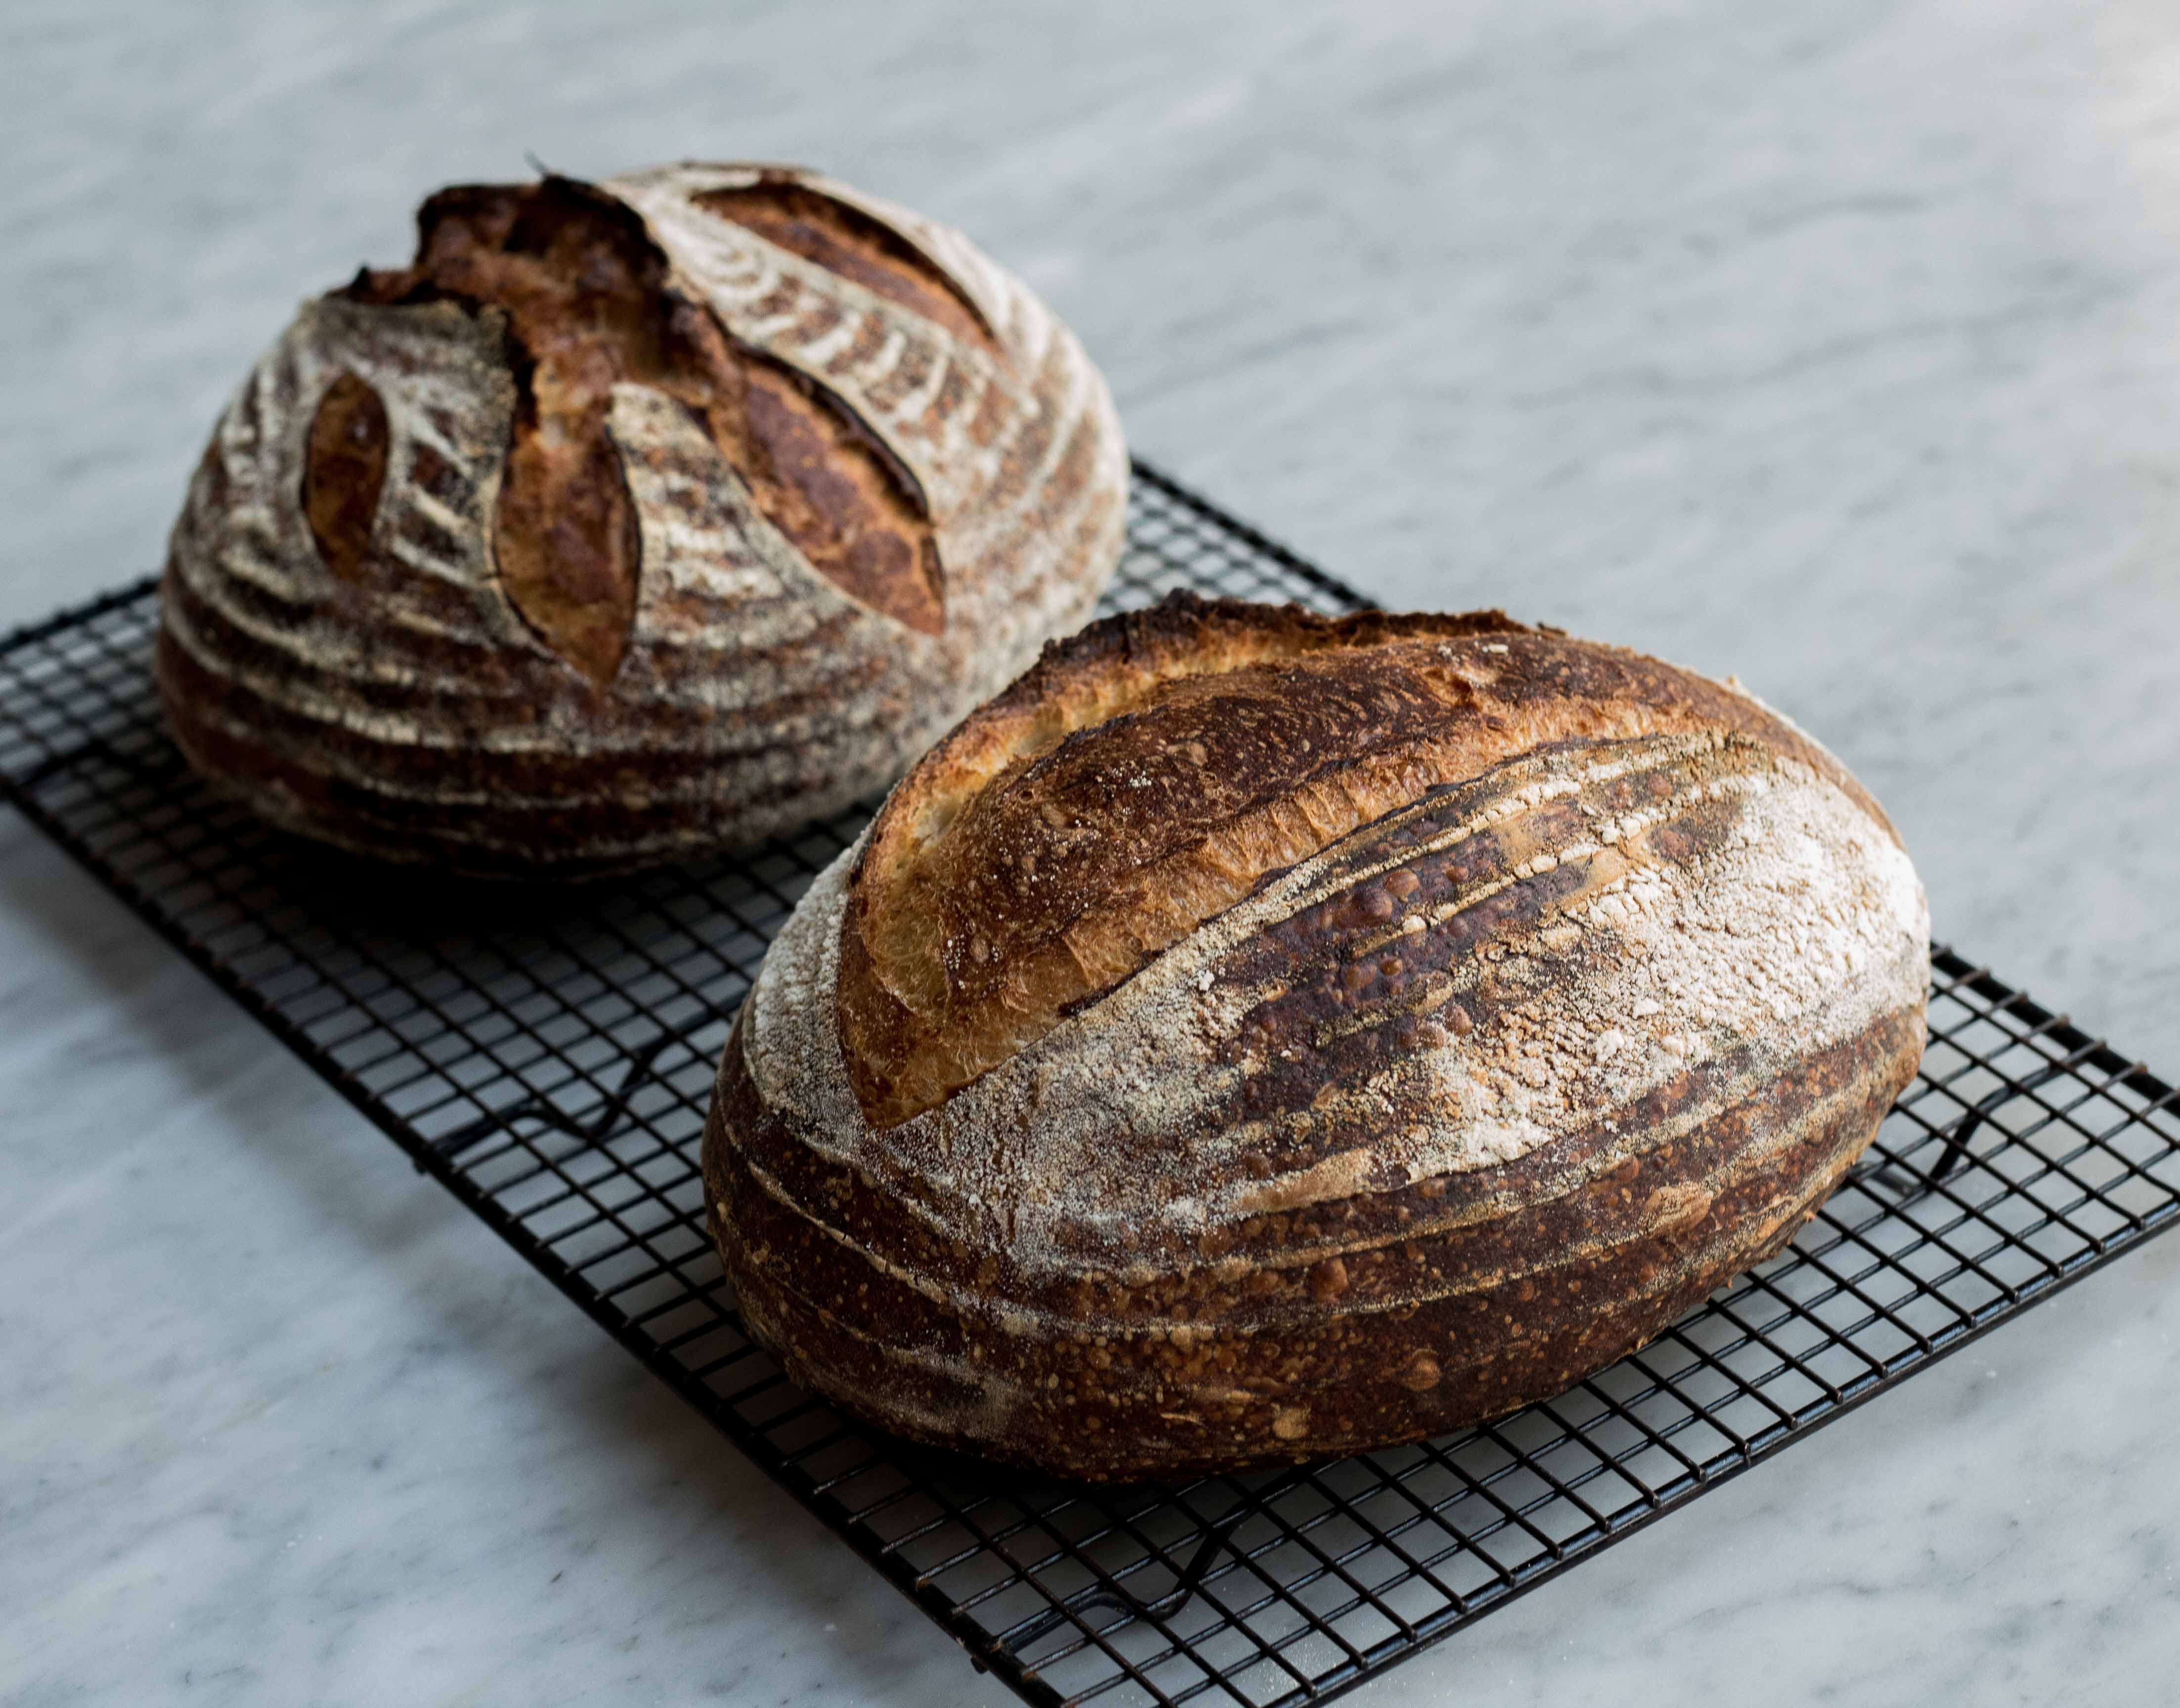
After 20 minutes, remove the lids and bake for another 20 to 25 minutes, or until the loaves have deep color.
After a few months of making Maura’s bread and receiving lots and lots of feedback from my family (often with a mouth full of bread), it’s become our daily loaf — the one that sits on our breadboard next to the butter. I’ve shared the process (via text) far and wide and have watched many people take on the role of Bread Boss.
As I’m an endless tinkerer and bread obsessed, I've adapted the recipe slightly. Here are some notes:
I use the same amount of flour (1,000g) but divide it differently. I use 750g of King Arthur Unbleached All-Purpose Flour. It’s strong enough for a good artisan loaf and it’s my Flour Power for the non-whole grain portion of just about everything in the house.
For the remaining 250g, I use a mixture of whatever flour I have on hand: whole wheat, golden whole wheat, whole rye, whole spelt, or even a little bit of buckwheat. I use a different blend of whole grains almost every time. My loaf is a little darker than Maura’s, but I love the flavor of the grains.
For water, I've lowered Maura’s quantity slightly. During cool months, I do need to warm my water to over 90°F; in warmer seasons, when my house isn't 60°F, I'll likely use 65°F water.
In early tests, my dough seemed a little sluggish. My Vermont wood-heated house is cool (many say cold!). As an adjustment, I increased the starter quantity to 100g in order to get things moving with a little more energy. As our seasons change and my house warms up I'll probably decrease the amount to Maura’s original 40g of unfed/discard starter.
Here are my measurements; all process steps remain the same.
750g King Arthur Unbleached All-Purpose Flour
250g King Arthur Golden Whole Wheat Flour
750g water — warm in the winter (90°F), cool in the summer (65°F), depending on ambient conditions
20g salt
100g sourdough starter
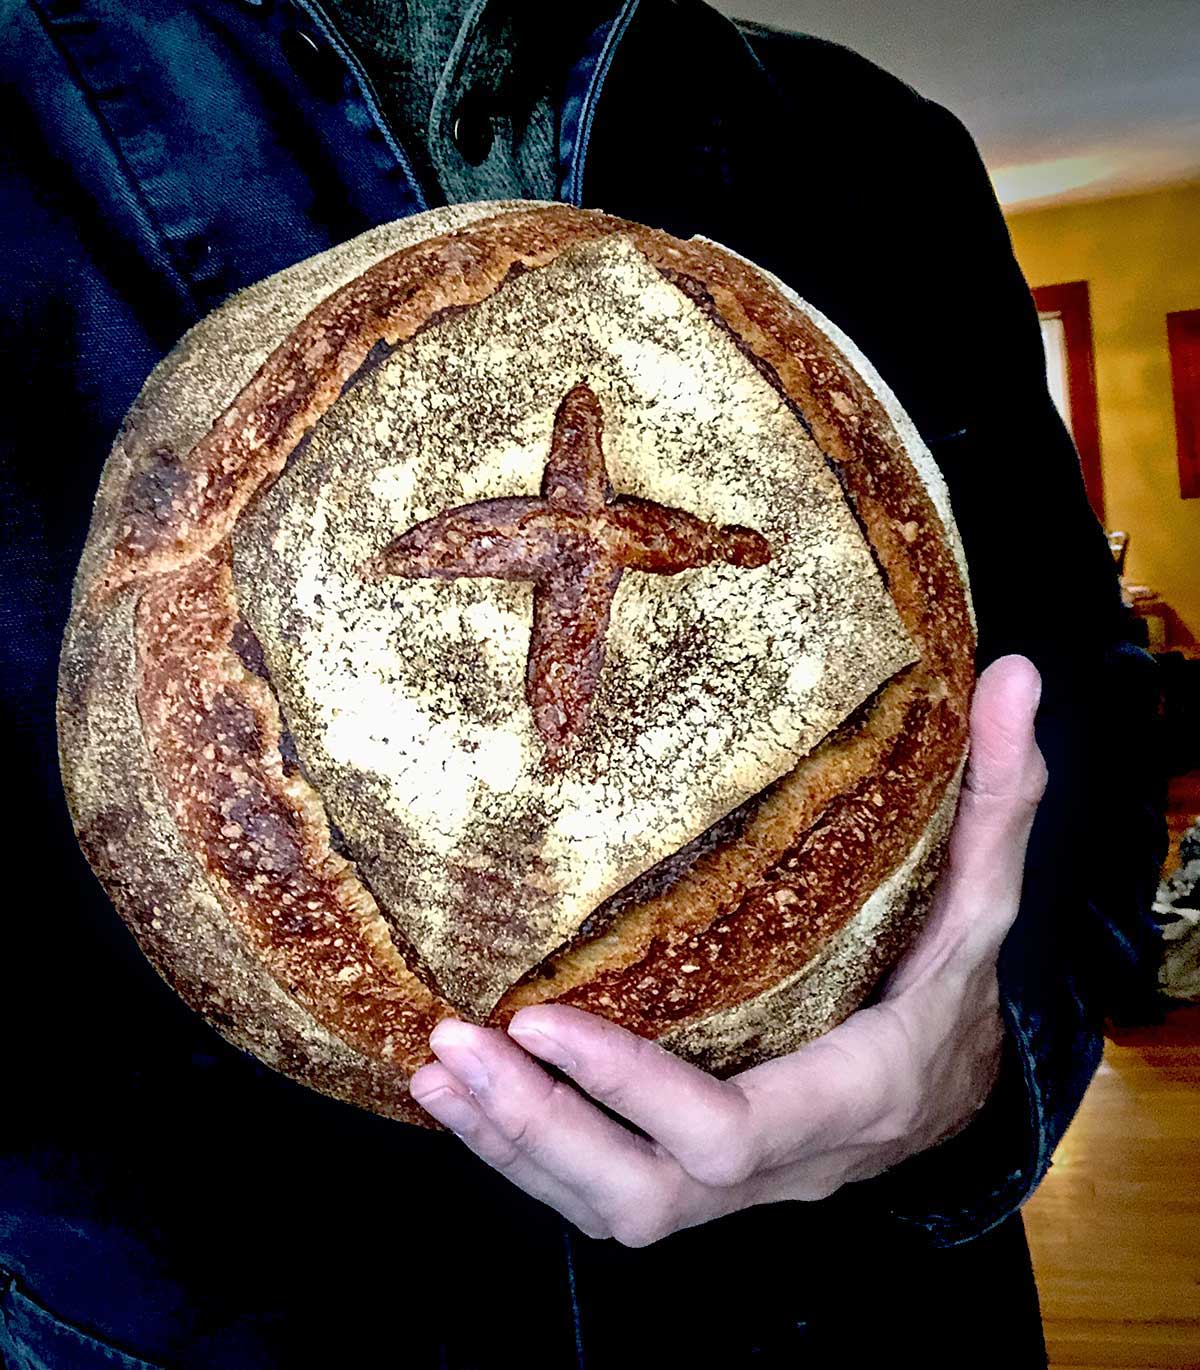
If you decide to give Maura’s bread a shot (every home needs a Bread Boss), let me know how it goes. Once you get the basic process down, you might consider adding seeds, toasted nuts, dried fruit, or even olives and herbs. As a starting point, for 1,000g of total flour use 200g of additions (in baker’s percentages that’s 20%). Keep all other measurements (water, salt, starter) unchanged.
As a general rule, anything dry (especially cracked or flaked grains, seeds, or toasted nuts) should be soaked in an equal weight of warm water for at least an hour — or even overnight — and strained before use. Olives and herbs don’t require this treatment as they're already moist. Use your imagination — maybe even dried figs with anise seed!
I want to express my gratitude to Maura for sharing her recipe and process. Baking is truly an act of love. When making things for our families, friends, and community, we bring our best selves. Thank you for the love!
For another recipe that uses the unrefreshed starter method, try our Do-Nothing Sourdough Bread recipe.


May 19, 2020 at 8:26am
Hi, I have made this bread four times already and the bread is delicious! Thanks so much. I was about to throw out my starter, but this saved its life! I do have one issue, and that is that after the first 12 hour rise on the counter, my dough is very wet and sticky. Trying to shape it into a round is very difficult and I end up in a big mess. Should I add less and less water each time until that does not happen? It always seems perfect up until this point. Thoughts?
June 3, 2020 at 2:01pm
In reply to Hi, I have made this bread… by Karen (not verified)
Hi Karen,
You might try dropping the hydration a little to make shaping easier. Try 730 or 740 grams per kilo of flour.
All the best,
Martin
May 18, 2020 at 11:15pm
Martin - After watching your Youtube video about this recipe a few times, I attempted to bake this loaf. I used your flour ratios and weighed the ingredients to the gram. The dough felt very wet. Not sure what happened but I used my starter that had been fed in the last week - first rise after 12 hrs was spectacular. Shaped it and put it in fridge for the cold 12 hr rise. It hardly rose at all. Baked it 450 in a dutch oven for 30 mins then 15 mins w/out the lid. The loaf looked good. Not very tall. Looked like a baby loaf. It tastes and chew is good but I wonder if I over proofed the 1st rise so no energy was left in the final rise to give the loaf much loft? Any thoughts? I'm new to yeast bread baking but love the process and have really enjoyed watching your vids w/ your kids!
June 3, 2020 at 2:04pm
In reply to Martin - After watching your… by Lena M. (not verified)
Hi Lena,
Thanks for your question--I'm so glad that you're enjoying the videos!
If the first rise was good (you're looking for something just below or equal to a doubling), you should be ok for the final rise. If the loaves don't move much in the fridge, allow them to "wake up" some before baking. The rise in the fridge shouldn't be significant. Try it again and let it warm for an hour or so before baking on day two. Let me know how it goes!
Happy baking and be well,
Martin
May 18, 2020 at 3:31pm
Hi- would you consider an autolyse for the recipe- perhaps combine the water and flour before dinner and then mix it with everything else around 8 pm? Would there be any benefit to the end result for doing that? Thank you
June 3, 2020 at 2:06pm
In reply to Hi- would you consider an… by Diane in CT (not verified)
Hi Diane,
No problem with that, at all. It may even improve structure some. Have fun!
Martin
May 17, 2020 at 3:56pm
Greetings! I see that there are some comments here that refer to a video that the author made on Maura’s method. I scanned this blog page carefully but cannot find a link to a video. I’d love to see it as I am interested in giving this method a try. Thank you for any help that you can give me.
June 3, 2020 at 2:13pm
In reply to Greetings! I see that there… by Pamela Moulton (not verified)
Hi Pamela,
Yes, I made a video of this process. Look on the King Arthur Facebook OR YouTube page. You'll see it there. I'll put a link here--I'm not sure if you'll be able to click it or not. If not, search Martin bakes at home - Maura's sourdough.
https://www.youtube.com/watch?v=kUmkS2KAKdI
Happy baking!
Martin
May 15, 2020 at 11:29pm
I have two questions: 1) I'd like to add 200 g of diced olives and figs (all together, 50-50) to the dough. Can I do it at the very end, just before baking? 2) Also, I have added much less salt, maybe 1/2 or 3/4 tsp, I don't think it is quite 20 g. Is that ok please? A third question: 3) I have used 20g of sourdough starter as suggested above, but should i add yeast as well please?
Thanks again.
June 3, 2020 at 2:16pm
In reply to I have two questions: 1) I'd… by arvind rajagopal (not verified)
Hi Arvind!
Love the combination of olives and dates--great! Add those things toward the end of mixing. If you add just before baking it will negatively impact the dough structure.
Lowering the salt is fine--make it how you like it.
I like this recipe with 40 to 100 grams of starter, no commercial yeast. Feel free to experiment!
Happy baking,
Martin