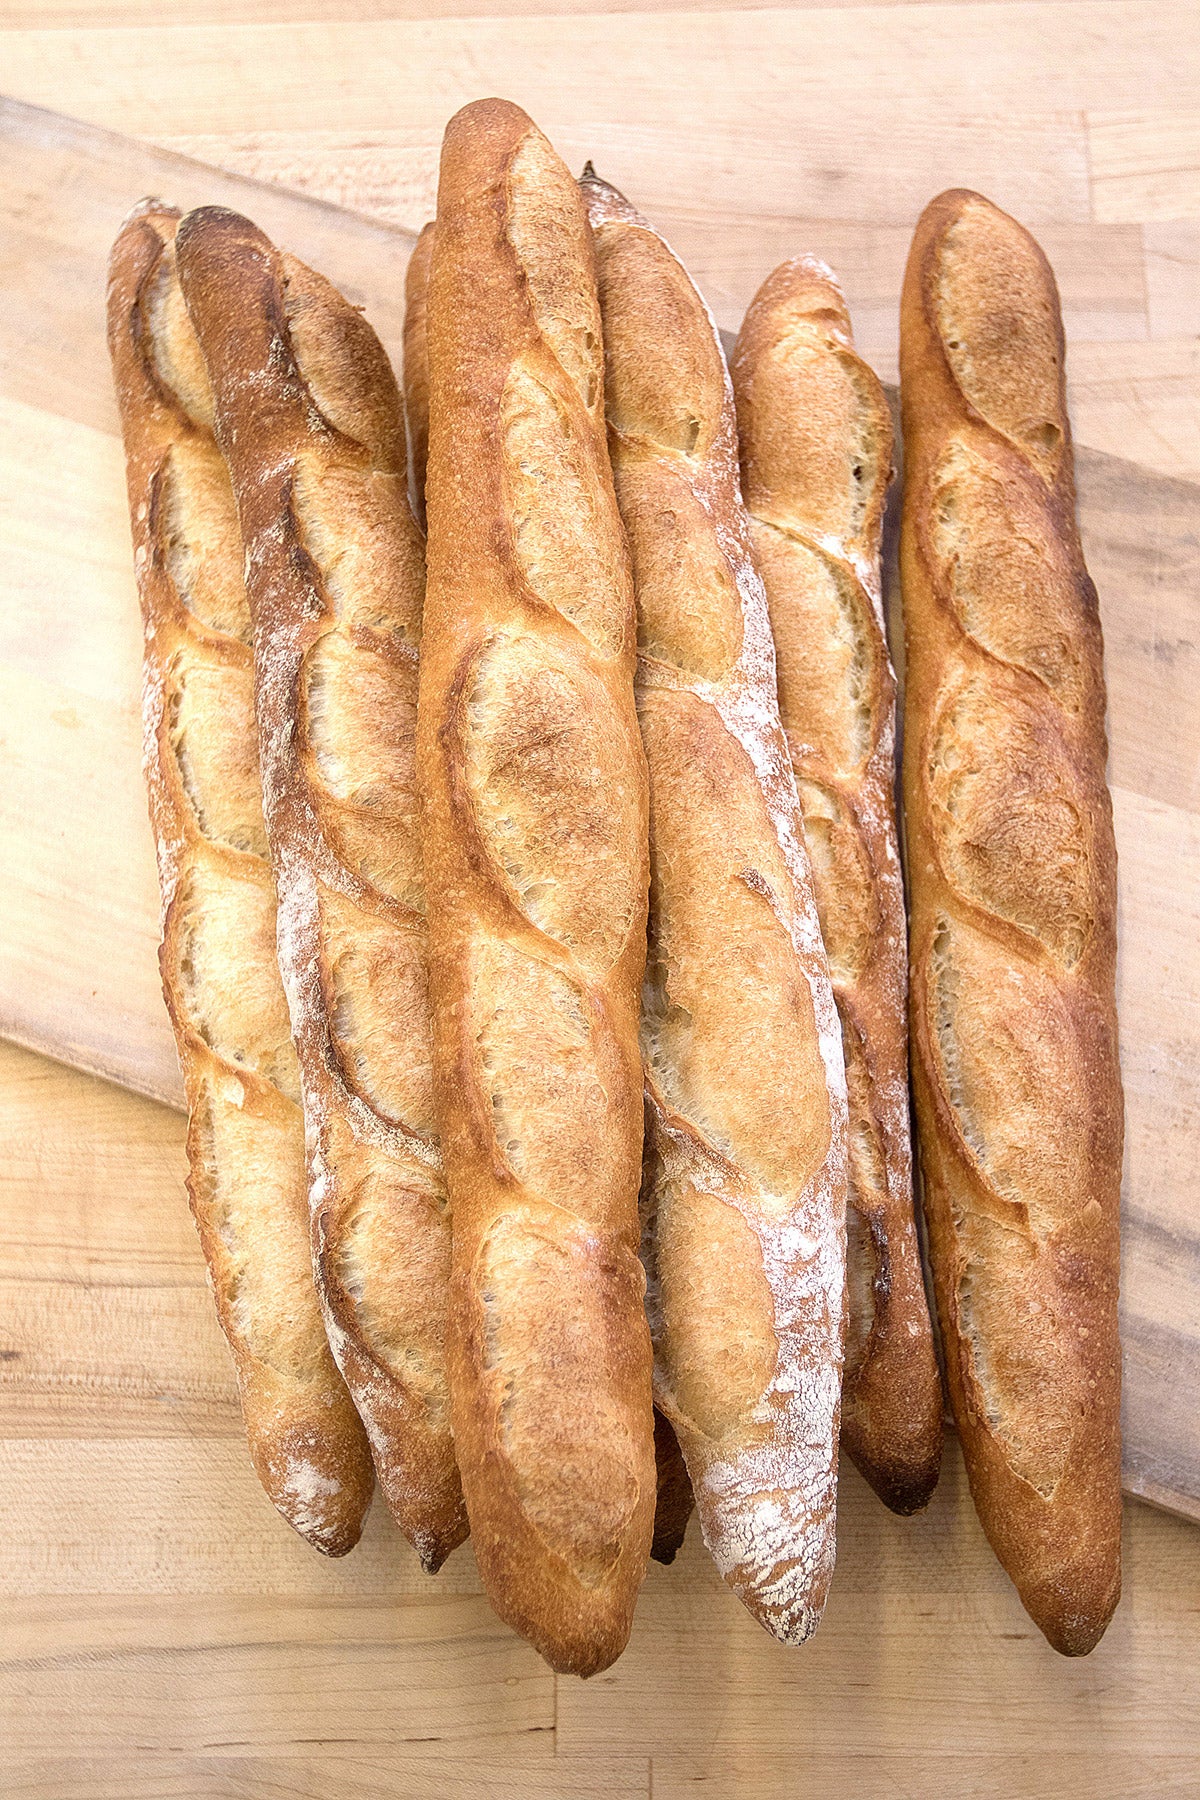


Our Classic Baguettes recipe is just as the name states – a classic. These baguettes are going to closely resemble those from an artisan bakery. They'll be chewy and riddled with holes on the inside, and crisp and golden on the outside.
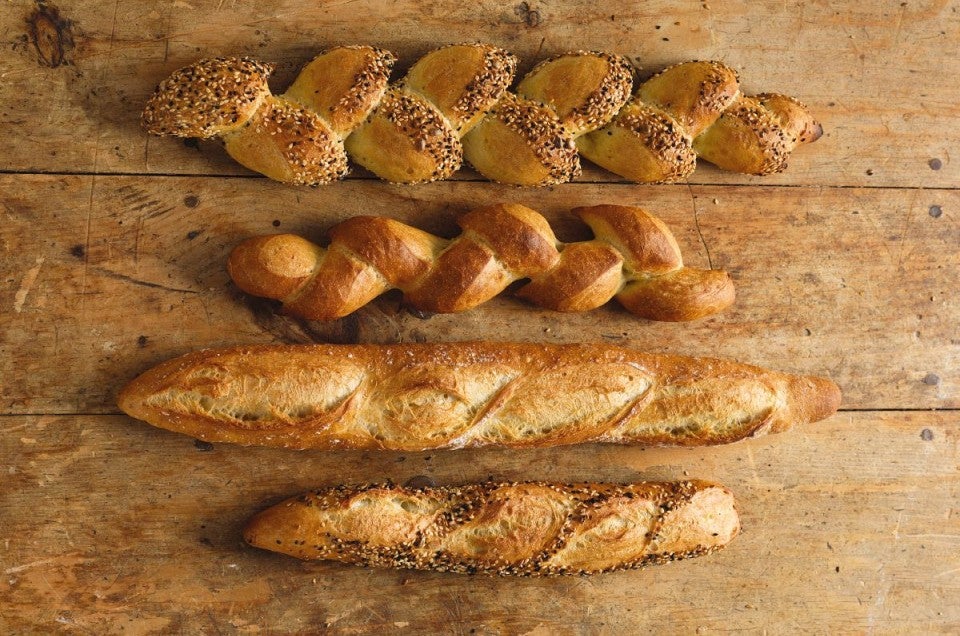
But this baguette dough does more than that – you can make four beautiful styles of baguette with just a few simple variations. Don't just take my word for it, see for yourself – the pictures don't lie!
Once you've made your dough and it's had its long, slow first rise (with a gentle deflate towards the end), turn it out onto a lightly greased work surface. Follow along as we make 1... 2... 3... 4! baguettes that are as beautiful as they are crisp and delicious.
Divide the dough into three equal pieces. Shape each piece into a rough, slightly flattened oval, cover with greased plastic wrap, and let rest for 15 minutes.
Working with one piece of dough at a time, fold the dough in half lengthwise, and seal the edges with the heel of your hand. Flatten it slightly, and fold and seal again. To see it in action, check out our video on how to shape a baguette.
With the seam-side down, cup your fingers and gently roll the dough into a 15" log. Place the logs seam-side down in the folds of a floured couche. Cover the baguettes, and allow to rise until they've become very puffy, about 1 1/2 hours.
Artisan bread bakers use a canvas cloth (couche) to create their fabulous, crusty baguettes. The baguettes are placed on the couche while they rise, enabling the dough to keep its shape intact and its surface dry. This allows it to create a thin skin – which is the secret to that chewy crust. If you don't have a couche, you can evenly space your baguette dough on a piece of parchment. The form just may spread a little with no sides to hold it up.
Toward the end of the rising time, place a pizza baking stone on the lowest rack of your oven, and preheat the oven to 450°F.
Baking stones are recommended for home baking because they closely recreate the atmosphere of big bakery ovens. The stone absorb the oven’s heat and transfers it to the baguette, providing a very hot, even bake, compared to the air temperature fluctuations your loaf might endure on a plain metal pan. In addition, moisture from the loaf's interior is drawn to the outer crust by the porous stone, yielding bread with incredibly crackly/crunchy crust and a light interior.
Gently roll baguettes from the couche onto a baker's peel, and then onto a piece of parchment. If you don't have a peel, you can use the back of a baking sheet to move your dough.
 Or simply onto a peel (as shown here), if you've perfected the art of "shaking" a shaped baguette from peel to hot baking stone.
Using a very sharp knife or lame held at about a 45° angle, make three to four 8" vertical slashes in each baguette. Our video on how to slash a baguette walks you through it.
A lame (meaning "blade" in French) is a curved extra-sharp blade that professionals use to slash their bread. The curved blade – paired with the proper holding technique – really allows the blade to get underneath your crust as you cut, allowing just the right shape of expansion for your bread as it bakes. A knife will certainly score the dough, but it won't give the classic crunchy "ear" shape that we associate with baguettes.
Spritz baguettes heavily with warm water, then transfer them to the heated stone in the oven.
If you don't have a baking stone, you can transfer the baguettes – parchment and all – onto a baking sheet. The parchment keeps the loaves from sticking while they bake.

Bake baguettes until they're a very deep golden brown, 25 to 30 minutes. Remove them from the oven and cool on a rack.
If you'd like to crust your baguettes with seeds, you're in luck – our bakers have mastered the art of seeding.
Dampen a kitchen towel, fold it in half, and lay it flat. Sprinkle a generous amount of seeds in a separate pan. Picking up your risen baguette, roll it first on the damp towel, and then in the seeds.
Our bakers find this method to be much more consistent than spritzing with water and sprinkling seeds on top. Any unused seeds can go back in a container for later use.
In Paris, every self-respecting bakery will offer épi de blé (sheaf of wheat) baguettes, a whimsical twist on the everyday baguette loaf. Once you hear the translation, you'll note that these stunning loaves do, in fact, resemble a sheaf of wheat. They're the ultimate picnic food, with each point breaking off into its own little bread roll.
Divide the dough into three pieces. Shape each piece as you would for a classic baguette.
Using scissors held at a 45° angle and held wider than the mouth of the bread, make swift, clean cuts 3/4 of the way into the dough. Move each cut piece to alternate sides of the loaf.
Repeat the process 2" to 3" farther down the loaf, moving the cut piece to the opposite side. Continue doing this until you reach the other end of the loaf.
Seeded dough is also easy to turn into épi de blé. They cut exactly the same way and create stunning loaves.
Note: the farther you cut into the loaf, the more elegant, though fragile, your épi de blé will be.
Smaller in size than the classic, demi baguettes are perfect for that "dinner for two." They also make the best sandwiches when split in half lengthwise and filled. Brie and apple, anyone?
Divide the dough into six pieces. Shape each piece as you would for a classic baguette, rolling them into 7"-long loaves.
Demi baguettes are as versatile as their larger counterparts. They can be seeded (or not), as well as made into miniature épi de blé.
"Why would you want to fill a baguette with meat and cheese?" Silly question. The better question should be, "Who wouldn't want to?!" Stuffed baguettes make terrific picnic food, airplane food, hiking food, work lunch food...
Divide the baguette dough into six pieces, and shape each into a 5"-long rectangle.
Layer with your favorite filling; we like mustard, ham, and Swiss cheese. Roll up like a jelly roll, sealing the long seam and pinching the ends closed. Place on a parchment-lined baking sheet, and allow to rest for 15-20 minutes, until just slightly puffy. Slash each baguette twice lengthwise before baking.
They aren't the most "baguette-like" if the cheese happens to bursts through, but crispy cheese will win any beauty pageant we're judging! Delicious.
There's nothing quite like the smell of freshly baked baguettes – but why go all the way to the bakery, when you can make them at home? Hopefully these baguette variations inspire you to get into the kitchen and get baking!


