

The air is crisp, the leaves are turning, and the apples are coming in.
It’s my favorite time of year, because it also means I’ll soon be on the road, meeting our customers, and teaching people how to make pie crust.
People are afraid of piecrust. They want to recapture the pies their grandmother made, and taste memories can be awfully hard to compete with.
So we go on the road, hoping to ease that anxiety, because once you enjoy the process, everybody wins. And, hopefully, pie happens. You may not get there the same way I do, but I can show you what works for me, and maybe I can inspire you to give it a go. PJ has a different way to get there, and the pie is just as awesome. The moral of our story? Any way you get to good pie is a path worth pursuing.
Flour. Salt. Fat. Water. Four ingredients, four thousand ways to put them together.
First things first. Add the salt to the flour so your crust doesn’t taste flat (especially important if you’re using unsalted butter). Stir together. Next? Flaky or tender: both adjectives you want to see applied to your finished crust. Want both? Keep it cool (the butter, that is). Should be right out of the refrigerator.
Cut in the first half of the fat fairly small (this coats the flour, therefore tender).
For flakiness, cut in the other half, leaving it in big chunks. Bigger than you think you should. This big.
Really.
Now the tricky bit. Add the water and toss with a fork, but keep things on the dry side. Just enough so that some of the dough will hold its shape with a gentle squeeze, but with about a third of the mixture still pretty dry.
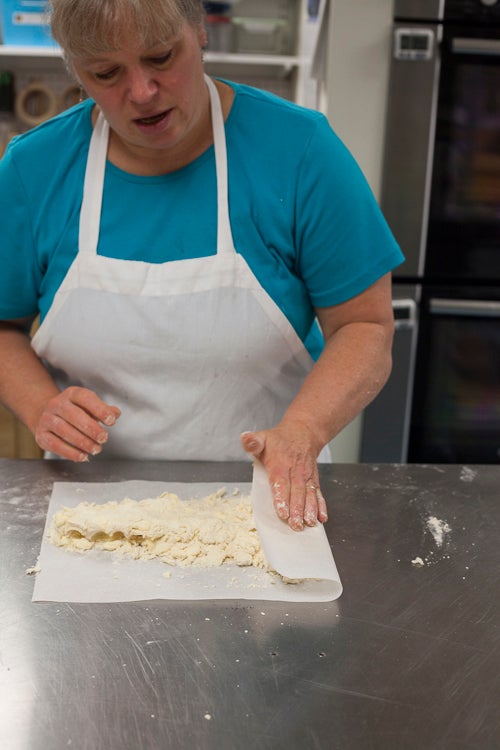
How to get the rest of the dough to come together, without making it soggy or tough? Turn the mess out on a piece of parchment.
Organize it into a band the length of the paper, and reach for your new best friend.
The spray bottle. Give the really dry-looking parts of the pile a few spritzes,
then use the parchment to fold the dough over on itself.
Repeat, spritzing as necessary, until the dough comes together, with some dry crumbs still shedding around the edges.
Divide 60/40 (the bottom crust should be bigger).
Check out those layers!
To roll out a round crust, put it away round, taking time to smooth the edges. Pat the dough into a disk. It’s OK that there are some crumbs still flying around.
I use sandwich bags to store the crusts; they're easier than wrestling with strips of plastic wrap. You’re going to rest the dough for 25 to 30 minutes, and during this time the water will redistribute itself.
The gluten will also relax, making rolling easier. Smooth edges will keep those dreaded Grand Canyon cracks from appearing when you roll. Which means no desperate wetting, patching, stretching, or (we know it happens) swearing. You can start making your crusts for Thanksgiving RIGHT NOW. Once you're at this point, no problem to pop your creations into the freezer for up to 2 months. Thaw in the fridge overnight before rolling.
What a difference a little rest makes. See how the dough has changed? Not dusty or crumbly, just ready to go. And still big butter chunks visible (remember, those are flakes in the making!).
Many moons ago, Mom taught me to roll pie dough between 2 sheets of waxed paper. I've graduated to slightly different tools, but the idea's the same. Take a piece of parchment, flour it. Grab a food storage bag, cut off the bottom and up the sides.
Put your dough disk on the parchment, sprinkle with more flour, and put your nice big sheet of plastic on top. I use this “sandwich” and one hip to keep the dough where I want it.
Work from the center of the dough out, but don’t get all contortionist about it. You can pivot your little dough sandwich much more easily than you can bend yourself 180°!
Big enough? Check with the pan above the dough, inverted. Make sure there’s about 2” more dough than the pan’s perimeter. People always ask: "What's the best pan for pie?" "Any pan with pie in it is a good pan", I reply.
Ahh, the poor sacrificial first slice. How many mangled first servings of pie have you experienced? No one tells you this, but you can (and if your dough is relaxed, should) grease your pan. It’ll make taking slices out easier, but will also help brown the bottom.
Plop your dough in the pan, trim the edges, flute. I’ll be doing a schmantzy top, so no need to wait on finishing the edges.
Now for the filling. I like to use at least 3 types of apples, for more complex, interesting flavor. This pie has Granny Smiths, Braeburns, and Honeycrisps in it. Sugar, cinnamon, flour. Some boiled cider and lemon juice for brightness and intensity.
Some of my colleagues swear by a generous dose of vanilla here: this recipe gives you an idea. A little bit of hooch (bourbon, for me, please) never hurt, either. Need a formula? Here's the recipe we give out at our demonstrations. Stir, fill, set aside (in the fridge) while rolling out the remaining crust.
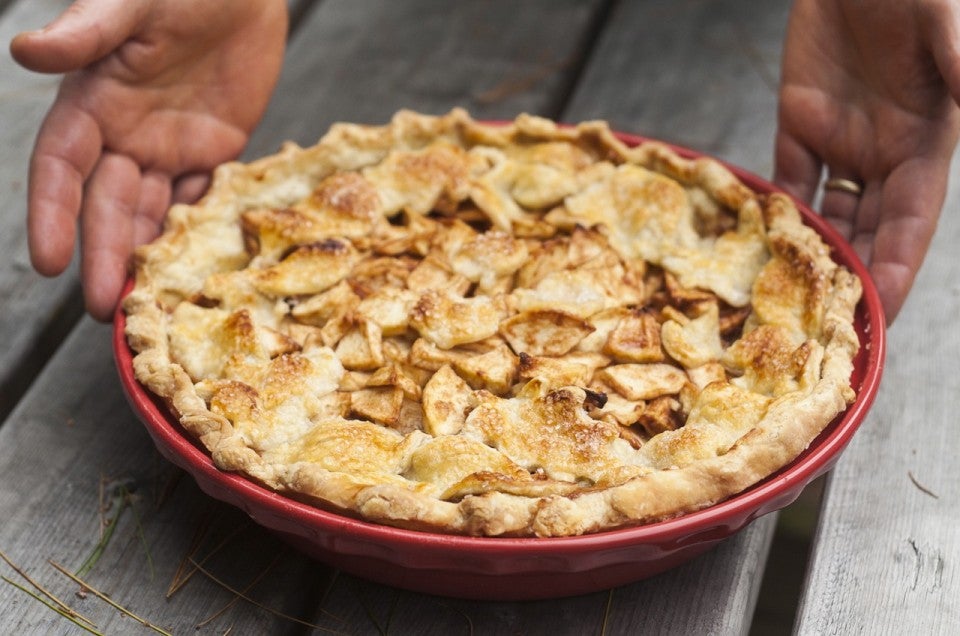
The easiest, prettiest thing to do is use some seasonal cutters on that dough,
and place the shapes on top of the filling. Easy as… yes, pie to do, and looks just gorgeous. If you want to get all in it, you can emboss the leaves with a paring knife, la de da!
Place, brush with milk or cream, sprinkle with sparkling sugar, bake. I love this technique because the leaves ride down on the filling as it bakes, avoiding that big old gap you sometimes get with 2-crust pies.
When I said bake, I meant to say on a parchment-lined pan. Bake at 425°F for 15 minutes, then 350°F until you see some real live bubbles in the center. Remove, cool, slice, share pie happiness.
By the way, these amazing photographs are courtesy of Julia Reed, our new public relations coordinator (and good company in the kitchen to boot!). I thank her for helping me show you how much fun and beautiful making pie can be.
If you're gearing up for pie season, be sure to check out our comprehensive Pie Baking Guide.


