


Do you have a certain food that floods you with childhood memories? No, not the canned peas your mom insisted you eat before you could leave the table. I mean a positive food experience — like your aunt’s special chocolate layer cake, or the peanut butter cookies enjoyed with your best friend after school.
My grandma wasn’t a baker, but she was, bar none, the best turkey sandwich maker ever. At the end of our annual Thanksgiving visit, she’d spread butter on flour-dusted soft white “snowflake” rolls from the supermarket down the street, then fill them with thick chunks of leftover turkey sprinkled with salt and coarse black pepper. A smear of mayo on top was the final touch.
Ever since those beloved childhood sandwiches I’ve had a special place in my heart for soft dinner rolls. Many people crave crusty baguettes or a chewy sourdough loaf. Some favor whole grain loaves packed with seeds and nuts. Me? I’ll take a tender white roll any day. And if it’s a potato roll — not only soft but moist, and with a hint of mashed potato flavor — so much the better.

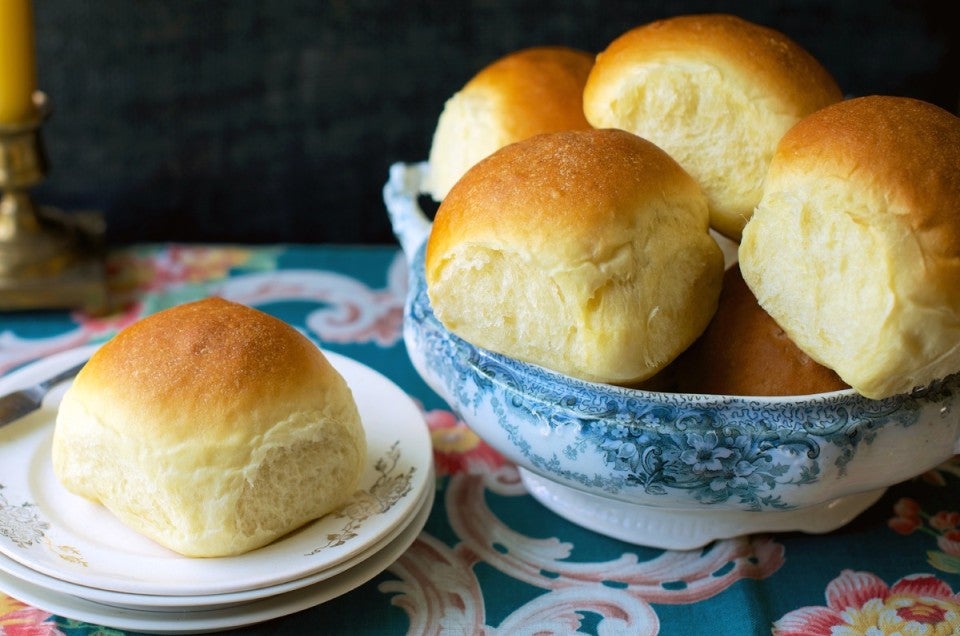
Amish Dinner Rolls are the quintessential potato roll. Golden from both butter and eggs, barely hinting at sweetness, and moist and flavorful thanks to the potato, they’re a wonderful complement to any meal.
While these rolls are welcome at all times of the year, I implore you: when Thanksgiving rolls around, make and enjoy Amish Dinner Rolls hot from the oven. Next day, go cold turkey (with mayo). You’re welcome.
Usually recipe directions take you step by step through the process. Beware, readers — I’m going to wander a bit here, but it’s all to ensure that you end up with the very best rolls possible.
Here are the ingredients you’ll need. It’s fine to use leftover mashed potatoes; just be sure, if they’re heavily salted, to cut back on the salt in the recipe a bit.
*Starchy russet (baking) potatoes (rather than waxy boiling potatoes, e.g., baby red or Yukon Gold) are best for this recipe. A medium-to-large russet potato will yield 227g of mashed potato.
The instructions for this recipe start out, “Mix and knead all of the ingredients together — by hand, mixer, or bread machine set on the dough cycle — to make a smooth, soft dough.”
Let me elaborate on this, as there are a couple of paths you can take.

First, you can do exactly what the directions say: gather all of your ingredients, put them in a bowl, mix, and then knead into a soft (very soft) dough. Or go the bread machine route: place everything into the bucket, program for dough or manual, and press start. To avoid lumps in your finished rolls, make sure your mashed potatoes are very smooth. If you're using leftover mashed potatoes and they're a bit lumpy, either warm them gently and mash until smooth, or purée them with a bit of the liquid in the recipe before using.
Second, you can deviate from the directions slightly and do what I do: save a couple of steps and in the process create a lovely, smooth roll.
Get out your digital scale (if you don't have a scale, follow the recipe as originally written). Take one medium-to-large russet potato and weigh it; so long as it weighs at least 230g or so, you’re good to go. Peel the potato, cut it in chunks, and put the chunks into a saucepan. Add enough water to cover, and simmer until the potato’s easily pierced with a fork.

While the potato’s boiling, put the sugar, salt, and butter into the bowl of a food processor. When the potato’s soft, drain it (saving the water), and weigh out 213g potato. Toss the potato into the processor bowl, followed by 170g (3/4 cup) of the hot potato water. The water is full of sloughed-off starch; why discard it? After all, potato starch is what makes these rolls moist and prolongs their shelf life.

Process everything until smooth and lump-free, then head back to your recipe and continue with it as written.
Why do I prefer this method to simply mixing all of the ingredients together, as directed? First, I don’t have to mash the potato separately, potentially ending up with lumps that will then mar my perfectly soft and smooth rolls. By blending the potato in its own water, I ensure a perfectly smooth slurry that’s easily mixed with the other ingredients.
Also, adding the butter, sugar, and salt to that same hot mixture melts and dissolves all three. Again, very easy to mix with the flour: no hard lumps of cold butter.

Take your slurry and pour it into your mixer bowl. Add the flour and mix very briefly, just to cool things down a bit. Add the eggs and yeast.

Beat at medium-high speed, using the beater blade, for 3 minutes. This dough is quite soft; beating for several minutes helps to turn it from a sticky mess into a stretchy … mess. Well, at least the gluten is developing!

Switch to the dough hook and give the dough another 4 minutes, again at medium-high speed. At this point the dough will still be sticky; it won’t form a ball. But that’s OK; as it rises, the gluten will continue to develop and the dough will gain some body and lose some (though not all) of its stickiness.
Now sticky dough can be annoying to work with, it’s true. But don’t add flour to your dough just to make it behave. The drier the dough, the less it’ll rise and the drier and harder your rolls will be. A sticky dough — one that perhaps sticks annoyingly to your fingers but will still hold its shape when rounded into a ball — will produce light, moist, tender rolls.

Scrape the dough into a lightly greased bowl. (Or scrape it out of your mixer bowl, grease the bowl, and plop the dough back in.) Cover the bowl.

Let the dough rise for 90 minutes to 2 hours, until it’s quite puffy though not necessarily doubled.
If you're using a bread machine, allow the machine to complete its cycle, then leave the dough in the machine until it's doubled in bulk, perhaps an additional 30 minutes or so.
Gently deflate the dough and divide it into 16 large balls, or 24 smaller balls.

I always make 24 rolls rather than 16. Why? I like the size of the “smaller” roll (it’s actually not that small, as you can see in the picture above). But more important, 24 rolls fit pleasingly into a 9” x 13” pan (four vertical rows of six rolls each). Sixteen rolls? Not so much.

Again, a scale is your best friend when dividing a ball of dough into 24 pieces. Divide the dough in half, then in half again, and in half once more so you have eight pieces. Divide each of those eight pieces in thirds. Voilà — 24 rolls.

Round each piece of dough into a smooth ball. Start by pulling and stretching the dough from the bottom to the top to make a small topknot; you’re developing surface tension here, which will help you create nice smooth balls.
Place the ball of dough, “knot” side down, onto a work surface that’s either bare (no flour) or lightly greased. If your dough remains really sticky, go the greased route.

Working with one piece at a time, lightly cup your fingers around the dough ball and move your hand in a circular motion. The slight tackiness between dough and work surface magically shapes the dough into a smooth, round ball. The dough should stick, but just enough to help shape it. If it’s so sticky it’s leaving smears of dough on the work surface, grease the surface before continuing.

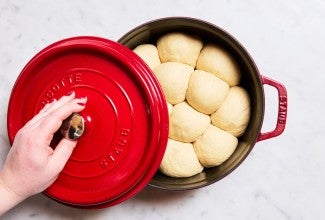
Place the rolls in a lightly greased 9" x 13" pan.

Cover the pan with lightly greased plastic wrap or your favorite reusable wrap and let the rolls rise for 1 1/2 to 2 hours, until they're quite puffy. Towards the end of the rising time, preheat the oven to 350°F.

Uncover the rolls and bake them for 20 to 25 minutes, until they're a light golden brown and feel set. Don’t overbake them; remember, they’re supposed to be soft and tender.

Remove the rolls from the oven and carefully turn them out of the pan onto a rack.

Brush with melted butter, if desired; 3 tablespoons will more than generously cover the whole lot.
Serve rolls warm, or at room temperature. Store rolls, well wrapped in plastic, for several days at room temperature; freeze for longer storage.
Sorry, no, not these Amish Dinner Rolls; they rely entirely on gluten for their structure. But do try our recipe for Gluten-Free Dinner Rolls.

Yes, absolutely. Due to the bran in whole wheat the rolls won't be quite as soft and tender, but should still please you. Substitute whole wheat flour (I prefer lighter-colored, milder-tasting golden whole wheat) for some or all of the all-purpose flour in the recipe. Substitute an equal weight of whole wheat flour for the all-purpose flour; if you don't have a scale, add an additional tablespoon of whole wheat flour per cup substituted (to account for the fact that whole wheat flour weighs less than all-purpose flour).
Once you’ve mixed the dough ingredients together, let the dough rest for 20 to 30 minutes for the flour to absorb the liquid; it takes longer for whole wheat flour to hydrate than it does all-purpose flour. Taking this extra step will make kneading easier; it'll also give the yeast a nice jump start.
Have I convinced you to bake Amish Dinner Rolls? I sure hope so. Who knows, maybe you'll unlock your own distant childhood memory — or give your kids or grandkids a memorable food experience for future reminiscing!
If you're looking for even more roll recipes, we've got a whole recipe category devoted to Buns & Rolls. Happy baking!


November 15, 2022 at 2:59pm
In reply to I need to make a double … by Ted (not verified)
Temperature during baking should stay the same, but the baking time will need to be extended by about 1/3 of the time for a standard half sheet pan (25 to 30 minutes in this case). We would recommend that you consider using Baker's Percentages for scaling up the recipe though, Ted. Not only will this give you a bit more control over how much dough you make but also keep the quantity of ingredients more accurate. We generally suggest using this method when you more than doubling any recipe for best results.
November 10, 2022 at 12:08pm
Can I prepare these the day before and bake them the day of?
November 13, 2022 at 2:46pm
In reply to Can I prepare these the day… by Joe (not verified)
Hi Joe, while I wouldn't recommend refrigerating the shaped rolls, you could certainly refrigerate the dough in bulk form after a slightly abbreviated (60 minute) first rise. Deflate the dough and place in an oiled bowl with plenty of room to rise. Cover well and refrigerate. If the dough continues to rise significantly in the refrigerator, you might want to gently deflate it again before you go to bed. The next day you can go right to dividing and shaping the rolls from the refrigerator (which will help the dough warm up faster), but allow for a little longer rise time, since the dough will still be cool.
November 23, 2022 at 6:17pm
In reply to Can I prepare these the day… by Joe (not verified)
This recipe is very similar to my 1970's Betty Crocker refrigerator rolls recipe. You simply put the dough in a greased bowl in the refrigerator for one to two days. The flavor that develops is wonderful! On the day you want to bake the rolls, shape and bake as described here. I have always received rave reviews for my rolls.
November 4, 2022 at 4:02pm
Hi, I love these rolls. I bake and freeze them then take them out Thanksgiving morning. Trouble is they tend to dry out quickly when I put them in the oven to warm up. Can you give me specifics on how to warm these up before a meal? How long, what temp, etc.
November 5, 2022 at 2:04pm
In reply to Hi, I love these rolls. I… by Sona (not verified)
Hi Sona, you can thaw out your frozen rolls at room temperature overnight (keep loosely wrapped in plastic bag), and then reheat as recommended for fresh rolls. Keep an eye on the rolls in the oven and heat just until warm. If they seem too moist, take the foil off for the last minute or two of reheating.
November 2, 2022 at 7:21pm
To save time on Thanksgiving day, am I better off making them the day before or baking and freezing these, then thawing and warming up right before the meal? I would also appreciate knowing the best way to warm them up. They have often dried out by the time people are going for another roll at dinner, so I assume I'm not reheating them correctly.
November 5, 2022 at 9:45am
In reply to To save time on Thanksgiving… by Sona (not verified)
Hi Sona, if you have time to bake these rolls the day before Thanksgiving, the mashed potatoes in them will ensure they remain nice and moist for the big day. Allow them to cool completely and then store them in plastic overnight. To reheat, place the rolls nestled together in a baking dish that is tented with foil. Reheat in the center of a 350°F oven just until warm (about 7-10 minutes).
November 2, 2022 at 12:56pm
I am going to make this recipe next week. I would like to use the food processor method, but I don't have a food processor. Should I use a blender, or my mixer?
November 3, 2022 at 5:40pm
In reply to I am going to make this… by Keith (not verified)
Great question Keith. If you want to replicate the perfect slurry of potato we would recommend using your blender so that you can be sure there are no lumps and your rolls come out perfectly puffy, moist, and smooth!