


What is more luxurious than a pool of perfectly smooth, perfectly ready-to-do-your-bidding chocolate? One that will coat whatever you want, and harden almost instantly to a shiny, firm-to-the-touch surface that snaps when you break it?
Our love affair with chocolate is never-ending, but as in all good relationships, there are some things that work and some that just... don't. The wise person knows all they can about their true love, and accepts that certain behaviors get better results. That's why knowing about tempering chocolate is important.
Sure, you can melt chocolate chips or those melting discs you see at the store and coat things, but the flavor and texture aren't quite what true chocolate apprecianados are looking for. Kind of like dating the brother of the guy you're really interested in.
The part of chocolate that allows it to melt so sumptuously in your mouth is cocoa butter, and it's made of a family of crystals (six types altogether). What makes working with chocolate tricky is each type of crystal forms or sets at a different temperature, and some of those forms aren't very stable; they can change over time and in storage.
When chocolate gets too warm, but not warm enough to melt, some of the cocoa butter crystals can migrate to the surface; this dusty-looking chocolate has "bloomed." It's fine to eat or bake with, but it's no longer "in temper."

Before we get to tempering, we need to explain what is and isn't chocolate.

To quote Chef Peter Greweling, CMB, from his excellent book Chocolates & Confections, "Simply put, the percentage listed on a label describes the portion of the chocolate that came from the cacao tree. The percentage of chocolate represents the combination of chocolate liquor [chocolate (cacao) solids] and cocoa butter, but fails to differentiate between them. As a result, two chocolates, each of them labeled 65%, can be radically different from each other."
Which brings us to:
There's more than one way to temper chocolate. One of them is called tabling.
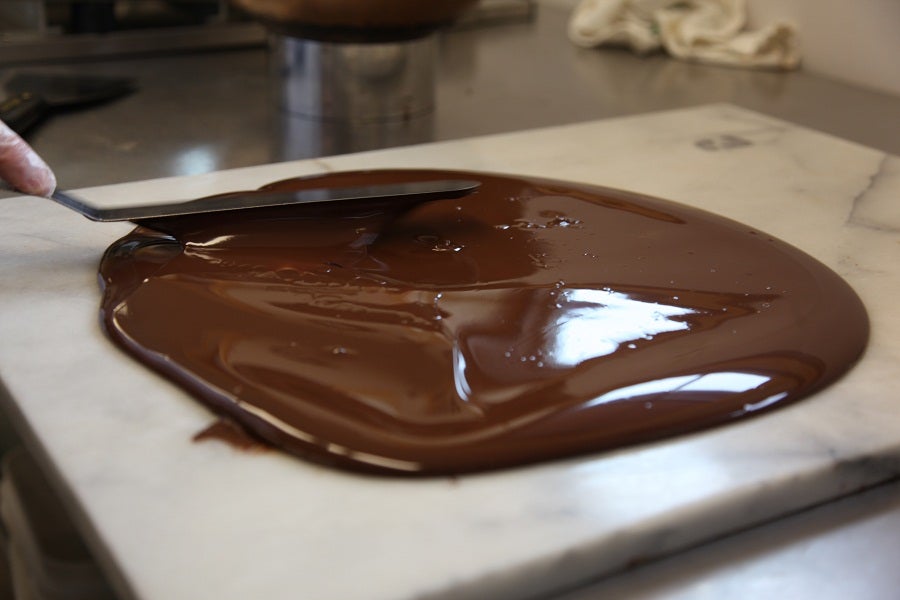
Chocolatiers like this method because it's efficient, and they get an immediate feel for how the chocolate is behaving. An amount of chocolate is melted, then 2/3 of it is spread on a clean marble slab and moved around to cool it until it starts to thicken. This paste is added back to the remaining melted chocolate to "seed" it; once tempered it's held between 86°F and 90°F and ready to use. Tabling is a wonderful method to use, provided you have lots of space and a large block of marble hanging around. Moving it around is kind of hypnotic.
There's also an approach typically reserved for those with lots of experience working with chocolate: it's called the direct melt method. By very carefully melting and stirring the chocolate and keeping it within specific temperature ranges, chocolate can be kept in temper the whole time. It's tricky to do, and takes some practice.
For many home bakers though, the most practical method of tempering chocolate is a process called seeding. Even the renowned pastry chef Roland Mesnier joked about the tabling method, saying "Who has time for that these days?" He used the seeding method when teaching a class at our Baking School, too, so don't think this method is inferior in the least.
Seeding is simple once you know the basic tenets and temperatures to guide your work. Let's dive in.
An accurate digital thermometer is important.
A bowl, a spatula to stir with, a saucepan with an inch of water in it, or a microwave to melt the chocolate. Parchment paper to place your cooling chocolates on. Depending on your project, you may want dipping tools, molds, parchment paper cones (for writing with melted chocolate), or an offset spatula for spreading tempered chocolate on the back of a baking sheet or transfer sheet.
In a nutshell, seeding can be shown and explained in just a few pictures and steps. The short version: Get the chocolate hot (but not too hot) and melted. Add chunks of unmelted chocolate. This is the seeding part. Stir and cool, take out the unmelted leftovers, test to see if it sets properly, then dip, dip, dip. The real key, though is in the details of the temperatures you need to achieve. For a full chart on specific melting temperatures for different kinds of chocolate, see our chocolate tempering temperatures table.
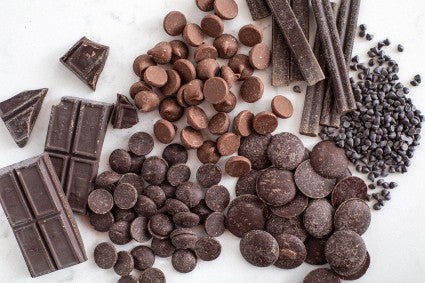
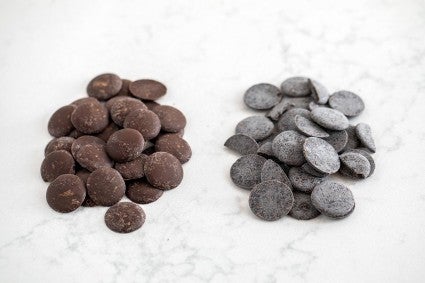
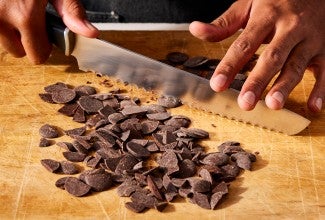
Melt the chocolate: Chop the chocolate with a knife or chocolate chipper. Or, use our disks, which are already in an easy-to-melt shape and don't need any chopping at all. It's best to have a pretty healthy amount: at least a pound to start with. Two is better. The more volume you have, the better it will hold the temperature where you need it to stay to be workable.

It's typical for chocolatiers to work with 10-pound batches at a time. Tempering a movie-size bar of Special Dark is possible, but it's going to be tricky, because its temperature is going to fluctuate wildly and, frankly, in this process, every single degree counts. There's not enough thermal mass in that small an amount to stay at one temperature for seconds, much less the minutes you'll want for working with it.
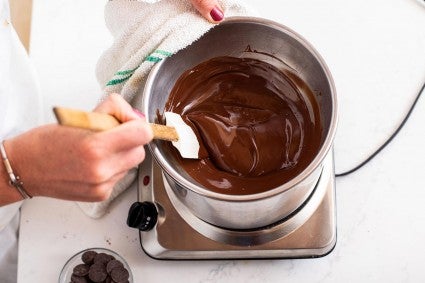
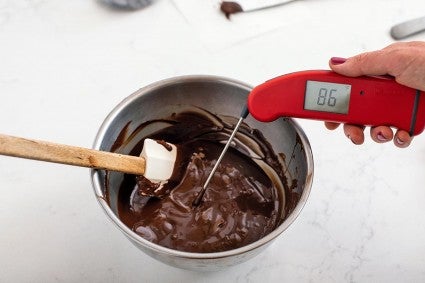
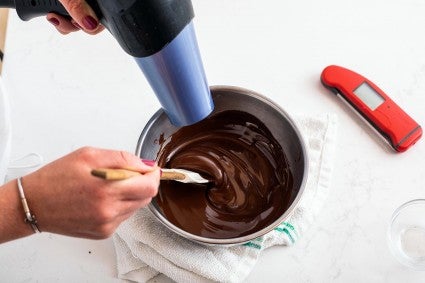
Place the chocolate in a bowl and put it over simmering water, or microwave it at half power in short (30-second) bursts, stirring in between. There will come a point where your chocolate is partly melted, with shiny-looking chunks that haven't lost their shape. That's about as far as you want to go, because you can melt it the rest of the way just by stirring. Your goal is to get all the different types of crystals melted and the chocolate to smooth liquid, with no lumps. Take the chocolate's temperature.

Two important things to avoid: Scorching (microwave); and getting any water in the chocolate (simmering water). Both of these things will ruin your chocolate and you'll have to start over. Water in melted chocolate "seizes" it, causing instant recrystallization – not in a good way. The chocolate will be unworkable.
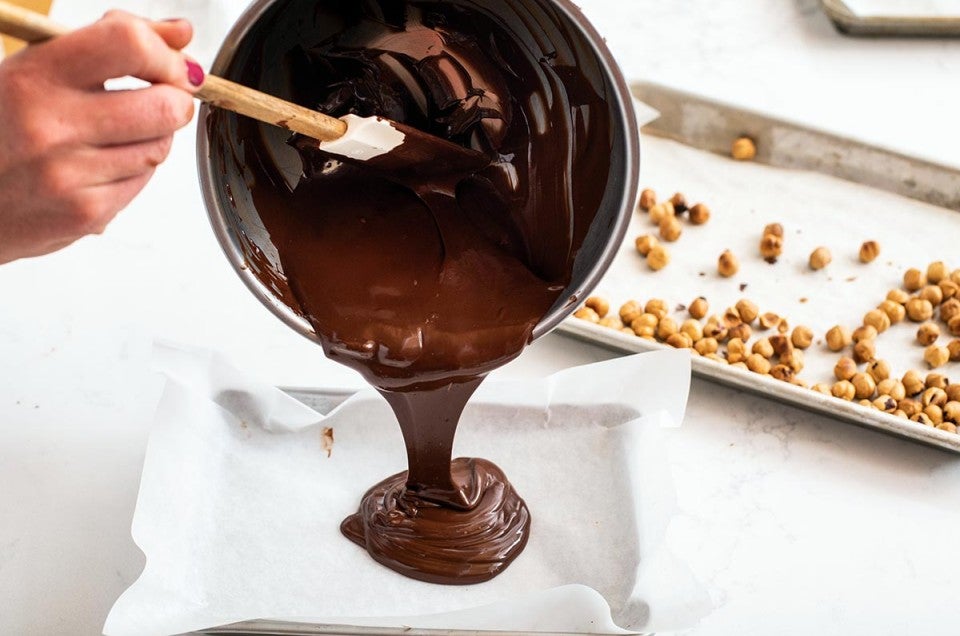
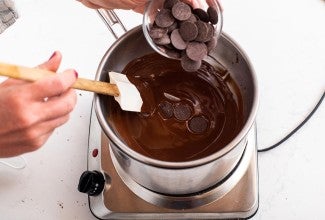
Seeding: Once your chocolate has reached the specified temperature, add a good-sized chunk of chocolate ("block seeding") or some more chopped chocolate to your lovely pool of melted chocolate. The stable crystals in this new addition encourage stable crystal formations in the melted chocolate. Stirring becomes very important here, because agitating the chocolate ensures smaller crystals will form and stay in suspension.

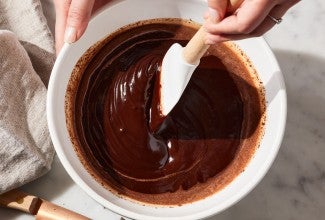
Cool: Stir continuously until the chocolate is at or below 90°F/32°C; as low as 86°F/30°C for dark chocolate or 84°F/28.9°C for milk or white. Every chocolate has its own "sweet spot" for this, and you almost have to learn the personality of individual brands and types. I'll tell you right now, it takes longer than you want it to. You have to be at peace with the process because it takes what it takes.
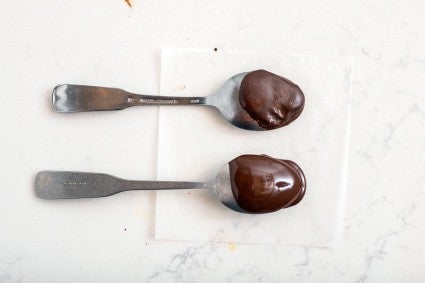
Test: Dip a knife, spoon, or spatula into the chocolate and set it down at cool room temperature (65°F to 70°F). If the chocolate is in temper it will harden quite quickly (within 3 to 5 minutes) and become firm and shiny. If you touch it, your finger will come away clean.

If the chocolate is too cool or out of temper, it will often set in streaks or look lumpy, like this:
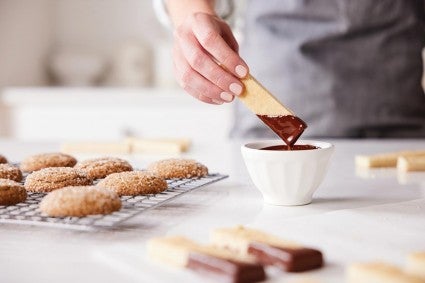
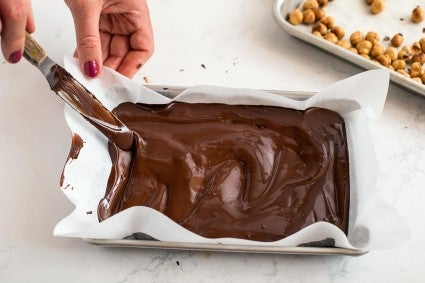
Hold at working temperature and dip away: Most chocolate is easiest to work with between 88°F to 90°F. You can put your bowl over another bowl of warm water, put it on a folded towel over a very low heating pad, or even try using a mug warmer. As you work with it, the chocolate may cool down; to bring it back up to a better working temperature, try grabbing your hair dryer and warming the chocolate with it, stirring the whole time. You'll have the best results if whatever you're dipping is close to the temperature of your working chocolate. As chocolate sets it contracts – which is one reason it pops out of molds easily.
Think of what you can do with your lovely, tempered chocolate. Envelop berries in a coat of dark chocolate.

Tempered chocolate can also be used to coat all kinds of cookies, including flaky, pastry-like rye palmiers.

It can also be used to dress up everyday cookies, like peanut butter chocolate chip.

Or use tempered chocolate to take an already decadent dessert over the top. Dunk chocolate desserts (like these Chocolate Peppermint Dips) into tempered chocolate to ensure a seal of approval from everyone.

When the chocolate is right and it's performing its miracle in front of your eyes, it's just the greatest feeling. If you're fascinated and want to give this a go, here are a few things to remember.
The next time you're gazing longingly at the case in a chocolate shop, give a nod to the patience, talent, and dedication of the people who made each of those beautiful chocolates by hand.
Do you have more questions about tempering chocolate? Ask away in the comments below!


November 2, 2020 at 2:53am
Hi, I prepared rum balls and placed it in the refrigerator to set. I started to melt the chocolate over a double boiler [ at a high flame] the chocolate melted, I coated 3 rum balls and then kept the remaining chocolate in the bowl [ for 3 days - outside the refrigerator]. Today as I tried using the same chocolate [ by melting it over a double boiler , as it had hardened] it did not work.
Also what is the quantity of melted choc. required to coat 12 rum balls. While dipping the rum balls in the chocolate , they happened to start breaking. Please help.
November 3, 2020 at 9:56am
In reply to Hi, I prepared rum balls and… by michelle dmello (not verified)
Hi Michelle! It sounds like you have a few different things going on. You always want to temper more chocolate than you need for a tiny recipe like this, because it's very difficult to temper small amounts of chocolate at a time. You didn't really offer any details about how your chocolate went awry the second time, but it sounds like it probably broke, either due to heating up too quickly or because some water got into it. Without knowing what recipe you're using to make your rum balls, it's impossible to say why they fell apart, but do feel free to reach out to our free and friendly Baker's Hotline so we can help you troubleshoot in more detail. Happy baking!
October 29, 2020 at 4:26pm
I have made “buckeyes” for years, and the recipe calls for paraffin in the chocolate used for dipping. Do you recommend paraffin? Or is that only an option for people who dont want to “bother” with tempering?
Also, can I freeze dipped chocolates? I made the Coconut Almond Candies for company that is not coming “after all,” and I was wondering if I could freeze my candies for the Christmas season.
November 3, 2020 at 9:47am
In reply to I have made “buckeyes” for… by Xenia (not verified)
Hey there, Xenia! The paraffin wax is likely just to make the chocolate coating shiny without tempering the chocolate, it should be just fine to skip this ingredient. You can freeze dipped chocolates and candies but this can bring the chocolate out of temper and cause them to sweat a bit while defrosting, affecting their appearance. We hope this helps and happy baking!
October 14, 2020 at 4:11pm
I'd like to make a small batch of chocolate syrup to dip the top of ice cream which is in a cone. Do you have a recipe/technique for this? I also want to roll it in peanuts before it hardens. Like a commercial ice cream drumstick, but lots better.
October 21, 2020 at 10:59am
In reply to I'd like to make a small… by Ev Martenet (not verified)
Hi, Ev! This isn't something we have an article on here at King Arthur, but if you do an internet search for "magic shell," lots of good recipes and techniques come up. Happy baking!
October 10, 2020 at 12:04pm
Hi,
I would like to ask, when do i add sugar into the chocolate during tempering?
i have 100% dark chocolate couvertures and i would like to make some chocolate deco for the cake i'm baking. I don't think many can take 100%, hence would like to add some sugar to it. Appreciate if you can help to advise.
Thanks.
October 21, 2020 at 9:08am
In reply to Hi, I would like to ask,… by Jamie (not verified)
Hi, Jamie! We'd recommend blending a sweeter chocolate with your unsweetened chocolate rather than trying to add sugar, in order to avoid problems with the tempering process. Happy baking!
August 5, 2020 at 6:51pm
Hi Betty, I tried my luck at tempering chocolate and failed miserably. My chocolate is smooth and shiney but won't harden. How to I rectify this to make it harden to make decorations for a cake? I used all the extra chocolate I had for seed. HELP!!! Thank you!
August 6, 2020 at 12:00pm
In reply to Hi Betty, I tried my luck at… by Sandy (not verified)
Hi, Sandy! It can be very challenging to temper chocolate in the hotter summer months, especially for those of us without air conditioning in our kitchens! If you'd like to chat in more detail about your process, though, do feel welcome to get in touch with our Baker's Hotline!