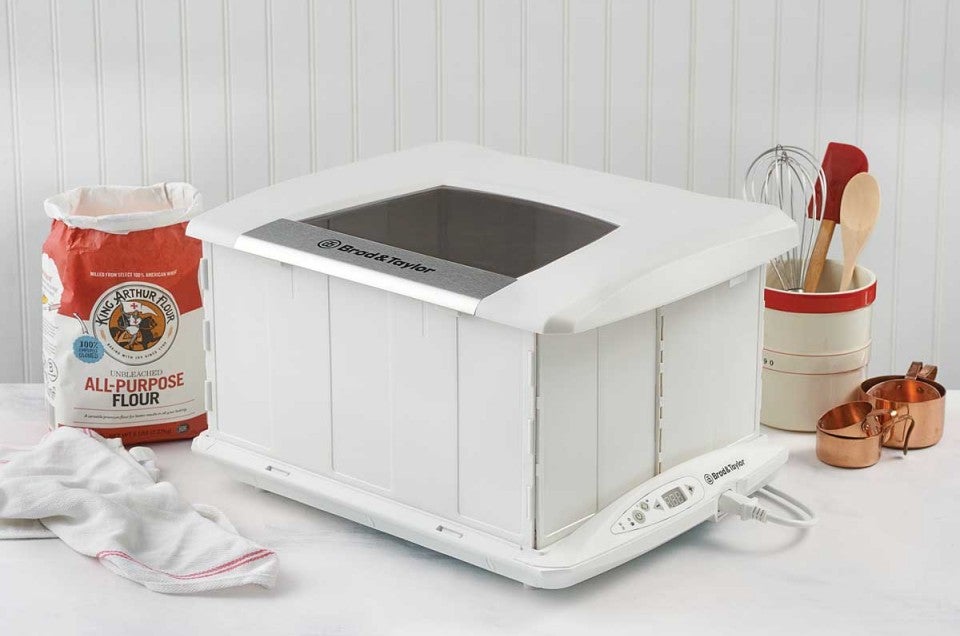


Do you need an electric proof box? No.
But do you WANT an electric proof box?
Yes – if you bake bread or rolls, feed sourdough starter, make homemade yogurt, temper chocolate, or simply need a warm and cozy, temperature-controlled place for any kind of food to rest while it's evolving.
Do I hear kimchee, anyone?
Officially titled a bread proofer, the name doesn't do justice to the full range of what this unprepossessing lidded box with built-in heating element can do.
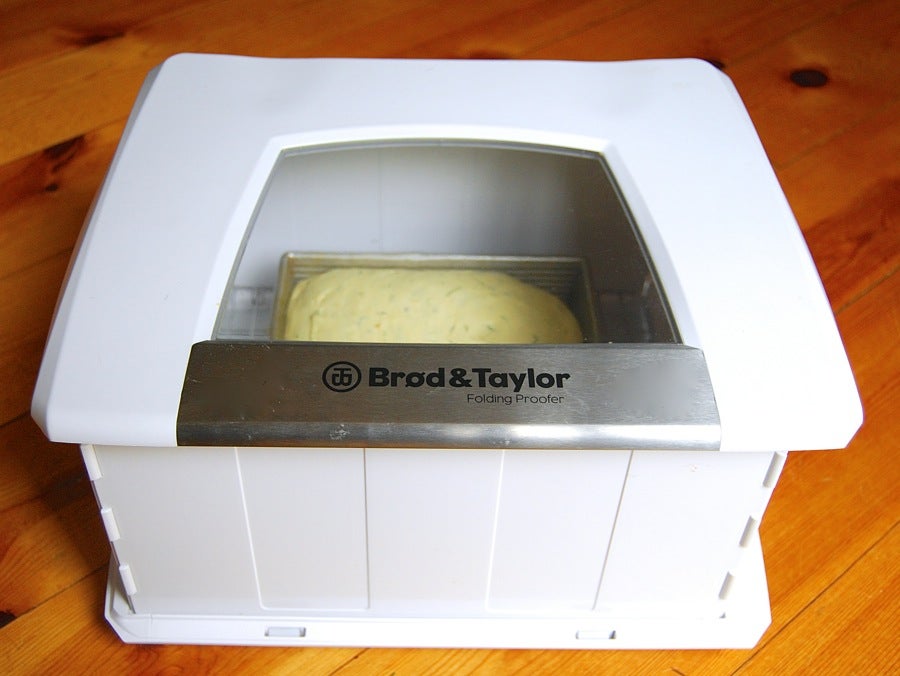
Sure, it provides the perfect warm, moist environment for rising loaves, rolls, and even a 12" pizza.
But it also holds 12 pint jars of soon-to-become-homemade-yogurt at their ideal fermentation temperature: 110°F.
Want to temper your dark chocolate, then keep it at a perfect 100°F while you dip truffles or coat caramels? Piece of cake.
How about the biggest issue of all: finding someplace warm on a cold winter day to set your sourdough starter during its feeding? Or even more of a challenge: someplace reliably warm, day and night, for the several days it takes to build your new from-scratch starter?
No problem-o.
Hey, I haven't even mentioned salt-rising bread, that notoriously finicky, ridiculously pungent, oh-so-wonderful American frontier bread. Hold the cornmeal starter at 95°F for 12 hours?
Put away the heating pad. We can do that.
I recently spent a week becoming best friends with this Brød & Taylor electric proof box. Let me show you what I did with it.
First up: bread.
I have a roll recipe I've been wanting to try: Golden Pumpkin Dinner Rolls. Let's see how that goes.
Yeast dough loves to grow at 78°F, so let's set the dial.

Yeast bread also likes a humid environment, so I've set the water tray in the base of the unit, with a splash of water for moisture.
On the left, pumpkin dough freshly kneaded. On the right, growing nicely.
I could have made a single pan of rolls, but I wanted to show you how handy the proofer's optional added shelf is. Simply put, the shelf doubles the proof box's capacity.
So, one 9" pan of rolls goes on the bottom shelf. Another pan of rolls on top.
Growing, growing... grown!
And baked. And brushed with butter. Not too shabby, right?
Speaking of the added shelf, see how you can proof a couple of loaves (bottom shelf) and a large pan of rolls (top shelf), all in one double-decker shot? That's a TRIPLE batch of Sour Cream & Chive Potato Bread or Rolls. Sweet!
Have you ever made your own Greek yogurt?
Yogurt is a simple matter of heating milk, adding a couple of spoonfuls of yogurt, then letting it sit at a specified temperature for several hours to become firm.
The "specified temperature" is the hard part; many people pour their yogurt into a thermos, or put it in a jar and wrap the jar in towels and put it in the oven with the light on, or...
Here's the easy way. Set your proof box temperature to 110°F.
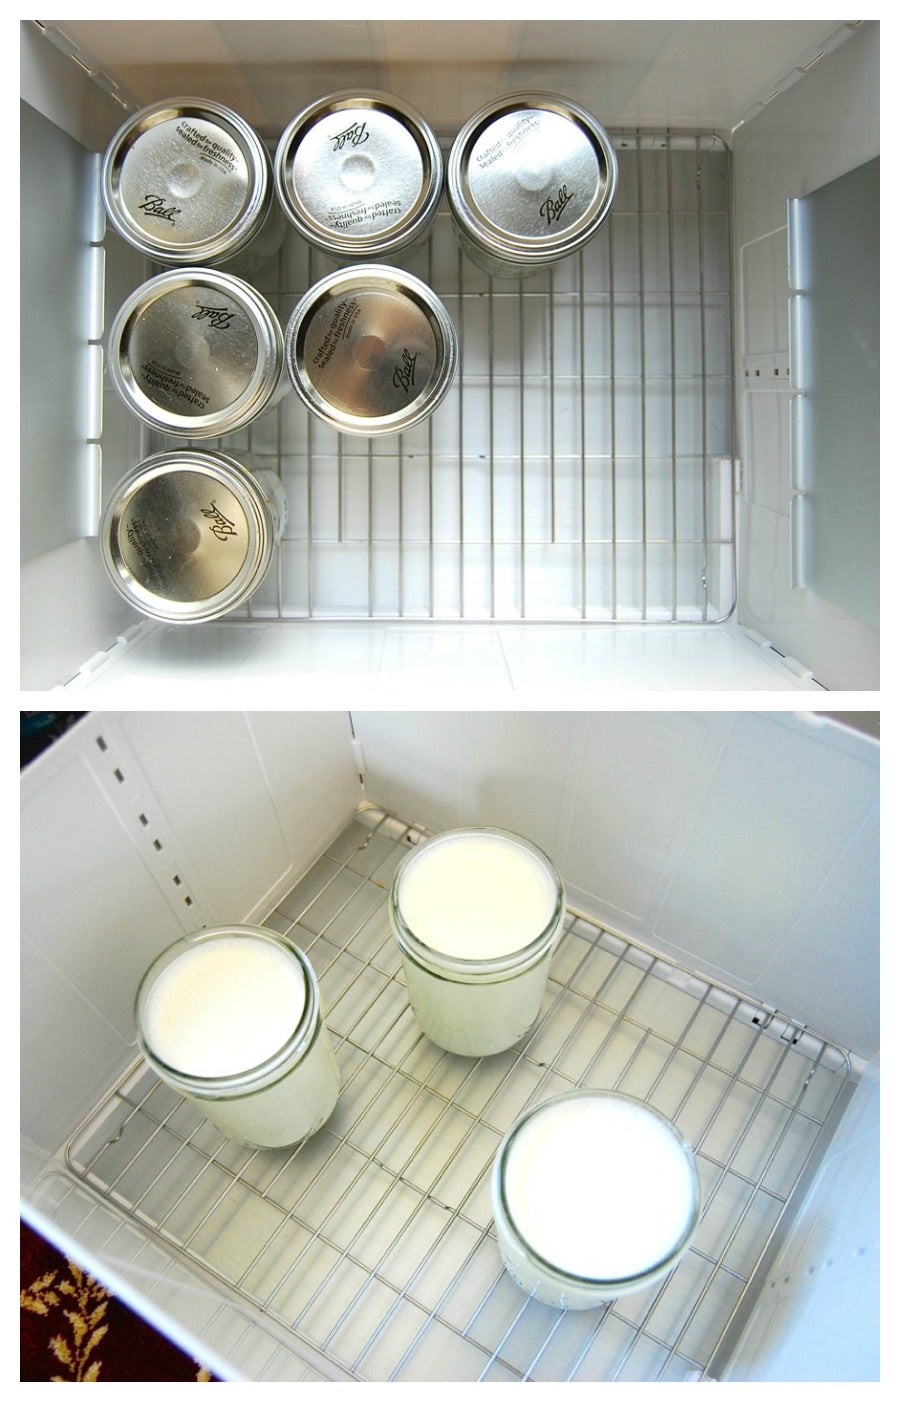
The proofer will hold up to 12 pints of yogurt (top photo; I've added six to show you), though I've chosen to make just three.
Here are the bare-bones instructions:
Stir 3 pints of milk together with 3/4 cup instant nonfat dry milk. Heat the mixture to 180°F. Cool to 110°F. Stir in 5 tablespoons yogurt with active cultures (I used Chobani Greek). Pour into pint jars.
Set the jars in the heated proofer. Lower the lid.
Five hours later - thickened yogurt (left). After a night in the fridge – thicker, standard-style yogurt.
And after draining overnight – ah, wonderful Greek yogurt, so thick you can stand a spoon in it.
No applause, please – I owe it all to Brød.
Next: Tempered chocolate.
What does that mean, anyway? Simply put, tempered chocolate is chocolate that's been gently heated and just as gently cooled so that it retains its wonderful satiny glow when it's set: no tan streaks, no dull gray "bloom."
If you're making candy, and you want it to look gorgeous, you have to temper your chocolate.
But isn't that fussy? Like, you need a marble slab, and a thermometer, and you have to be SOOO careful?
Not if you have a proof box – as these chocolate-covered Oreos will attest.

I follow the instructions that come with Brød for this one. Set the temp. to 115°F.
Melt a bowl of chopped chocolate; I'm using chocolate chips. My fellow test baker Susan Reid insists on bar chocolate, since she feels the lecithin in the chips "messes with what tempering is really about." But I'm just not that fussy. Take your choice.
It takes awhile for the chocolate to ever-so-gradually soften; probably 30 to 40 minutes. I go get caught up on email in the meantime.
I stir the soft chocolate until it melts. Stir in a couple of pieces of chocolate candy bar (I like Hershey's Special Dark). Keep stirring until everything melts. The temperature of the chocolate gradually drops under 90°F.
Is it tempered (or "in temper," as a chocolatier would say)?
Dip the back of a metal spoon in the chocolate. Set the spoon in the fridge for 2 minutes.
Does it retain its shine? On the left is the just-dipped spoon; on the right, after its 2-minute rest in the refrigerator.
While not as shiny as the original hot chocolate, it's nicely satiny.
Good enough for dipping Oreos, wouldn't you say?
Next, the big gorilla in the corner: sourdough.
I grab a jar of our King Arthur historic sourdough starter, the same "live dough" we send to customers wanting to make their own starter "from scratch."
Feed it with flour and water, as directed. Put it in the proof box. Set the temperature to 78°F. I figure if the yeast in bread dough enjoys growing at 78°F, it should respond to that same temperature in sourdough starter.
It does. Looks pretty happy after its first feeding, eh?

And its second, and third...
Now, finally, what about that salt-rising bread?
As I said, it's finicky. But I'm certain the proof box was key to my success when I first made this challenging loaf last year.
Here I'm making the bread's cornmeal/milk starter. It needs to ferment overnight at temperatures between 90°F and 100°F. It was November, when my thermostat is set to 55°F at night.
Hmmm... Thanks to the proof box, the starter grew, the dough rose...
...and the bread baked. Into a lovely, close-grained bread with tangy, cheddar-like flavor. PERFECT for toast. Read my post Classic American Salt-Rising Bread: A Tasty Journey Into the Past for the details.
So, what do you think – have I convinced you?
Over the years I've used all the usual "hot spots" – top of the water heater or fridge, over the floor register, in the oven with the light on, wrapped in towels with a heating pad...
But honestly, this proof box is so "set it and forget it," I've fallen for it. Brod, you've got me: hook, line, and optional second shelf.
Readers, I highly recommend this tool. But I also know there are plenty of other ways to give your yogurt, rising bread, sourdough, chocolate – and kimchee! – the steady, gentle, 24-hour heat they need. Share your homemade hot spots in comments (below), OK?
And happy proofing!
P.S. A couple of my colleagues, Pete and Ben, made this GIF, and I couldn't resist sharing it with you. Thanks, guys!


