

The other day I experienced one of those "Oh DUH" moments that got me so excited, I could hardly wait to share it with you here.
Now, before you get all worked up, I have to warn you: this may very well be something you figured out years ago, and have been automatically applying to your baking ever since. If this is the case – bear with me, and with the rest of us who weren't bright enough to discover it earlier.
Without further ado, today's earth-shattering baking news is...
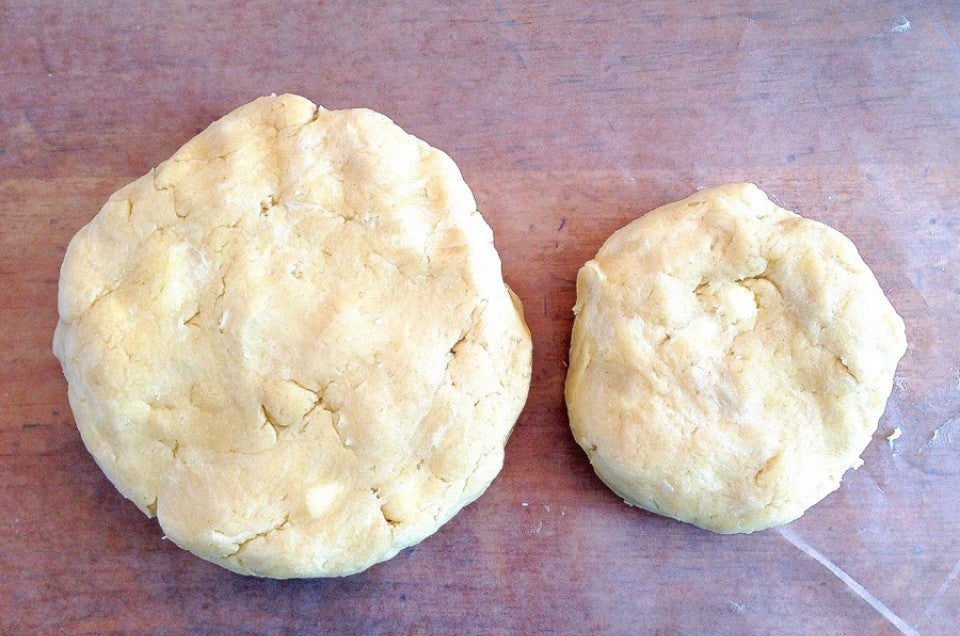
When you're dividing your pastry for a double-crust pie, the bottom crust should be a significantly larger chunk than the top crust.
How many times have you read a pie recipe that says, "Divide the crust in half," before shaping each piece into a disk?
Why look, there's one now!
Yet, when you think about it, the bottom crust should be a lot larger than the top crust. After all, the top crust only needs to cover the surface of the filling. But the bottom crust needs to hold all the filling, with enough left over to bring it up and over the top crust, to make a good seal.
Remember high school geometry, and how you sat there bored out of your skin wondering when you'd EVER have to use all that stuff in real life?
Well, now's the time.
But if you've forgotten all that "pi-r(adius)-squared" stuff, don't worry; I remember it, and I've done the math for you.
Yeah, I rounded up and down a tiny bit, but here's the bottom line: to make pie crust that's equal thickness, top and bottom, your pastry should be divided not in half, but in thirds. Two thirds will be the bottom crust; one third, the top crust.
Looked at another way, the bottom crust should be twice as large, mass/weight-wise, as the top crust.
This is easy, if you have a scale; simply weigh your pastry, and scoop out 1/3; that'll be your top crust, the rest will be the bottom.
If you don't have a scale, divide your pastry into three parts; one will be the top crust, the other two, squashed together before rolling, will be the bottom crust.
So, this has all been theory, up until now. Let's put the formula into action, and see what happens.
Want to bake this pie? I used my favorite pie crust recipe, Classic Double Pie Crust, and the filling from our guaranteed Apple Pie recipe.
I'll start with the larger bottom crust. My goal is to roll it 13" wide – same as in the past, when I was dividing the pastry in half.
Back then, I'd roll my crust half and, in an attempt to make it 13" wide, it would become thinner and thinner – and its edges more and more ragged.
This time, the crust rolled out very easily – with only one little ragged patch, which you can see up near the top there. The rolled crust was thick enough to handle without mishap, and settled into my 9" pie pan nicely, without stretching.
Which is important – stretching a pie crust to fit is the best way to ensure it'll shrink as it bakes. Which is why, when you're prebaking a crust (baking it fully before adding a cooked filling), you'll sometimes find the crust puddled in the bottom of your pie pan. Not a pretty picture.
So, with the crust's copious overhang, it didn't have any trouble at all holding a nice big mound of apple filling.
Next: the top crust.
I rolled it into a 9" round, as planned. Plopped it atop the apples. Brought the overhanging bottom crust up and over the top crust, and pinched the two together, then made a nice crimp.
One caveat here: if you're making a "mile-high" pie, with copious amounts of filling, you'll want to roll the top crust a bit wider than 9".
How much wider? Hey, I can't remember geometry covering arcs (though I do have unhappy flashbacks to trigonometry and parabolas). Let's just say "a bit wider."
Next step: put it into the oven.
An hour later –
My oh my, it's apple pie! And a darned good one, too, its top and bottom crusts equal thickness – no thick, doughy top crust, nor skimpy bottom crust.
Thank you, Mr. MacLeod at Central Junior High in Hingham, MA for the lesson in "pi" that's lasted me a lifetime!


