

Did you know that Thanksgiving is 10 days from now?
WHOA! Hold on. Before you start hunting for the turkey roaster (and prior to checking yourself for a severe case of "my, how time flies"), listen up ...
American Thanksgiving is right where it's always been (well, since 1941): the fourth Thursday in November.
And Canadian Thanksgiving is right where it's been since 1957: the second Monday in October. Which this year is October 10 – 10 days from today.
Canada's Thanksgiving celebration has had a confusing history. As the story goes, Martin Frobisher, an English explorer seeking a western passage to the Orient, landed in Newfoundland in 1578 and promptly offered up a feast of thanksgiving for his safe arrival on shore – any shore. Canadians consider this their first Thanksgiving.
During the Revolution, American loyalists moving to Canada brought their own Thanksgiving traditions – including pumpkin pie. But, like their neighbors to the south, Canadians could never quite decide when to celebrate.
The official holiday bounced from November 6 (1879), to the third Monday in October (early 20th century), to the Monday of the week in which November 11 occurred (post WWI, as a tribute to the war's end on Nov. 11). Finally, in 1957, Parliament put an end to the confusion, declaring that henceforth Thanksgiving would be celebrated on the second Monday in October.
Which means a 3-day weekend; most Canadians have their big meal on Sunday or Monday, but some dig in on Saturday and don't quit until Monday.
So if you're a Canadian, yeah – it's time to get out the roasting pan.
And the pie pans. As in the U.S., pumpkin pie is a big part of Canada's Thanksgiving.
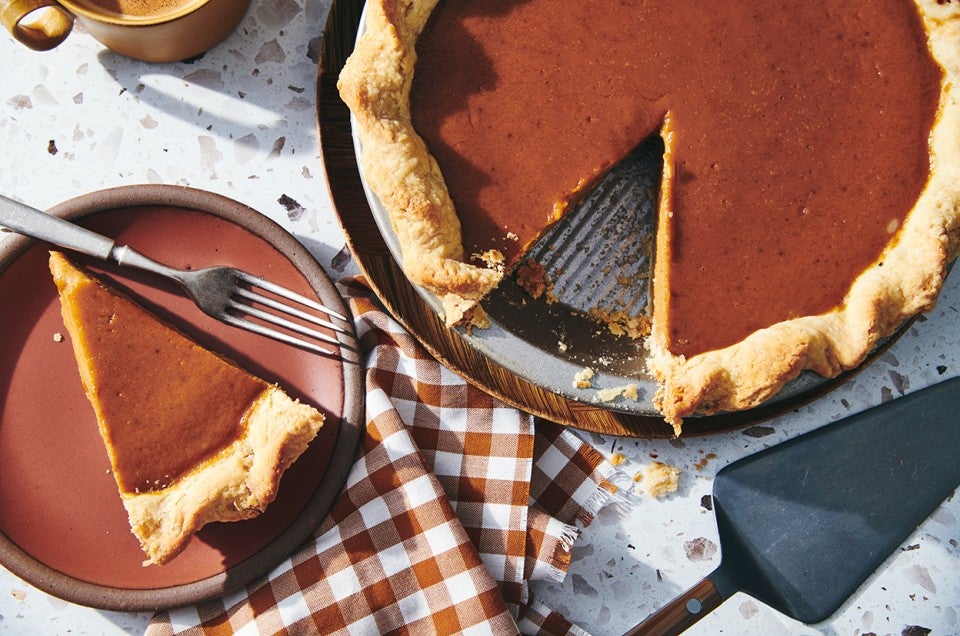
But research tells me that Canadians tend to like their pie a bit spicier than we Americans. Which means our recipe for Smooth and Spicy Pumpkin Pie is just the ticket to kick off the Thanksgiving season – both north and south of the border.

Speaking of spicy, here's one of our favorite spices: Vietnamese cinnamon. Considered by many to be the world's finest cinnamon, Vietnamese (cassia) cinnamon is sweeter, more aromatic, and more powerful than the Indonesian cinnamon commonly sold in supermarkets.
And, because of its higher oil content, Vietnamese cinnamon disperses more fully throughout your baked goods (so long as you thoroughly mix it with the dry – not liquid – ingredients first). The result? Cinnamon-through-and-through flavor.
Let's start with the crust. Use the crust below, or your favorite single-crust recipe – though if you're planning on added pastry decorations, your recipe had best include at least 1 1/4 cups of flour.
Whisk together the following:
1 1/4 cups King Arthur Perfect Pastry Blend or King Arthur Unbleached All-Purpose Flour
heaping 1/4 teaspoon salt
Add 3 tablespoons vegetable shortening, working it in with your fingers, a mixer, or a pastry blender until the mixture is evenly crumbly.
Next, you're going to add 4 tablespoons cold butter. But you're not going to just cut it in chunks and add it.

Put the butter, in a chunk, on a piece of parchment.

Cover with more parchment, and whack with a rolling pin until the butter is flattened to about 1/4" thick.

Add to the mixture in the bowl.
What's up with this?
You want the cold butter distributed, in chunks, through the flour/shortening mixture. And it's preferable that those chunks are flat; they'll be forming a barrier between layers of flour, which will translate to a flaky crust. The flatter the butter chunks, the larger the flakes.

Work in the butter, leaving some of it in fairly large, flat pieces. You can use your mixer, as I do here, but be gentle and quick. People get nervous about pie crust, and in their anxiety they tend to work the dough too much. Cutting the butter in too far makes a mealy crust; so leave those bigger chunks alone – they're fine!
If you're at all nervous about overworking your dough, mix in the butter with your fingers or a pastry blender.
Next, drizzle in about 4 to 5 tablespoons ice water, tossing the mixture as you add the water.

When it comes together, stop mixing. Mixing the dough too much (and/or adding too much water) toughens it, making it more difficult to roll out.

Grab the dough, and squeeze it into a ball.

Now, you can shape the entire piece into a flat disk; or you can lop off a piece about the size of a golf ball (1 1/2 ounces), to make pastry decorations.
Wrap the dough in plastic, and refrigerate for about 30 minutes, while you make the filling.

Combine the following in a mixing bowl:
2 tablespoons King Arthur Unbleached All-Purpose Flour
1/4 to 1 1/4 teaspoons Vietnamese cinnamon, to taste; use the larger amount if you're a cinnamon lover
pinch (1/16 teaspoon) to 1/8 teaspoon ground cloves
1/8 teaspoon to 1/4 teaspoon ground nutmeg
1/4 teaspoon ground ginger, optional
1/2 teaspoon salt
3/4 cup (159g) brown sugar
1 1/2 cups (12 ounces, 340g) canned pumpkin

Add 2 tablespoons (39g) corn syrup, light or dark; and 1 1/2 cups (340g) milk OR a 12-ounce can evaporated milk. Stir to combine.
Allow the mixture to rest for 30 to 60 minutes at room temperature; or up to overnight in the refrigerator, if desired. This allows the flavors to meld, and will make the filling smoother.
Want to get a head start now on your American Thanksgiving pumpkin pie? You can freeze the filling for up to 2 months (after you've added the eggs, below). Says my fellow baker Susan Reid, "The time the spices spend talking to each other makes a much tastier pie. Frozen filling defrosts overnight in the fridge and bakes up beautifully."
OK, back to the crust.
Preheat the oven to 450°F.

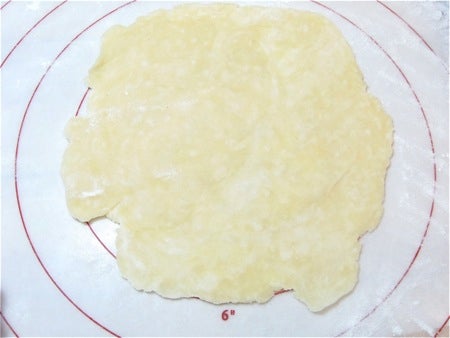
Remove the dough from the refrigerator, and roll it into a 12" to 13" circle.
Wow – I did a terrible job rolling this into a circle, didn't I? No problem; I'll just center the crust in the pan as best I can...

...like this...

...and trim off the extra crust. It won't be wasted; I'll use it to make extra decorations.

Crimp the edges of the crust. Here's the easiest way to make a pretty crimp.

See?
A "standup" crimp, like this one, is good for pumpkin and other pies that start out with a liquid filling; it helps prevent spills when you're maneuvering the unbaked pie from counter to oven.

And, back to the filling. Beat 2 large eggs, and stir them into the filling.

Pour the filling into the prepared crust.
Next, let's make some decorative pastry leaves.
Decorative? MOI?
Yes. Even I, the "hates to fuss," non-artistic baker in the King Arthur test kitchen, can make these.

Because I have this easy leaf cutter, which shapes, imprints, and cuts leaves in one fell swoop.

Gather any trimmed dough from the crust, combine it with the small piece you'd set aside earlier, and roll the dough until it's about 1/8" thick. Try to make the dough uniform thickness throughout, so the leaves will all bake at the same rate.

Stamp and cut out as many leaves as you can.

I was able to make 14 leaves.
Place the leaves on a parchment-lined or ungreased baking sheet.

Nice use of space, eh? Well, in hindsight, it turned out to be kind of a silly move. Of course the leaves were done WAY before the pie, so there I was, sticking my arm in a hot oven trying to nudge the leaves onto a spatula to get them out without jiggling the pie.
I should have put the leaves on a separate pan. Do as I say, not as I did!

Place the pie on the bottom rack of your oven, and bake it for 15 minutes.
Leaf alert: the leaves will brown pretty quickly; start checking them in about 5 minutes, and watch closely. Take them out when they're golden brown.

Reduce the oven temperature to 350°F, move the pie to the middle rack, and bake for an additional 35 to 40 minutes, adding a pie shield for the final 15 minutes or so, if the edge of the crust appear to be browning too quickly.

How will you know if the pie is done?
Insert a knife about 1" from the edge.

It should emerge moist, but clean.
Also, use your instant-read thermometer to take the pie's temperature at its center (which will still look quite soft). It should be about 175°F (for a softer pie) to 180°F (for a firmer one).

Once the pie is cool, arrange the leaves around the edge, and plop one in the center, if you have enough.

A thing of beauty is a joy forever.
And trust me, it's VERY seldom I get to say that about anything I've baked – Martha Stewart I'm not!
Read, bake, and review (please) our recipe for Smooth and Spicy Pumpkin Pie.