


The practical magic of Mason jar whipped cream
The tip that'll give you portable, made-to-order whipped cream.
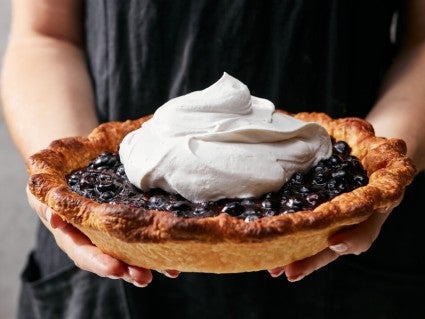
“I’ll bring a pie!”
Whenever there’s a question of who will make dessert for a gathering, I claim that job as quickly as possible. Between my love of baking and affinity for pie, I feel like I’ve scored the best role in the play when I’m the designated dessert baker. And that usually means I’m baking pie.
The only trouble with bringing pies to gatherings — large and small, indoors and out — is what to do about the whipped topping? Most pies aren’t complete without a dollop of freshly whipped cream, yet pre-whipped cream doesn’t travel well and is tricky to make in advance.
Making it on the fly doesn’t always work either: Whipping cream in someone else’s kitchen requires bothering the host to get out the mixer (thus dirtying more dishes), or you’re relegated to an unexpected arm workout if there’s no mixer and you’re forced to use a whisk.
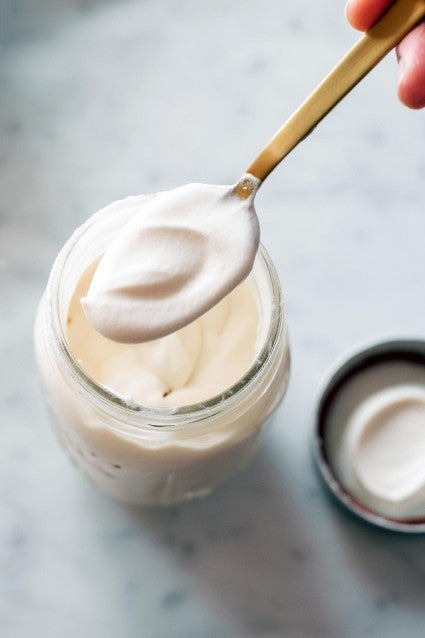
What about the canned stuff? While store-bought whipped cream will work in a pinch, there’s something magical about the soft, billowy consistency of homemade whipped cream. The freshness of made-to-order whipped cream simply can’t be beat.
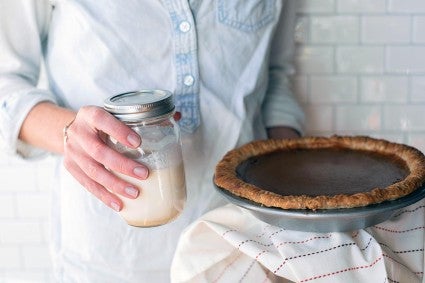
The solution to all these problems is simple: Mason jar whipped cream. It’ll have you saying, “I’ll bring the pie!” without any worry about whipped cream woes.
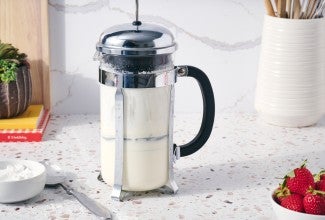
You can whip cream by any means of agitation — most commonly, it’s beaten in a stand mixer (or with an electric hand mixer) until light and fluffy. However, there are other ways to incorporate air into cream, including using a whisk or simply shaking cream in a jar.
What’s the science behind this magic? It’s exactly the same as it is for regular whipped cream, only you’re providing the power behind the agitation. As you shake the jar, air is forced into the cream. Initially, bubbles start to form that then pop and quickly disappear. (If you stop shaking in the early stages of making whipped cream, you’ll see the frothy texture rapidly dissipate and the cream return to its original state.)
If you continue shaking the jar, you’ll increase the surface tension of the cream by adding even more air. What exactly is happening here? The fat starts to break down and destabilize due to the force of the cream sloshing around the jar. Eventually, a network of fat globule-surrounded air bubbles develops into a semi-stable foam, also known as whipped cream.
Ta-da! It’s science. And magic.
Want to try it for yourself?
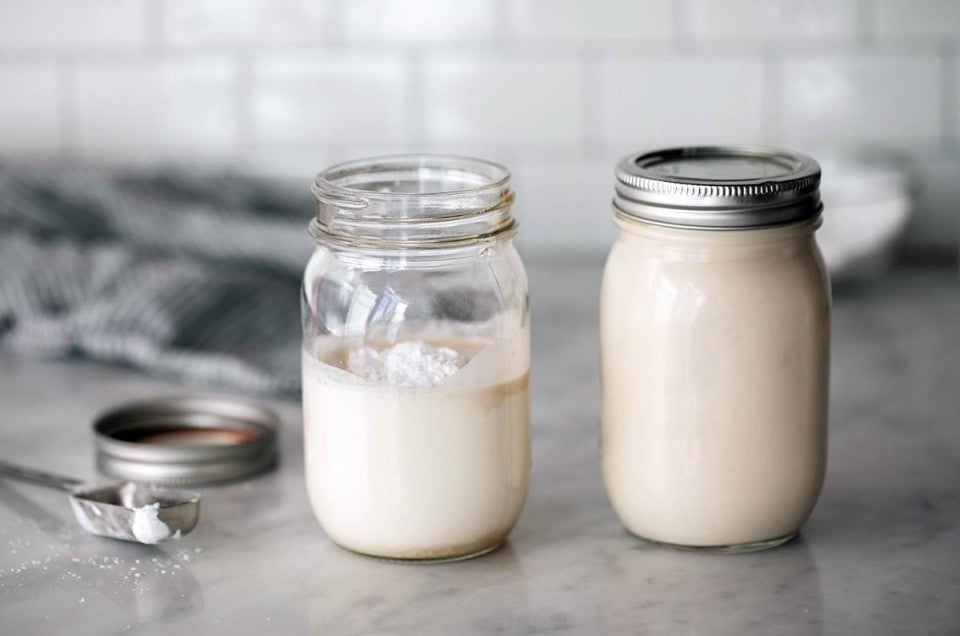
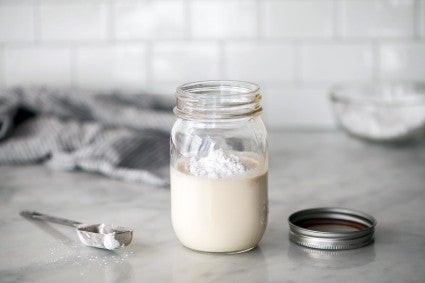
To make about 1 1/2 cups of whipped cream (which is the amount I like to serve with a 9” pie), start with a clean, empty jar that can hold at least 12 ounces; a pint Mason jar works well.
What you’ll need:
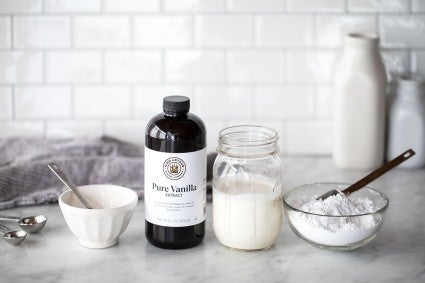
1 cup (227g) heavy cream or whipping cream
3 tablespoons (21g) confectioners’ sugar
3/4 teaspoon vanilla extract, optional
Fill the jar with cream and add the confectioners’ sugar and vanilla extract. For extra visual appeal, use vanilla paste or Pure Vanilla Plus to get real flecks of vanilla bean throughout the whipped cream.
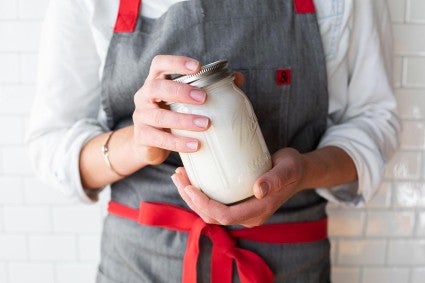
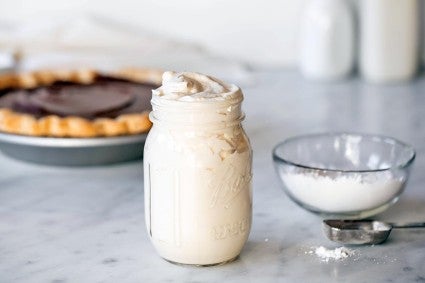
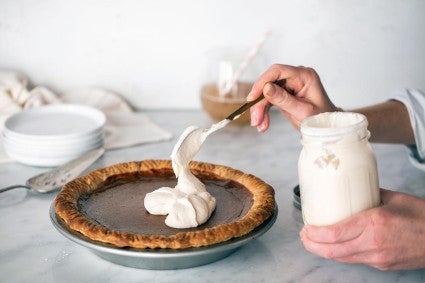
Close the lid tightly and vigorously shake the jar for 60 to 90 seconds. Check the consistency of the cream — if it’s not as stiff as you’d like, shake again for another 20 to 30 seconds until it reaches your desired consistency. This method is ideal for creating soft whipped cream — the kind you can scoop onto a slice of pie, where it’ll droop ever so slightly over the edges as if it’s nice and relaxed.
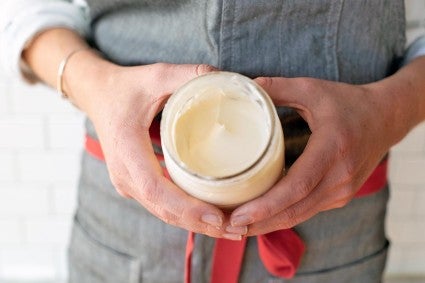
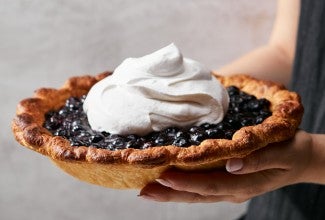
Keep shaking and checking the consistency until you end up with whipped cream that’s exactly as thick you like. Serve immediately over pie or any dessert that could use a dollop.
While this method is close to foolproof (a 4-year-old could do this on their own!), there are a few elements to keep in mind to ensure fluffy, creamy success.
1) Avoid low-fat dairy.
Anything less than 30% fat won’t be stable enough to capture little air bubbles and transform into foam, leaving you with a shaken but soupy cream. Be sure to use full-fat cream (heavy cream or whipping cream) that’s fresh and preferably locally sourced.
2) Keep your ingredients cool.
When cream is cold the fat is more solid, stable, and capable of holding air bubbles. That means that cold cream takes less time to turn into foam than cream that’s warm or at room temperature.
Stash your cream-filled Mason jar in a fridge until ready to serve. Or if you’re adventuring outdoors, bring an ice pack to help keep everything chilled until the moment you’re ready to start shaking.
3) Flavor to taste.
Don’t be shy with the vanilla extract if you like the sweet and complex flavor it brings to baked goods. You can also get creative and use spices (like cinnamon, nutmeg, and cloves), cocoa powder, or even other extracts and oils (citrus oil, anyone?) to make whipped cream that will take your dessert to the next level.
4) Don’t give up … but also, don’t make butter.
Sixty seconds doesn’t sound like a long time … until you’re shaking the jar for a full minute. Set a timer to keep track instead of guessing the time; meanwhile, keep on shaking! It might seem like nothing is changing until all of a sudden, you’ll hear the slosh, slosh, slosh of the cream turn into the more muted sound of soft cream rolling around in the jar. At that point, check the consistency and keep shaking for a bit longer if you’re hoping for stiffer cream.
Be forewarned: You can go overboard here and turn your cream into butter. If you’re overzealous and over-shake, the solid fat will separate from the buttermilk, and you’ll have the early stages of butter. At this point, you might as well keep on shaking and enjoy the delight that is fresh butter, then try again with additional cream. (Or read our post, How to fix whipped cream, if you're determined to salvage it.)
5) Use a watertight jar.
It goes without saying, but a tight-fitting lid is an essential part of making this process successful. If the lid leaks, you’ll end up with cream everywhere. Be sure your jar and lid are watertight — you can test it by filling with water, closing the lid, and shaking it over the sink. If there are no drips, you’re golden!
Once Mason jar whipped cream becomes one of your go-to tricks in the kitchen, start thinking about making your own vanilla extract to take all your sweet desserts up a notch. For a full step-by-step tutorial, see our blog post: How to make vanilla extract. (Like Mason jar whipped cream, it’s easier than you think.)
Cover photo by Jenn Bakos.


December 11, 2024 at 9:31am
Update to my last comment:
We made this country crock plant based heavy whipping cream. At firdt no matter how much we shook it was still liquidy. We poured it on our crisp and stored the rest in the fridge. It been 2 days and a just pulled it out and it's perfectly scoopable like cool whip! Love it!
December 7, 2024 at 11:48pm
On a whim we tried this with country crock plant based whipping cream. It didn't get soft peaks at all but it did thinken and tastes super yummy. Close enough!
November 24, 2024 at 7:16am
Have the kids pass the jar around to take turns shaking! They enjoy making the magic and if we’re lucky it’ll put to use some of their youthful energy 😊
November 10, 2024 at 11:50pm
I love this! We took it to a gathering to go with the pumpkin pie-no asking the hostess to clear off the kitchen counter for the mixer. And I love the soft whipped cream. The whole thing was like magic and every adult had to look in the mason jar to see if it really worked 😅. Thank you!
November 17, 2024 at 10:01am
In reply to I love this! We took it to a… by Sharon (not verified)
You're very welcome, Sharon! We're so glad to hear this made your gathering more magical!
September 6, 2024 at 1:35pm
I loved making this, it was creamy and delish! If anyone needs any jars I have been getting some great options from SKS Bottle & Packaging so I wanted to share! Thanks again!
August 5, 2024 at 10:59am
One caveat to this great old method: use the jar’s 2-piece metal lid intended for canning, not the plastic ‘keeper’ lids that are sold for mason jars. The plastic lids don’t seat well & liquid can get out when they’re agitated or flipped over. Yep, found that out the messy way once … :)
August 5, 2024 at 4:02pm
In reply to One caveat to this great old… by Athena PN (not verified)
Thanks for sharing this tip, Athena!
November 16, 2023 at 6:59am
Can Instant Clear Jell be added with the sugar to stabilize the whipped cream?
November 18, 2023 at 11:40am
In reply to Can Instant Clear Jell be… by sandy (not verified)
Certainly! I would recommend up to 1 teaspoons of instant clear jel per batch of whipped cream. Happy baking!