

Super-wet, sticky bread dough can be particularly challenging to knead by hand. It sticks to everything — your bench, your tools, your hands — causing a mess and plenty of frustration. So when I recently learned about the chop-and-plop method for kneading high-hydration doughs in a class taught by my colleagues at our Baking School, I was immediately intrigued.
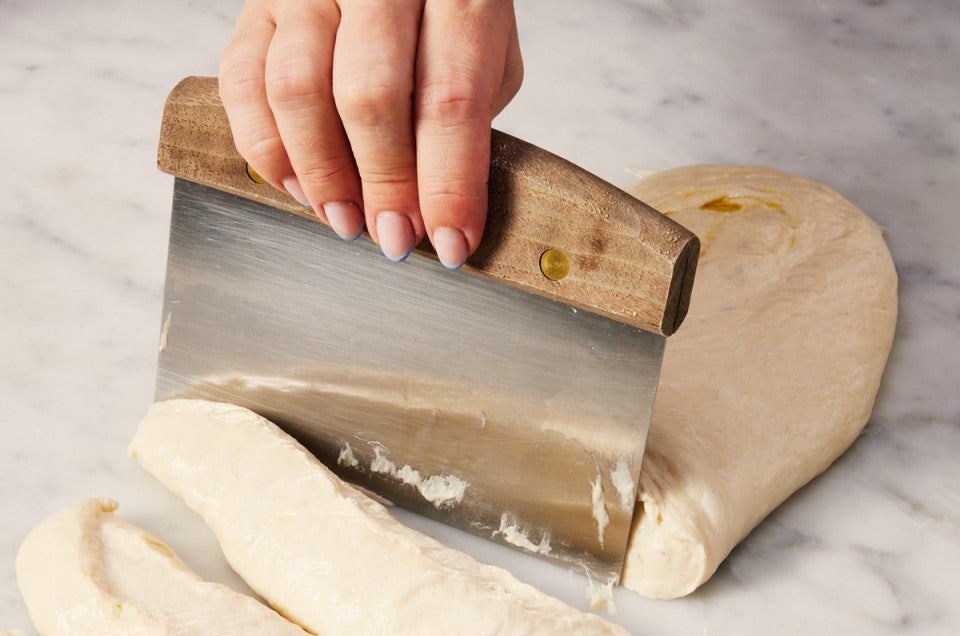
The proper French name for this dough kneading technique is passage en tête, but bakery kitchens in the United States often refer to it as the chop-and-plop. This method involves chopping off a small portion of wet dough, then stacking that chopped dough back on top of the larger portion — like a head (or tête in French). The process is repeated several times, gradually resulting in more cohesive, less sticky dough with increased structure.
Let’s review some bread basics. In almost all conventional bread baking, dough is formed by combining flour and water (along with yeast and salt). Flour contains two specific proteins (glutenin and gliadin) that, when agitated in the presence of liquid, form gluten. Elasticity from the glutenin and extensibility from the gliadin enable the formation of gluten strands in bread dough. These strands form a matrix, which holds on to the gas produced by yeast and beneficial bacteria in the dough, allowing for rise before and during baking.
With this in mind, you may be confused (as I was) about just how the chop-and-plop method works. If the goal is to build strong gluten bonds in bread dough, why on earth would I purposely chop my dough into pieces, potentially severing those bonds? Baking School Lead Instructor Jessica Meyers has the answer: “By cutting the dough, the gluten matrix will actually fuse together in a stronger web.” In other words, chopping the gluten strands counterintuitively supports stronger gluten development, transforming wet doughs from slack to silky without traditional kneading.
This method allows you to work with sticky dough without adding additional flour during kneading (which can make your bread denser). It also allows the flour already in the dough to fully hydrate since no new flour is being added during kneading, which would compete for the available moisture in the dough. Since gluten forms in the presence of liquid, this full hydration helps the gluten matrix form and fuse more easily. And, perhaps best of all, it’s an easy way to work with wet dough, one that won’t lead to sticky dough all over your bench and hands.
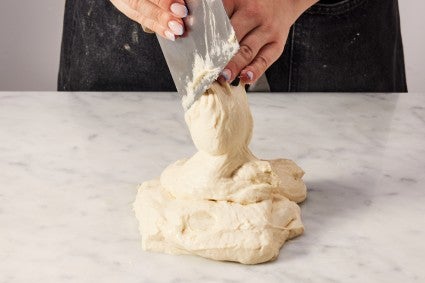
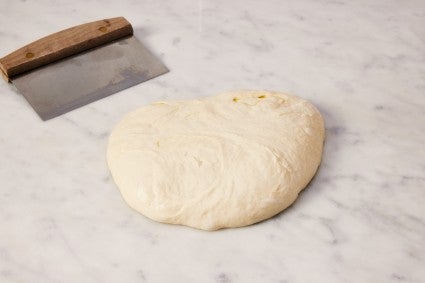
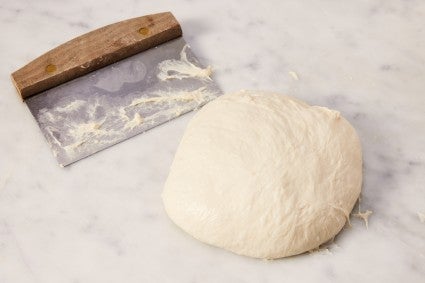
Starting with your large blob of dough on a work surface, use your bench knife to chop off a small piece. (Let’s say 2" x 2" if your mass of dough is roughly 8" x 8".) Plop that small piece of dough on top of the larger blob. Repeat, stacking the chopped pieces on top as you go. As you continue with the process, the gluten will start to develop and the dough will become more tense and harder to chop. It is beginning to transform from an amorphous blob into a dough that has tension, structure, and strength. And a strong dough translates to a bread that will rise higher when baked.
The whole process takes just a few minutes of chopping and plopping. As forced realignment of the gluten matrix in the dough creates tension and resistance, a loose, shapeless dough turns into a more tautly formed mass that will rise well when baked. The dough will begin to resist the chopping process, indicating the formation of a strong gluten matrix, and it is this indicator that lets you know when you’ve done enough chopping and plopping and can move on to the next step in your recipe.
The chop-and-plop method is most useful when working with high-hydration doughs. Doughs are generally considered to have high hydration when the percentage of liquid to flour in a recipe is about 80% or higher. Take this ciabatta recipe as an example; its hydration is 79.5% (close enough to qualify). As expected, the dough is wet and sticky, so the recipe includes 7 minutes of beating in a stand mixer to achieve a smooth, elastic dough. The same outcome could be achieved using the chop-and-plop method instead, which is a great workaround if you don’t own a stand mixer. The only tool you need is a bench knife.

Our panini bread recipe is another instance where the chop-and-plop method is useful. Coming in at up to 96% hydration, there is nearly as much liquid in the dough as there is flour, making for an extremely wet and sticky dough. It is so sticky, in fact, that we call specifically for the use of a mixer. If you don’t have one or simply want the tactile experience of bread-making by hand, the chop-and-plop would replace the kneading step. It’s a useful method for keeping the soft, wet dough in one spot without a bowl.
Whether you’re making one of these recipes or another high-hydration loaf, give the chop-and-plop method a try the next time you bake. You may just adopt it as your new favorite technique for wrangling that super-wet dough.
Unsure how to calculate the hydration of your dough? Check out this helpful blog post.
Cover photo by Rick Holbrook; food styling by Kaitlin Wayne.
