


You finally got a sourdough starter. Now what?
Find out how to feed and grow it and, most important, when it's ready for baking.

Love sourdough, but looking for a bit more flexibility and ease when you bake with a starter? In The Casual Sourdough Baker, PJ shows you just how wonderfully stress-free sourdough baking can be, from simple but richly flavored loaves to countless easy ways to use your discard. If you're just beginning your journey, our Sourdough Baking Guide lays out the basics you need for success — whether you decide to become serious or go casual!
* * *
You’ve wanted to learn to bake sourdough bread for the longest time. But starting a starter from scratch? “Wow, that can take a week or more and quite a bit of attention; do I really want to go there?”
But wait — someone just gifted you with some of their starter. Or you’ve decided to buy one that’s already mixed and ready, needing only a couple of feedings to get it up to speed. Awwright, sourdough bread here we come!
Then you realize there’s still that gray area between receiving your new starter and actually using it to make bread. Dealing with starter for the first time is kind of like bringing a newborn baby home from the hospital. You’ve read all the books and thought you were ready, but now that the baby is actually here: “WHAT DO I DO?”
First, relax. Your “baby” is going to be fine. Like all babies, your starter requires warmth, food, and attention. But unlike human infants, whose needs are pretty much nonstop, your starter needs very little attention; once you feed it, it can sleep happily in the back of your fridge for days (even weeks) at a time.

Let's assume your friend has gifted you starter in storage mode (i.e., not having been fed over the past 24 hours). Like a baby, you need to first feed your new starter, then let it rest in a comfy spot. Here’s what to do.
Take 1/2 cup (113g)* of the starter (discarding any additional starter) and place it in a medium-sized bowl: stoneware, glass, plastic, doesn’t matter what it’s made of (though if you use metal, be sure it’s stainless steel).
*If your friend has given you less than a half cup of starter (though, really?), it's OK. Go ahead and follow these instructions anyway, using the small amount of starter you've received. Bottom line, once it's been established (as has your new arrival, courtesy of your friend), sourdough starter will survive and thrive under all manner of maintenance feedings (which is what you're giving it here). It's only when you want to bake naturally leavened bread with it (bread with no added commercial yeast) that you need to pay close attention to how much and when you feed your starter. For the details on readying your starter for baking naturally leavened bread, see Putting your starter to work.

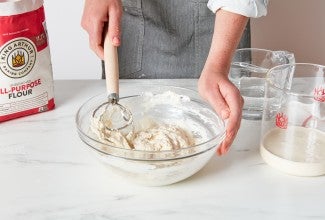
Add 1/2 cup (113g) lukewarm water (tap water is fine) and a scant 1 cup (113g) unbleached all-purpose flour. Stir until everything is well combined.
Cover the bowl; it shouldn’t be completely airtight but you also don’t want the starter drying out, so a kitchen towel isn’t suitable. Try a reusable bowl cover or plastic wrap.
Place the bowl in a moderately warm spot, somewhere between 68°F and 78°F. Options: Heat your microwave for 1 minute (to about 80°F), then place the bowl inside. Or place the bowl in your turned-off oven with the oven light on. Like a baby, your starter wants to be cozy, neither super-warm nor shiveringly cold.

After 8 hours (wouldn’t you love your new baby to sleep for 8 hours at a time?!), take a peek at the starter. Has it become bubbly and doubled in size? If so, great; it's ready to stash in the fridge or use in a recipe. If not, you'll want to feed it again.
Give your starter another meal: Scoop out 113g (discarding the rest), place it in a bowl, feed it with 113g each unbleached all-purpose flour and lukewarm water, keep it warm, and wait 8 hours or so for it to grow.
If after its second feeding it hasn't doubled in size within 8 hours, don't give up; your new starter just may need some extra TLC. Continue feeding as directed above. In order to keep your schedule sane, move to feeding just twice a day, every 12 hours or so.

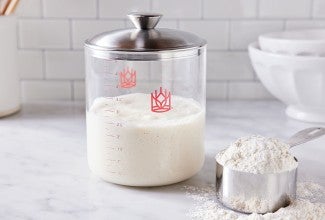
You can leave your fed starter in the bowl during this process, or do as I do: Transfer it to a 32-ounce straight-sided glass jar, such as a wide-mouth quart-sized canning jar. Loop a rubber band around the jar at the height of the starter, then measure how tall the starter will be when it’s doubled and loop another rubber band there. When it reaches the second rubber band it’s doubled in size.
Once your starter is reliably doubling in size within 8 hours of being fed, it's ready to bake with — or store for future use. If you plan on refrigerating your fed starter, let it rest at room temperature for 2 hours after its feeding before stashing it in the fridge.
If after three to four days of feeding your starter doesn’t double within 8 hours of being fed, I’d recommend ditching it and buying a vital, healthy starter from King Arthur.
As always, King Arthur does everything possible to guarantee your success: Just follow the feeding directions in the booklet that comes with the little jar of live starter you purchased, and your new baby will start to grow within hours — and grow, and grow!
If you haven’t yet bought your starter, here’s a preview of what you’ll do once it arrives.
Having fed a new starter more than once, here’s my suggestion: Begin in the evening, around or just after supper. That way, your starter will be ready to feed again the next morning, right around or just after breakfast. Unlike most new babies, this one is perfectly content to sleep through the night.

To begin, open the jar of starter; it’ll probably look a bit limp and soggy in the bottom of its container. That’s perfectly OK; it’ll perk up once it’s fed.
Pour 1/4 cup (57g) of lukewarm water over the starter in its “travel jar.” By lukewarm, I mean just barely warm to the touch; nothing you’d want to take a bath in. Screw on the cap and shake-shake-shake to combine the starter and water. Then pour the resulting cream-colored liquid into a medium-sized (at least 2-quart) bowl or other roomy container.

Follow the directions in your booklet, using 1 cup (227g) lukewarm water and about 2 cups (227g to 241g) unbleached all-purpose flour for the starter's first feeding. Cover the bowl with your favorite reusable cover (or plastic wrap) and set it someplace warmish (68°F to 78°F is about right). Let the starter rest, undisturbed, for anywhere from 8 to 24 hours; the warmer your kitchen, the more quickly your starter will grow.
Give the starter its second meal: discard all but 1/2 cup (113g) and feed the remainder with 1/2 cup (113g) each flour and water (you'll find the details in your booklet). Your starter should now double within 8 hours of this second feeding. But if it doesn't? Feed it once more. Once it doubles and bubbles within 8 hours of feeding, it’s ready to use in a recipe or go into the refrigerator for long-term storage, where you’ll only need to feed it once a week.

Some people like to keep their starter on the counter, at room temperature, and feed it twice a day. The advantage is, your starter will be active and ready to bake when you are. The disadvantage? Well, having to feed it twice a day. I prefer the more flexible fridge routine.
That’s it! Your baby is healthy, fed, and happy to nap until needed. Ready to take the next step and actually bake a loaf of bread? See our blog post, Putting your starter to work.
Finally, what about all that extra starter you’re supposed to discard along the way? Despite its name, you can save and use it in all kinds of recipes, from biscuits and pancakes to crackers and cake. Check out our sourdough discard recipe collection for inspiration. And if you’re uncomfortable with the amount of discard you’re generating, there’s a simple solution: reduce the size of your starter. See our instructions for maintaining a smaller sourdough starter.
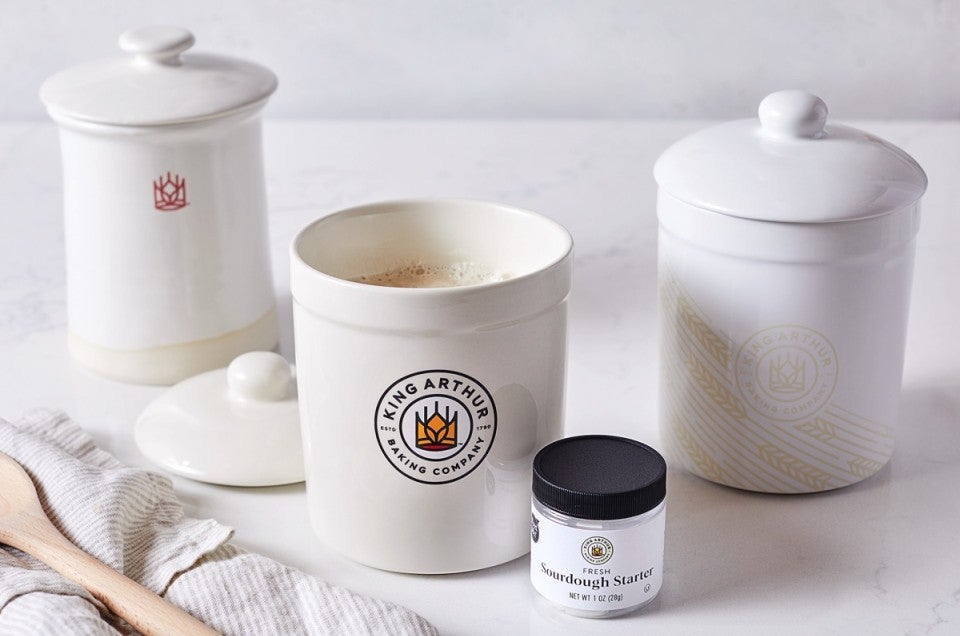
Cover photo by Kristin Teig.


January 6, 2024 at 8:24pm
I was just given starter however I’ll be traveling by plane shortly and need to take it with me. Do you have any suggestions for taking 3 ounces of starter on a plane?
January 12, 2024 at 1:49pm
In reply to I was just given starter… by Jill Rizzuti (not verified)
Hi Jill, I would recommend converting it to a stiff starter by adding enough flour to make a stiff dough. You should be able to carry this on the plane with you in a ziploc bag or small container (leave room for it to rise). To prevent possible leakage, I like to use a container and a plastic bag. If you're checking any bags, I would recommend including your starter in your checked bag, but the stiff starter should still be okay to bring in your carry-on luggage as long as it's 3 ounces or less. For instructions on how to return your starter to a liquid state, check out the Tips From Our Bakers section of our Stiff Starter recipe.
December 31, 2023 at 2:02pm
When you discard part of the starter, can you give that to someone to start thier sourdough. I am trying to decide if I want to try doing this. Thanks
January 6, 2024 at 4:42pm
In reply to When you discard part of the… by Luann (not verified)
Hi Luann! Many bakers will take their discard and then share that with friends and family to continue feeding. You'll want to give them the same feeding instructions you use so that they can continue to feed and ripen the starter in their own kitchens. Of course you can always have them reach out directly to us with any questions as well! Happy Baking!
October 19, 2023 at 8:50am
Can I use whole wheat flour instead of all purpose? Or some other more nutrient dense flour?
October 22, 2023 at 10:49am
In reply to Can I use whole wheat flour… by Nicki (not verified)
Hi Nicki, you can certainly maintain a sourdough starter with whole wheat flour, however, this type of starter won't perform exactly the same way as a white flour starter does. The type of flour you feed your starter has an impact on the organisms that will thrive in it, and this can influence the aroma, flavor, fermentation and rising behavior of your starter. Also, keep in mind that when you transition to a new food source it can take a week to 10 days of twice daily feedings for the starter to fully convert and become stable again. This doesn't mean you can't use it during this transition period, but don't expect it to behave like a whole wheat starter until it's had time to stabilize with this type of flour.
October 9, 2023 at 4:16pm
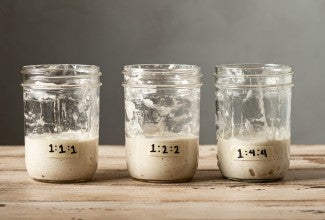
Can you please explain how different feeding ratios affect the starter? I have heard of people doing 1:1:1 and 1:5:5 and others as well. Which is best? I am using King Arthur Organic Unbleached Bread Flour.
October 14, 2023 at 9:40am
In reply to Can you please explain how… by Laura (not verified)
Hi Laura, a 1:1:1 (starter:water:flour, by weight) starter is basically the same type of starter as a 1:5:5 starter (both are fed equal parts by weight of water and flour). The difference is in the relative size of the meal and how quickly the starter is able to consume and ferment it. A 1:5:5 means the starter is getting a larger meal, which it will take a bit longer to process. This type of feeding ratio is especially useful if you happen to live in a warm environment, where fermentation happens faster. Ideally when you are maintaining your starter at room temperature you want your twice daily feedings to line up with when the starter is ripe (at its peak rise, or just beginning to fall). This helps to keep the yeast more vigorous. If your starter routinely falls between feedings this can lead to sluggish yeast behavior. Feeding your starter a relatively larger meal in this way isn't harmful to it and doesn't have to mean using up more flour, since you can reduce the percentage of starter relative to the water/flour amounts.
August 22, 2023 at 7:42am
I have relocated a tropical climate and can no longer use the incubation temps. recommended for Starter. Can you recommend and adjustments I can make for warmer temps? My indoor temp is 79 deg. Thanks!
August 26, 2023 at 2:43pm
In reply to I have relocated a tropical… by Diane Dutt (not verified)
Hi Diane, it can be challenging to create and maintain a sourdough starter at consistently warmer temperatures, but 79°F isn't a deal breaker for the creation process, and there are adjustments you can make once your starter is fully developed which can be helpful. Some bakers actually recommend a warmer environment for creation, so you could consider following along with this blog post to create your starter. Once you get your starter developed, refrigerating your starter when you're not able to feed it regularly is a great option, and when you have it out at room temperature, a ratio of 1:5:5 (starter:water:flour, by weight), as Maurizio recommends, should help slow down fermentation and allow your twice a day feedings to line up close to the peak rise, which helps to keep the yeast active and vigorous. Note that Maurizio mentions that he sometimes reduces the starter portion down to 10g in warmer months (which would be 1:10:10), so you could also try that once your starter is established. Feeding with cooler water might also be a useful tool in slowing down fermentation in your tropical climate.