


How do you track the seasons? By the temperature outdoors? The quality of light pouring in the window as you sit at the breakfast table? Or perhaps by which of your favorite professional teams is in action. (Go Sox!)
Me, I track the seasons by what’s for sale just inside the entry doors at Kmart; and what’s featured in the supermarket’s in-store bakery.
Though I haven’t been to Kmart recently, I’d imagine that by now, 7 weeks before Easter, they’re heavily into spring clothes, stuffed bunnies, and the ubiquitous Marshmallow Peeps — in more shapes and colors than ever before.
Yes, the past few years we’ve witnessed a Peeps explosion. Blue bunnies! Purple eggs! Green chicks! Yellow, white, pink, doesn’t matter to me, so long as they never lose that plain-jane marshmallow flavor, and signature soft-gritty Peep texture.
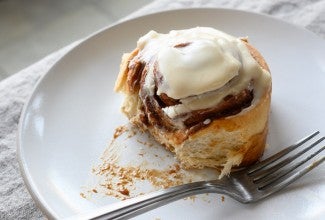
Supermarket bakeries, on the other hand, are still drafting on the high of Mardi Gras king cakes, while getting ready to jump into shamrock cookies, green-iced cupcakes, and golden rounds of Americanized Irish soda bread.
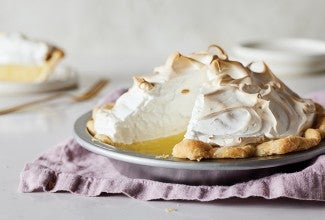
St. Patrick’s Day is a tough one for bakers. Green + baking aren’t two concepts that play happily together. Though pistachio cookies and Key lime pie try to carry the day, there’s not a single kelly-green baked good that doesn’t rely on a heavy dose of food color for its hue. Ewwww.
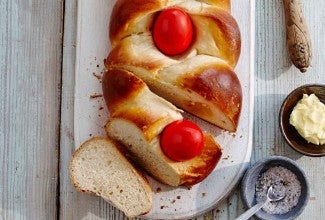
But Easter — ah, Easter is heaven for supermarket bakeries. Bunny cakes! Iced flower cookies! In Italian bakeries, gorgeous lamb cakes, and columba pasquale, Easter dove bread.
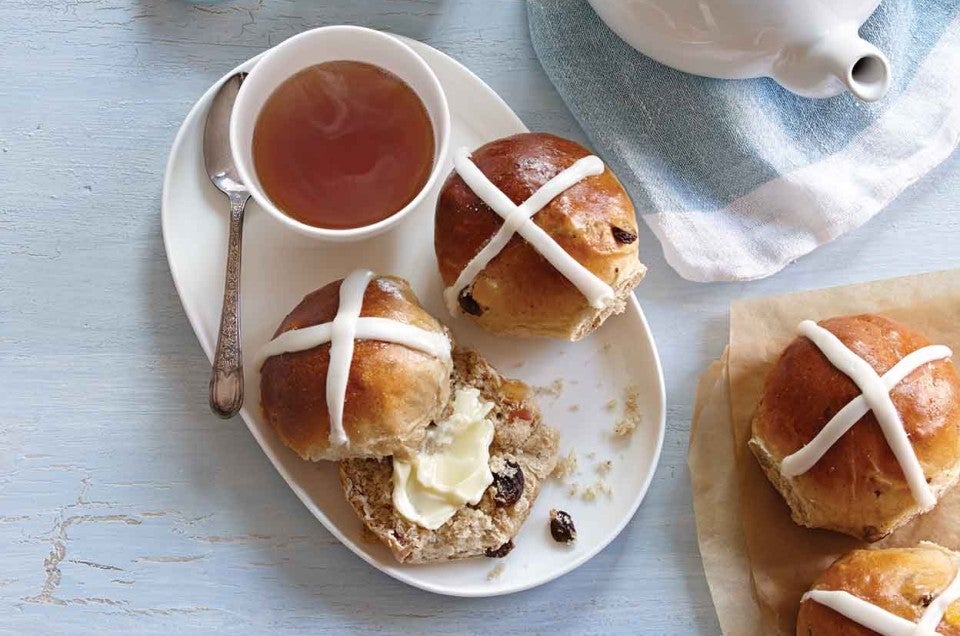
And everywhere, of course, hot cross buns.
These buns, historically baked 2 days before Easter on Good Friday, are now available well before that. Originally packed with candied peel and other dried fruits, and marked with a piped pastry cross on top — not sweet icing — they’ve devolved into plain raisin buns topped with a thick frosting cross.
If you ask me? Let's celebrate the longed-for return of warm weather with a batch of hot cross buns well in advance of Easter.
Read our Easy Hot Cross Buns recipe as you follow along with these pictures.

First, let’s prepare the fruit; you should do this well ahead of when you want to make the buns, as it needs to sit for preferably a couple of hours (longer doesn’t hurt).
I like to use tiny, sweet dried currants; and our fruitcake blend, which combines diced apricots, pineapple, cranberries, raisins, and dates. Non-traditional, for sure, but oh-so-tasty. Combine the fruit with rum (or apple juice), cover with plastic wrap, and microwave for a minute or so, just to heat it up. Remove from the heat, and let it cool to room temperature. As it cools, it should absorb most of the liquid.

I decided to follow this recipe’s original directions by combining everything except the flour — butter, milk, eggs, yeast, sugar, spices, salt, and baking powder.

And here’s what happened — a mess. Globs of butter and spices floating in liquid. Next time, I’m combining ALL of the dough ingredients at once.

Here’s what the dough looked like when I added the flour. That’s more like it.

It’s very soft. I beat it with the flat beater for 3 minutes…

…then scraped down the sides of the bowl, and switched to the dough hook.

An additional 4 minutes of kneading with the dough hook turned it into a sticky, fairly smooth dough.

In goes the cooled fruit, including any liquid that hasn’t been absorbed.

This is sticky business, kneading the fruit in. Your best bet is to oil your hands, and do it right in the bowl.

Keep at it till the fruit is well distributed throughout the dough. Cover the bowl, and let the dough rise for 1 hour.

Here it is after 1 hour. It’s not a vigorous riser, but should puff up a bit.

Gently deflate the dough by scraping it down.

Use a muffin scoop, if you like, to scoop out generous, billiard-ball-sized portions.

Grease your hands, and round the scoops into balls. I ended up with 13 full-sized buns, and one baby. They snuggled nicely in a 9” x 13” pan.

Cover the pan; a plastic shower cap works nicely. Let the buns rise for 1 hour, or until they’ve expanded and started to crowd one another.

Next, whisk up a mixture of egg white and milk; this will give the buns a satiny shine.

Apply to the risen buns; a silicone brush does a nice, gentle job.

Here they are, ready to go into the oven.

Bake the buns for about 20 minutes, till they’re a rich golden brown.

Remove them from the oven.

See that soft shine? Take them out of the pan, and cool them on a rack.

When the buns are cool, make the icing. Combine confectioners’ sugar, milk or cream, a tiny pinch of salt, and vanilla.

Your goal is enough milk or cream to make icing that’s the perfect consistency for piping. Go easy with the liquid; icing can go from perfectly pipe-able to liquid with just a few extra drops.

Now comes the challenge: piping the crosses atop the cooled buns. I used to cut the corner off a plastic sandwich bag to do this; now, it seems every sandwich bag I find has a gusseted corner, or some other “improvement,” that makes it unsuitable for snipping off its corner to make a homemade piping bag.
Plan B: a parchment funnel. (Or Plan B might be disposable pastry bags, if you're into piping icing on a consistent basis.)
Roll the parchment into a cone.

Secure with a rubber band.

Spoon icing into parchment cone, and cut off its tip, if it’s too small.

Squeeze icing in cross shapes atop the buns. In the end — success. These buns looked almost as good as they tasted. Welcome, spring!
Read, rate, and review (please) our recipe for Easy Hot Cross Buns.


March 30, 2024 at 3:44pm
Made these today. Dough was very sticky and as unable to shape properly. Had to just make a blob of dough. Baked ok, but certainly do not look anything like the photos in the recipe. Not sure what to do so the dough is not a super sticky mess. Was disappointed as everything else I have made from your recipes has come out great.
Any ideas on what to do better?
April 1, 2024 at 12:53pm
In reply to Made these today. Dough was… by Anna W (not verified)
Hi Anna, this is a sticky dough, especially when it's warm, so you might find it helpful to chill the dough in the fridge for half an hour or so before dividing and shaping the buns. You can also use a little bit of flour when it comes time to divide and shape, if you find it difficult to do with greased hands. It's also important to use our Unbleached All-Purpose flour rather than another brand, as other brands of AP flour are generally lower in protein as compared to our flour. This means that they will not only develop less gluten, but will also absorb less liquid, which can make for an even wetter and stickier dough. Another option would be to try the tangzhong method (as described in the Tips From Our Bakers section of this recipe) which will help to develop a slightly stiffer dough that will also help keep your buns softer for longer.
March 14, 2024 at 2:13am
Hi , can I use high gluten flour ? Thanks !
March 14, 2024 at 1:32pm
In reply to Hi , can I use high gluten… by Paula Stonoga (not verified)
Hi Paula, you can use high gluten flour but will need to increase the milk in the recipe by a few TBSP. With high gluten flour the rolls will have a crispier crust and be less soft. Hope this helps!
March 24, 2023 at 8:30pm
I’ve attempted this two times without success. Both times dough was entirely too wet to even handle. Couldn’t even get into a dough ball - flattened out. I thought I measured wrong the first time, so repeated with the same results. Cut back on liquids? Knead in more flour?
March 25, 2023 at 10:24am
In reply to I’ve attempted this two… by Steve S (not verified)
Hi Steve, this is meant to be a rather sticky/wet dough, although if you happpened to use another brand of all-purpose flour, this could have contributed to your difficulties. Other brands of AP flour tend to have a lower protein percentage as compared to our flour, which means they won't develop as much gluten and also won't absorb as much liquid. This can make for a very wet dough that doesn't hold its shape well. If you did use our flour, I would stick to the ingredient weights, and perhaps use a little flour on the table in order to form the rolls. If the dough came off the mixer very warm (higher than 78°F), this can make the dough seem even more sticky and hard to work with. If this is the case, try sticking the dough in the refrigerator for 30-45 minutes after the initial rise and before shaping. Chilled dough should be easier to work with, although the final rise time may be a bit longer.
April 4, 2022 at 3:21pm
Hi has anyone tried these Hot Cross Buns in an Ankarsrum mixer? I was thinking about using the roller
April 6, 2022 at 11:58am
In reply to Hi has anyone tried these… by MJ Vinella (not verified)
Hi MJ,
I have made dinner rolls, sourdough loaves and bagels in my Ank, with the roller and had great success, so I think this recipe would be just fine as well.
March 27, 2022 at 10:31am
can the buns rise overnight in the refrigerator and then get baked Easter morning?
March 27, 2022 at 10:51am
In reply to can the buns rise overnight… by vanessa (not verified)
They certainly can, Vanessa! I would recommend storing them in the fridge for up to 10 hours and as soon as you preheat the oven, remove them from the fridge to warm up. Due to the stiffness of the cold dough in the fridge, they may not puff up as much before putting them in the oven but once they hit the heat of the oven, you should see a good real of rise due to the extended fermentation they've undergone in the fridge. Happy baking!