


Here at King Arthur's Baker's Hotline we hear a common lament from frugal sourdough bakers:
“Why do I have to throw out so much sourdough starter every time I feed it? Isn’t there a way to avoid all this waste?”
Our tried and true maintenance routine requires discarding a full cup (227g, 8 ounces) of starter each time you do a feeding and aren't planning to bake, which can add up to a lot! That's why we've devised so many great recipes that utilize sourdough starter discard. But what if you don't want to deal with the discard to begin with?
If you’ve found a good groove for feeding and maintaining your starter that gives you great results and creates little waste, this blog post may not be for you. But if you're drowning in discard and wondering why you couldn't just maintain less starter, read on!

To be honest, we weren't sure how low it was safe to go.
Our sourdough maintenance routine evolved out of the artisan baking world, where bakers have nurtured sourdough cultures and produced beautiful breads for centuries. In production baking, starter is primarily kept at room temperature and nourished through a course of feedings that build the starter to the amount needed for baking, with enough left over to feed and begin the process all over again.
This system works great if you're baking daily and using a lot of starter. But of course, that's not the way most of us bake sourdough at home.
I was recently lucky enough to take a sourdough class here at King Arthur with guest instructor Debra Wink. She's an accomplished microbiologist and devoted baker who's combined two passions by turning her microscope to the world of sourdough starters. Wink was able to provide some really helpful insight when it comes to maintaining a smaller sourdough starter. From her own research and hands-on experience, Wink has concluded that refrigeration isn't likely to cause any permanent harm to your sourdough starter. In fact, Wink revealed that she regularly refrigerates her starters and maintains them at just two ounces, rather than the more normal 12 or so ounces.
What, only two ounces?
If you’re like me, your sourdough brain may be feeling just a little blown.
As soon as I heard "two ounces," I went home and reduced the size of all six of my sourdough starters. (And if you're wondering why on earth anyone needs six different starters — you're right, there's no good reason.)
They did come in handy this time, though! I was able to test the smaller starter method on a variety of starters: liquid, stiff, rye, whole wheat, and even two different gluten-free starters.
Conclusion: I've been maintaining reduced versions of my starters for a few months now and everyone is happy and healthy.
And, believe me, I was overjoyed to discover that my starters could thrive on this reduced maintenance routine!

Note: For step-by-step directions in easily printable format, check out our recipe for maintaining a Smaller Sourdough Starter.
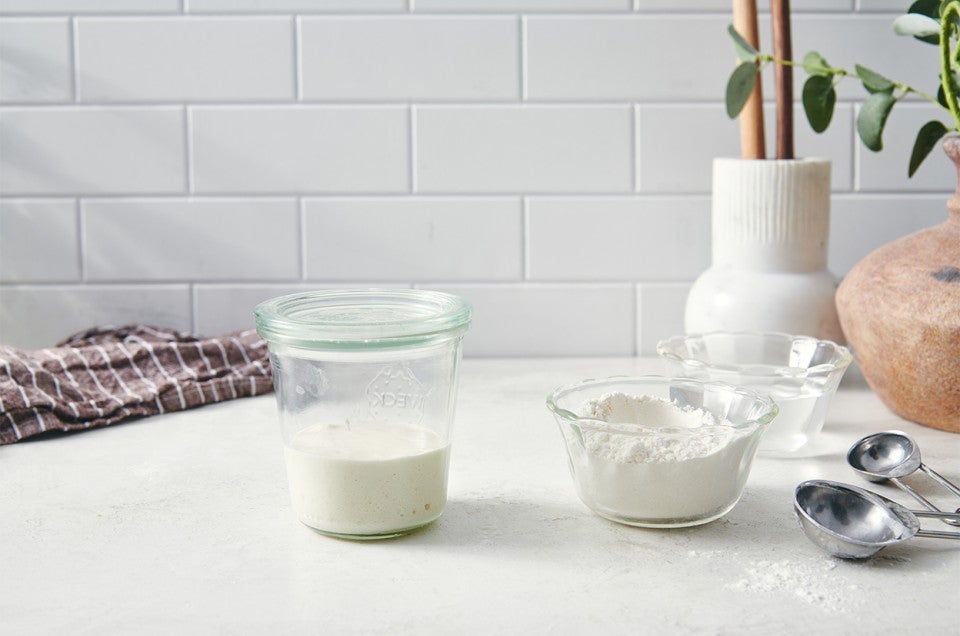
We’re going to keep the same ratio of ingredients as our regular liquid starter: equal parts by weight of starter, flour, and water. All we're doing is reducing each component to a much smaller quantity.
For this method, a digital scale really, really comes in handy. I can give you rough estimates for measuring by volume, but working with tablespoons of starter is messy and not very precise. So, take all that money you'll be saving in discarded flour and consider adding a scale to your baking toolbox.
Two ounces is equal to 57g, but for simpler calculations, I've rounded up to 60g. Not only will a scale make this process easier, but working in grams makes much more sense when working with such small quantities.
For 60g of starter: Save 20g (1 heaping tablespoon) starter and feed it 20g (4 teaspoons) water and 20g (2 tablespoons) flour.

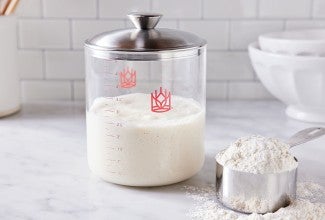
If you decide to maintain a smaller sourdough starter, downsizing your tools can make the process much easier. Our regular sourdough crock is just too big for this little guy.
For our smaller starter, you'll need an 8-ounce canning jar or a similar-sized container. This jar will only be used for maintenance feedings. Be sure your jar has a wide mouth to make stirring easy.
Two identical jars can make the feeding process even easier. If you're weighing your ingredients you can tare the empty jar. If you're measuring by volume it will be easier to transfer the heaping tablespoon of starter to the clean jar.
You'll also need a larger container or bowl when it comes time to build the amount of starter you have in preparation for baking. Our sourdough crock could come in handy here, but I'd be wary of building more than 454g (16 ounces) of starter in this crock.
Mini spatulas and a mini-scoop can also make the feeding routine a lot easier.

While refrigeration may not harm your sourdough starter, it doesn't provide the necessary environment or nourishment to keep bacteria and yeast populations at optimal levels for baking.
If you're accustomed to storing your starter in the refrigerator and feeding weekly, then you know it's helpful to take your starter out of the refrigerator a day or two before you plan to bake and start feeding it twice daily at room temperature. These revival feedings at room temperature help bring your starter back to full vitality.
When maintaining our regular 12 ounces of starter, two or three such revival feedings can generate as much as 567g (20 ounces) of discard.
The real beauty of maintaining a smaller sourdough starter is that the revival feedings that are necessary after refrigeration are integrated into building the quantity of starter, with little or no discard generated along the way.
Say you want to make our Naturally Leavened Sourdough Bread recipe on Saturday. This recipe calls for a daunting 454g (16 ounces) of ripe sourdough starter. Here's how to prep your smaller starter to bake:
Feeding 1: Thursday night you'll take your 60g of starter out of the refrigerator and give it a normal feeding:
Feeding 2: Friday morning, rather than discarding, you'll begin building the quantity of your starter. You'll save all 60g and feed it with equal parts flour and water:
Feeding 3: Friday evening, you'll do the last feed/build before baking on Saturday morning:
Saturday morning you'll have enough starter for the recipe (454g), plus 86g leftover. You'll need 20g of that 86g remaining starter to feed and perpetuate.
This means you're only generating 66g of discard with this last build. If you include the 40g of discard from the first feeding, the total discard generated is only 106g (less than 1/2 cup).
And how does the bread turn out when you use this method? I tried it out, and the results were pretty darn nice.

Of course, there are various ways you can accomplish these builds, incorporating more or fewer feedings into the building process.
Keep in mind, if your starter has been stored in the refrigerator for several weeks or longer it's going to need more than just a few feedings to bring it back to full vitality before baking. For more on this, see our tips for reviving a neglected starter.
More room-temperature (70°F) feedings will lead to a more active starter, which will perform better in your baking. In particular, more feedings will contribute to a better rise. But what if you only have time for two feedings/builds before baking the bread recipe above? How do we get from 60g starter to 540g in two builds? And how will fewer feeding/builds affect our results?
Feeding 1: Friday morning, take your starter out of the fridge and begin building immediately, with no discard:
Feeding 2: Friday night, we continue to build the quantity of starter, again with no discard:

Saturday morning: You'll need 454g starter for the recipe and 20g to feed, leaving only 66g (about 1/4 cup) to discard!
But will our results suffer with only two feedings/builds?

Surprisingly, the results are just as nice as the bread that got three feedings/builds.

The results are even more surprising when I test our Pain Au Levain recipe with only one feeding prior to the overnight levain. Hardly the lackluster loaf I was expecting!
If more feedings lead to better rising bread, why don't my results bear this out?
Takeaway: A few midweek room-temperature feedings may help improve the vitality of your starter, allowing it to recharge more quickly later in the week.
Reducing the amount of starter you maintain can really revolutionize your sourdough baking routine. We're sure you'll have lots of questions, so please don't hesitate to ask them below! And if you've already taken the leap to a smaller starter, we'd love to hear about your experiences and results!
For a recipe to follow along, as well as easy printing, see our recipe page for A Smaller Sourdough Starter.
Many thanks to Debra Wink for inspiring us to try maintaining a smaller sourdough starter.


September 5, 2020 at 1:43am
I'm new to sourdough baking . I developed my starter 3 months ago which I've kept on counter and I'm already exhausted from not wasting 1 cup of discard (and gaining weight from all the yummy sourdough treats stockpiled in freezer!) So, tonight, I decided to finally read this post I had seen a while back. So glad I did, will definitely give this smaller starter a try, but I would like to continue leaving it on the counter and not refrigerate because I bake several times throughout the week. Wanted to make sure that's ok too? I feed my 100% Whole Wheat starter every 12 hours at peak rise and our house is 70-74 F all the time. When building the starter to make bread, I would simply apply the steps you described above? Would it possibly lower the amount of feedings needed to build for the recipe requirements, since my starter is stored at room temperature?
September 5, 2020 at 9:11am
In reply to I'm new to sourdough baking … by Jill Fisher (not verified)
Hi Jill, if you store your mini starter on the counter and feed twice daily it should remain very active, and your builds can then be entirely focused on increasing the quantity of starter available, rather than reviving the starter.
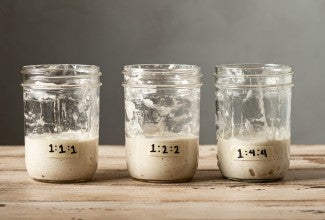
That being said, you may find that your smaller starter responds to environmental temperatures a bit differently than your larger starter, so keep an eye on it and be sure that you're able to continue feeding at the peak. If you notice your smaller starter peaks earlier and collapses between feedings, consider reducing the percentage of starter as compared to water/flour fed, which can help slow things down so that your twice a day feedings continue to line up with the peak of rising. For example, in warmer months you might want to switch to a 1:3:3 ratio (starter:water:flour, by weight), which could look like: 10g starter + 30g water + 30g flour.
As you can see from my examples in the blog, it won't take long to build the quantity of starter you have available. And if you look at recipes like our Pain Au Levain or Vermont Sourdough, you'll notice that these levains only require a tiny amount of starter, so no building is necessary to make these breads!
I hope this helps. Let us know how it goes.
Barb
September 6, 2020 at 12:50pm
In reply to Hi Jill, if you store your… by balpern
Thanks so much for all the tips! Can't say it enough how grateful I am for the inspiration, education, and encouragement King Arthur bakers like you provide during my sourdough journey.
August 27, 2020 at 8:33am
How Low Can You Go?
I have been maintaining a mini starter using
1.3.3 ratio. 3g starter, 9g water, 9 g. flour. fed twice daily for cooler months.
1.5.5 ratio: 3g starter, 15g water, 15g All Purpose organic flour [King Arthur] fed twice daily for summer heat.
Whenever I want to bake, I scale up to the amount needed for the formula at the AM feeding the day before. The night before my bake day, I either set the levain or re-feed if the formula uses a direct starter.
This extremely small amount produces wonderful bread with excellent rise. I desire more lactic acid flavor so I do use higher temperature for fermentation and bake the same day rather than retarding the loaves with refrigeration.
I bulk ferment and proof my loaves at 85F. I bake the first loaf and since they are all ready at the same time and I only can bake one at a time I put the remaining loaf in the freezer for 30min prior to scoring. This short retard gains a bit more oven spring.
This mini starter brings the amount of discard down but enough to accumulate for a recipe within a few days. I usually discard around 30g. of starter at each feeding.
Thanks for your article-it was a catalyst to help me "go low" with my experimentation. I am a new baker and just baked off loaf #50.
Theresa
August 29, 2020 at 9:57am
In reply to How Low Can You Go? I have… by Theresa Hall (not verified)
Hi Theresa, thanks for sharing your mini-starter routine! It's so helpful and encouraging to hear how you've adapted this method with such positive results. You may think of yourself as a "new" baker, but you sound like a pro!
August 30, 2020 at 7:53am
In reply to Hi Theresa, thanks for… by balpern
Thank you for your kind compliment. If newbies progress it is because of the generosity of artisan bakers and professionals who are so generous with online information and teaching. Thank you all.
August 1, 2020 at 10:07pm
I have a great active sourdough starter going that I started with 1 cup water 1 cup flour and every day discarded a half cup and fed it half cup water and 1 cup flour. Can I reduce the amount of flour and water I feed it now and continue to maintain it? I have plenty to bake with and I use the discard often, but I am going thru wayyyyy too much flour feeding it 1 full cup everyday. Can I reduce the amounts by half to discard 1/4 cup and feed it 1/4 water and 1/2 cup flour? Can I reduce it more than that and maintain my starter?
August 3, 2020 at 10:18am
In reply to I have a great active… by Anna (not verified)
Hi Anna, it sounds like your sourdough starter is very similar to ours, although you're discarding a little less than we normally do (our routine calls for discarding 1 cup of starter and feeding 1/2 cup of starter + 1/2 cup of water + 1 scant cup of flour. The short answer is, yes, you can reduce your total maintenance amount to as little as 2 ounces or 1/4 cup, as I've illustrated in this article. It's trickier to go down to that level if you don't have a scale, however. You want to maintain the ratio of ingredients that works best for your starter in your smaller version, while maintaining an accurate and easy means of measurement. A scale can really be helpful in this regard. Things to pay attention to when you reduce your starter size:
1. A smaller starter is more temperature sensitive, so is likely to ferment quite quickly on warmer days, and go dormant more rapidly when refrigerated. When you're maintaining your starter at room temperature ideally you want to feed it when it's at its highest point of rising, or just beginning to fall, which promotes vigorous yeast activity. Allowing the starter to fall significantly between feedings can lead to sluggish yeast behavior. This means that on hot summer days you may need to adjust the ratio of ingredients in your starter so that you're offering a smaller portion of starter a relatively larger meal of water and flour, which it will take longer to consume and ferment. Again, weight measurements make this much easier. While our normal feeding routine calls for equal parts by weight of starter:water:flour (1:1:1), if your house is warm in the summertime, you might need to shift to something more like 1:4:4. With our smaller starter recipe that might look like: 7g starter + 28g water + 28g flour. When you plan to refrigerate your smaller starter, feed it and then let it sit out for at least 4 hours before refrigerating.
2. You'll also want to be sure that your starter container is an appropriate size for your smaller starter, since it's not particularly healthy for your starter to be spread out too thinly in a larger container. I like to see about an inch of depth to my smaller starter right after feeding.
I hope this helps! Let us know how it goes.
Barb
July 14, 2020 at 5:06pm
Except that if your starter is reasonably active, a 1:1:1 feed Friday night will leave you with a depleted starter Saturday morning.
At 1:1:1 my starter peaks in ~ 3.5 hours. I think the overnight feeds need to be set up to take longer to peak.
July 15, 2020 at 9:43am
In reply to Except that if your starter… by Mark (not verified)
Hi Mark, you are totally correct! While the 1:1:1 ratio (by weight) might work perfectly well under cooler conditions, if your home tends to get warmer this time of year, then your starter will peak much sooner than it normally does, and this can require some adjustments to your feeding routine. To keep yeast activity vigorous you ideally want to replenish (feed) your starter when it's highest point of rising, or just beginning to fall. Allowing the starter to collapse significantly between feedings tends to lead to sluggish yeast behavior.
A smaller starter is particularly vulnerable to changes in environmental temperatures, so feeding with cooler water and tweaking the ratio of ingredients to include a smaller percentage of starter as compared to water/flour fed can be helpful in controlling the rate of fermentation. Offering your starter a relatively larger meal of water and flour will take it longer to consume and ferment, which can help you line up those twice a day feedings closer to the peak. To that end you might want to try feeding your starter with a 1:3:3 or even 1:4:4 ratio. For the smaller starter a 1:4:4 ratio might look like: 7g starter +28g water + 28g flour. Of course you could also feed your starter more frequently when it's being stored at room temperature, especially if you're maintaining a smaller starter, but I hesitate to recommend feeding more often than 2-3 times a day, and the overnight feeding is definitely going to require a longer fermentation time.
Thanks for pointing this out, Mark!
Barb