

What's the best way to keep your baguettes crisp? Or your granola crunchy?
What guarantees the snap in your gingersnaps?
Simple: a long, slow cool helps keep things crisp. And your oven can do all the work: first baking your favorite crisp/crunchy treats, then finishing the job by drying them out, too.
Think about it: your crisp crackers, crunchy cookies, and crusty baguettes have those particular characteristics for a reason, right? They're dry – through and through in the case of thin cookies and crackers and croutons, or at least throughout the crust, in breads.

How many times have you pulled a crunchy artisan loaf (like this Stirato) out of the oven, admired its wonderfully crisp crust and, within an hour, cut a slice to find the loaf's gone limp and leathery?
This may sound like an oxymoron, but it works: cool your crisp baked goods in the oven.

Take crusty bread, like these baguettes. Once the bread is baked, turn off the oven. Transfer the bread from pan (or stone) to a middle oven rack. Crack the oven door open a couple of inches (a folded potholder works well here), and let it cool right in the cooling oven.
How does this help keep bread and other baked goods crisp? As the bread (or crackers, or cookies) cools, any leftover moisture in its interior migrates to the surface. If that moisture reaches the surface and hits cool air – e.g., typical room temperature – it condenses on the outer crust, making it soggy. If it hits warm air (your still-warm oven), it evaporates – leaving the crust crisp.
Cooling in the oven can also help prevent the wrinkled crust that afflicts your sandwich bread every now and then. I say "help prevent" because that particular issue is caused not just by condensing moisture, but by the minute separation of top crust from the rest of the loaf – something it's pretty difficult to control.

This English Muffin Toasting Bread is cooling in the turned-off oven. It's been half-brushed with melted butter, to see if butter affects the crust's wrinkling one way or the other; as it turned out, it didn't.
Be sure to take the loaf out of the pan before returning it to the oven; this will help any interior moisture escape from the bottom and sides of the bread, as well as from the top.
Baking a loaf in your bread machine? As soon as your bread is done, remove the bucket from the machine, take out the bread, and gently set the loaf back into the machine, sans bucket.
Crack the lid open an inch or so, and let the bread cool right in the turned-off machine. The still-warm (but gradually cooling) air helps prevent moisture from condensing on your loaf’s surface – helping prevent those unsightly wrinkles!

The bread on the right was baked in the machine, then turned out of the pan onto a rack to cool at room temperature.
The double loaf on the left was turned out of the pan back into the machine to cool. It's a tiny bit wrinkled, but not nearly as much as the loaf that cooled outside the machine.
The tactics are the same – with a few minor tweaks.

First, don't try to make a crisp/crunchy cookie out of a recipe designed to make soft/chewy cookies; it's a losing proposition.
For crisp cookies, look for the words "crisp" or "crunchy" in the description at the top. If the recipe has specific instructions for crisp cookies, follow them. For instance, our favorite gingersnap cookie recipe says to "Bake the cookies for 11 minutes, for cookies that are crisp around the edges, and 'bendy' in the center. Bake for 13 minutes, for cookies that are crisp/crunchy all the way through."
If the recipe doesn't give specific instructions for crisp cookies, but does give a range of baking times, choose the longer amount of time.

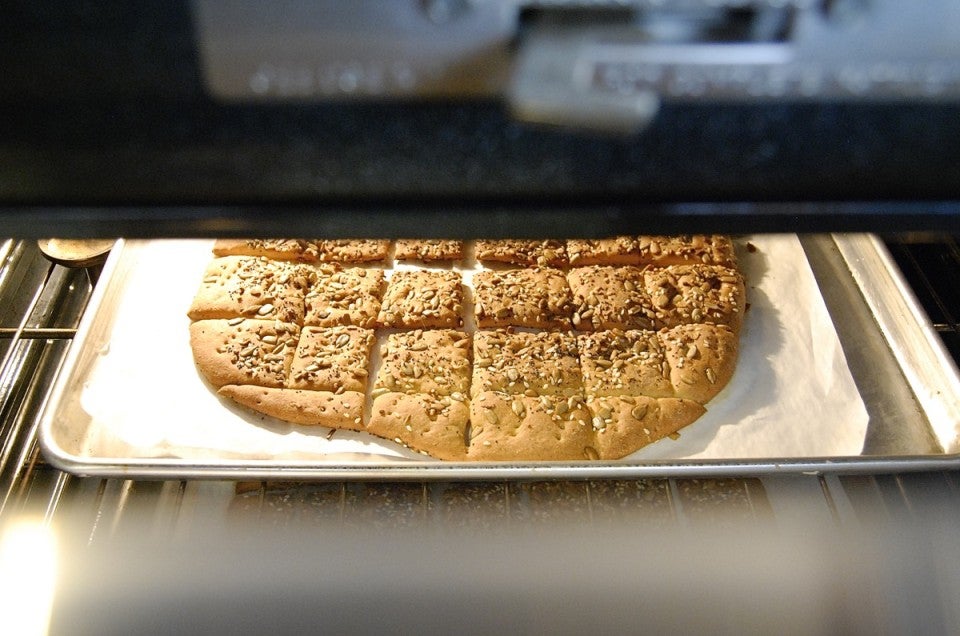
Have you ever seen a recipe for soft, chewy crackers? No, neither have I. Crackers (like these seed-topped Crunchy Crackers) are inherently crisp. Once the crackers have baked as long as the directions suggest, break one open: if there's any hint of softness or moisture, turn off the oven, crack it open, and let the crackers cool/dry inside.

Once popovers are finished baking, use a sharp knife to vent them and release the steam. A 1" cut right along a seam will be unnoticeable, and will do the job.
If the popovers are sturdy enough to stand on their own, remove them from the pan, set them on the oven rack (or on a baking sheet), and let them cool briefly in the turned-off oven, while you rustle together the rest of your meal. That way, they'll not only stay crisp, but be wonderfully oven-warm when you serve them, as well.

What do these three treats have in common? You tend to keep them around a bit longer than, say, cookies or crackers. Thus it's important that they're COMPLETELY dry – lest they mold, or become unpleasantly soft.
When making granola or croutons (which I do often), I bake to just shy of the brown-ness I like. Then, leaving the granola or croutons inside, I turn the oven off and crack it open a few inches. After 15 to 20 minutes, or when the oven is just lukewarm, I shut the oven door and come back when everything is completely cold.
Bake dog biscuits until they pass the cracker test (no detectable moisture inside), then cool them like granola or croutons: first with the door cracked open, then closed.
The biscuits will get VERY hard; but you won't need to worry about them molding. And besides, I've never yet known a dog who didn't love a good, hard biscuit to gnaw on!
What tips do you have for baking extra-crispy treats? Please share in comments, below.

