


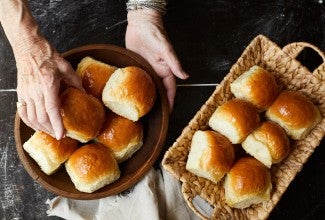
There's nothing like a bread-basket full of gorgeous, golden dinner rolls, right? Their buttery, yeasty aroma alone is enough to satisfy any bread lover. But when they look good, too? You've hit a home-baker home run.
So what's the best way to make sure your rolls are as nicely shaped as they are tasty?
First, make sure the dough is divided evenly; a scale is invaluable here. Second, pay attention to your shaping; a roll that starts out less than round isn't going to get any prettier. And finally, select the right pan.
Wait a minute – what does the pan have to do with whether or not a round roll stays round as it rises and bakes?
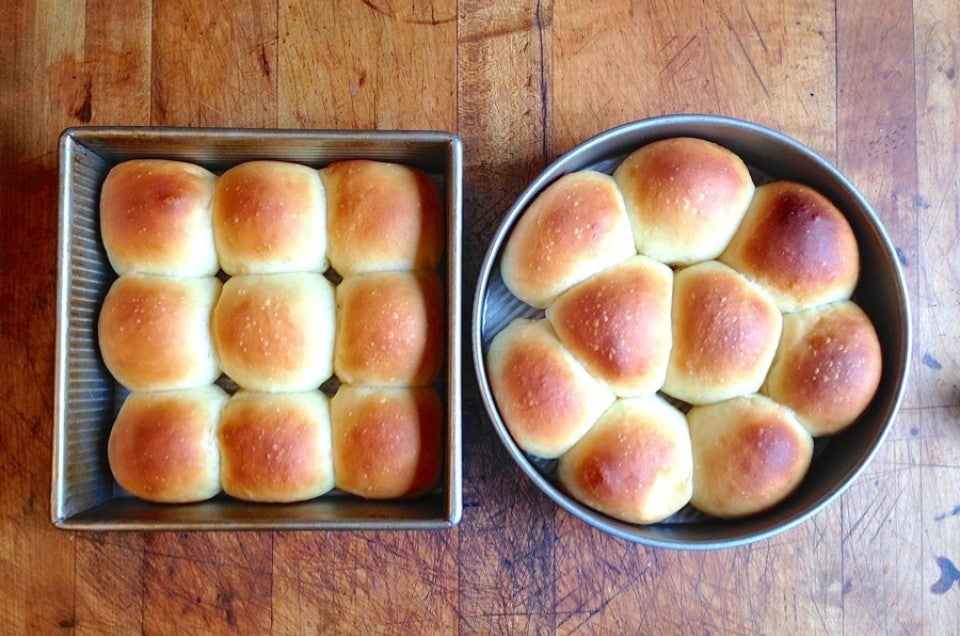
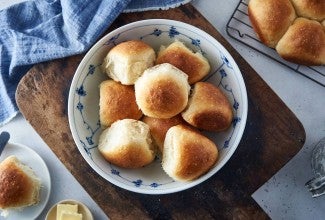
As it turns out – plenty. Let me show you, with this recipe for Amish Dinner Rolls. I start by dividing the dough into 24 pieces. Usually I'd put all 2 dozen in a 9" x 13" pan, but today, I put nine rolls into a 9" round pan, and let them rise.

Nine rolls go into an 8" x 8" x 2" square pan. Which is the same volume as a 9"x 2" round pan – did you know that?

And nine rolls go onto a baking sheet.

Clearly, the rolls in the two tall-sided pans will turn out to be pull-apart rolls, since I've placed them close together. Those on the pan will be free-standing. If you like soft-sided rolls with less crust, make pull-aparts; crisper rolls with more crust, a baking sheet.
Let's bake them and see what happens.

Well, they're all nice-looking rolls, aren't they? But look at the difference in finished shape.
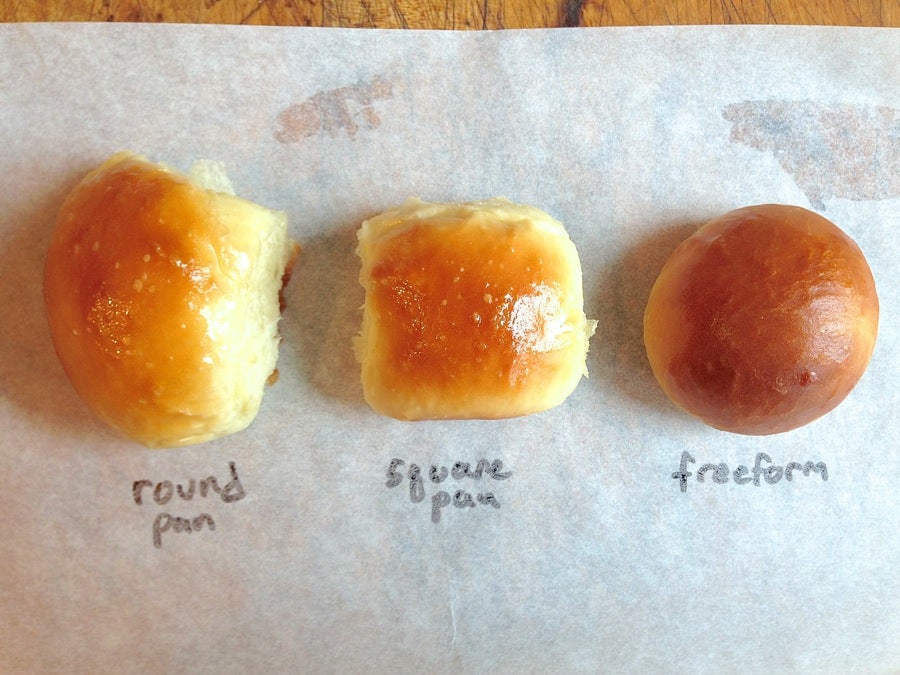
The rolls in the round pan bake up elongated or even triangular. Those in the square pan end up square. Well, square-ish; they could pass as round. And the free-form rolls retain their initial round shape entirely.
So, what have we learned?
For most uniformly shaped pull-apart rolls, bake them in a round or rectangular pan. For non-pull-apart perfect spheres, bake rolls free-form.

Though in the end, how much difference does it really make – so long as there are hot rolls, brushed with butter, on the table when dinner is ready? Check out all our buns and rolls recipe and get baking.
P.S. One more tip: what's with those spots scattered across the rolls? I shaped the dough and then refrigerated the rolls overnight, since I didn't plan on baking them until the next day. When I took them out of the fridge to warm up, I left their plastic covering on. Moisture condensed on the plastic, and dripped down onto the unbaked rolls. Then, when I put them into the oven, those droplets formed small blisters – spots. Lesson learned: if unbaked rolls have been chilled overnight, take the plastic off once you take them out of the fridge.


March 29, 2015 at 3:49pm
In reply to Love your comparisons. If you make big rolls or just use an 8"… by Ruth (not verified)
March 29, 2015 at 12:30pm
March 30, 2015 at 4:17pm
In reply to I'm confused. The intro in the e-mail this blog was sent says … by Livingwell (not verified)
March 29, 2015 at 12:19pm
March 29, 2015 at 11:40am
March 29, 2015 at 11:55am
In reply to Such helpful advice! Love the tip about taking the plastic wrap… by LCrook (not verified)
March 29, 2015 at 11:25am
March 29, 2015 at 1:54pm
In reply to Thank you so much for this excellent article. Such a simple pre… by SpeltBaker (not verified)
March 29, 2015 at 11:11am
March 29, 2015 at 2:47pm
In reply to Interesting. Also how many rolls to what size pan was helpful… by Jane (not verified)