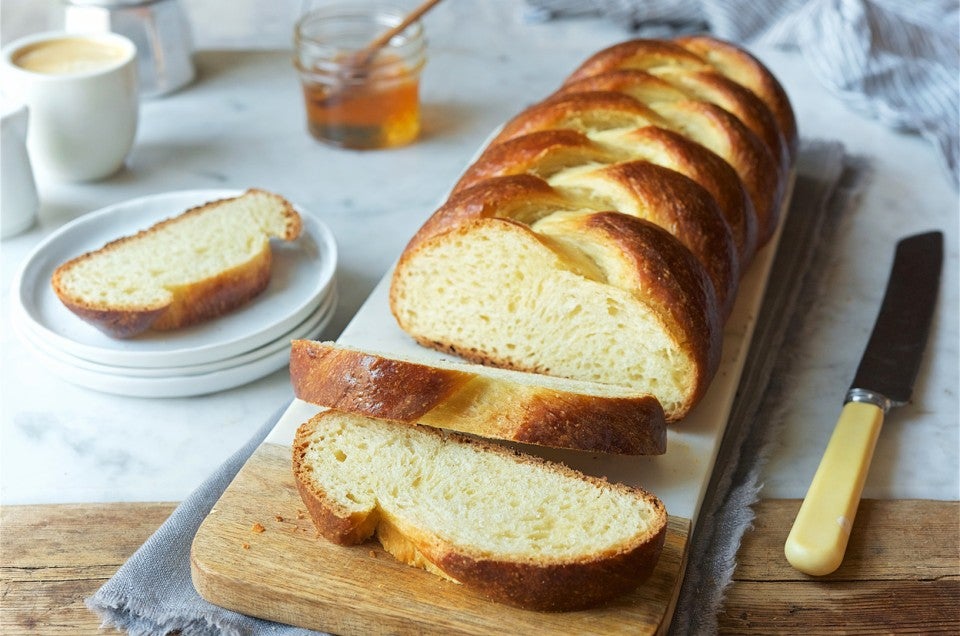


I confess that I'm not an expert on Jewish baking. I didn’t grow up in the culture (aside from a brief exposure to Chanukah songs in kindergarten). As a kid, my Jewish friends gravitated, like me, more towards McDonald’s fries and Ring-Dings than latkes and honey cake.
But I have to admit, my education has been growing by leaps and bounds since I started blogging here. You readers out there have seen to that.
First there was the flourless chocolate cake for Passover, where you told me that vanilla and confectioners’ sugar and butter (sometimes) are NOT suitable ingredients for Passover baking.
Then there was the mandelbrot, where I learned that chocolate chips have to be “parve” to be considered kosher, and walnuts shouldn’t be eaten on Rosh Hashanah.
And then there were the latkes … I didn’t rashly smash TOO many dietary laws there, but did get lots of good advice about potato starch, and a warning not to serve latkes with sour cream unless the accompanying meal is vegetarian.
Thanks, all of you, for your contributions to my continuing education! I now (tentatively, hesitantly) present you with my version of challah, the most traditional and beloved of Jewish yeast breads.
After all, my apple challah recipe passed muster with flying colors during the Jewish high holidays last September. Which gave me the confidence to present you with this classic four-strand braided challah.
And its sibling, challah French toast, which Halley (our Web projects manager) says is the ONLY thing to do with stale challah.
If I’ve broken any (dietary) laws, forgive me. And tell me where I’ve gone astray. Higher education is a good thing... particularly when food is the focus.
Want to read a recipe before you begin? Check out our Classic Challah.
Let's play with the bread machine today.
First, combine all of the ingredients—water, oil, honey, eggs, flour, salt, and yeast—in the pan of your bread machine. Program for the dough cycle, and press start. This is what the dough will look like (above) after 5 minutes or so. If it appears too dry or too wet, adjust with some extra water or flour.
This is a good time to mention winter vs. summer yeast breads. Flour is like a sponge; in summer it soaks up humidity from the air, and you need less liquid to make a soft dough. In winter flour dries out, and you need more liquid. So don't be surprised if the recipe you followed successfully in August makes dough that seems a bit dry now, in January; just increase the liquid by a tablespoon (or 2, or 3).
Here's the dough fully kneaded.
An hour later, it's risen nicely. Because of the eggs and honey this dough doesn't rise vigorously; but it should definitely look puffy by the end of the cycle.
Remove the dough from the bread machine. We're going to make a four-strand braid here, so divide dough into four pieces, shaping each into a rough log on a lightly greased silicone mat (or other clean surface). If you want to make a simple three-strand braid, divide the dough into three pieces.
Gently roll each log until it's at least 18” to 24” long; the longer the logs, the longer/skinnier the loaf.
Here they are, ready for braiding.
Here's a copy of some handy 4-strand braid directions from The King Arthur 200th Anniversary Cookbook. Refer to these as you work if (like me) you're easily confused by the braiding process.
Squeeze the ends of the braids together.
The top strand goes over the two middle strands...
...then back under one. Notice you still have four distinct strands here; keep that fact in mind.
The bottom strand goes over the two middle strands...
...and back under one.
Top strand over the middle two...
...and back under one.
Bottom strand over the middle two...
...and back under one.
Repeat until the loaf is totally braided, tucking the raggedy parts at both ends underneath, so they don't show. If you're flummoxed by all this, just make a simple three-strand braid, OK? It'll be just fine. This tutorial is for bread-braiders looking for a challenge.
Let the loaf rise till it's puffy, then brush with an egg-and-water glaze.
Sprinkle heavily with sesame or poppy seeds, if desired.
Bake (on an oven stone, if you like)...
...till the challah is a beautiful, shiny, golden brown. Cool completely on a rack. Enjoy with dinner. Then use any leftovers for toast or—for a real treat—challah French toast.
Want to read a recipe before you begin? Check out our French Toast.
Slice the challah about 3/4” thick. You'll be making about 7 or 8 pieces of French toast.
Whisk together cream, rum, eggs, sugar, a pinch of salt, nutmeg, and vanilla. Can you leave out the rum? OF COURSE. It's there for flavor only.
Pour the liquid into a shallow pan, and set a slice or two of challah in the pan to soak for about 30 seconds or so. The drier/staler the challah, the longer you should let it soak. It shouldn't be sodden, but the liquid should definitely penetrate into the interior somewhat.
Soak the other side the same way.
Cook challah over medium-low heat, or on a 300°F griddle, till both sides are golden.
Like this.
Serve the French toast immediately. Or set it on a baking sheet and keep it warm in the oven till everyone's ready.
Serve with butter and syrup, or with cinnamon-sugar. The aroma of cream and nutmeg and cinnamon and butter and frying is unbelievable...
Read, rate, and review (please!) our recipe for Classic Challah.
Read, rate, and review (please!) our recipe for French Toast.

