-
Weigh your flour; or measure it by gently spooning it into a cup, then sweeping off any excess.
-
To make the preferment: In the bowl of a stand mixer, whisk together the water, flour, and yeast until no dry spots remain. The mixture will have the viscosity of pancake batter. Cover and let it rest at room temperature for 1 hour. There will be many small bubbles on top and the mixture will have grown in volume.
-
To make the dough: Add the flour, salt, whole eggs, egg yolk (reserving the egg white to brush on the challah later), honey, and oil to the preferment and mix with the dough hook on medium-low speed until a shaggy dough forms, about 2 minutes. Scrape down the bottom and sides of the bowl well, then increase the speed to medium-high and mix until the dough begins to pull away from the sides of the bowl and is shiny and smooth, 8 to 10 minutes. Scrape down the sides of the bowl; the dough will be sticky.
-
Cover the dough and let it rise in a warm place until very puffy, though not necessarily doubled in size, 1 to 1 1/2 hours.
-
Use a bowl scraper to gently ease the dough out of the bowl onto a lightly floured work surface. Line a rimmed baking sheet with parchment and set nearby.
-
To make a 3-strand braid: Divide the dough into 3 even pieces (235g each). Preshape each piece into a cylinder, then cover and let rest for 15 minutes.
-
On a clean, unfloured work surface, roll out each piece of dough into a log about 14" long. If the dough resists stretching and shrinks back, set that piece aside and work on the other pieces before trying to roll it again. Even a short rest can help relax the gluten just enough to make shaping easier. If the dough sticks to the surface, use a bench knife to scrape up any residual dough and add just enough flour to keep the dough from sticking. If it’s difficult to form the log because the dough is sliding on the surface, use a very lightly dampened kitchen towel to remove any excess flour from the surface and lightly moisten the surface to create some tension for the dough to roll more easily.
-
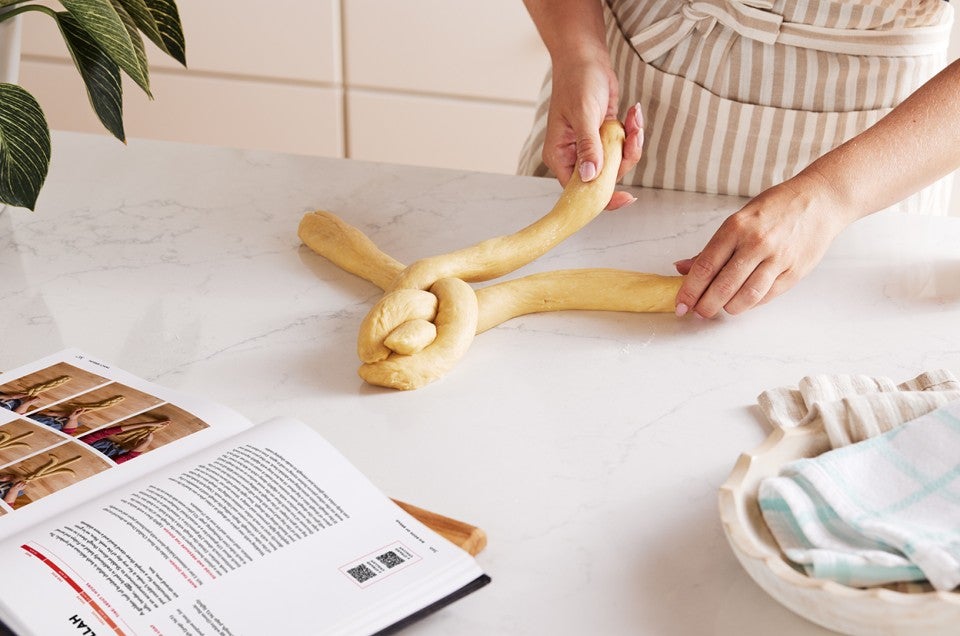
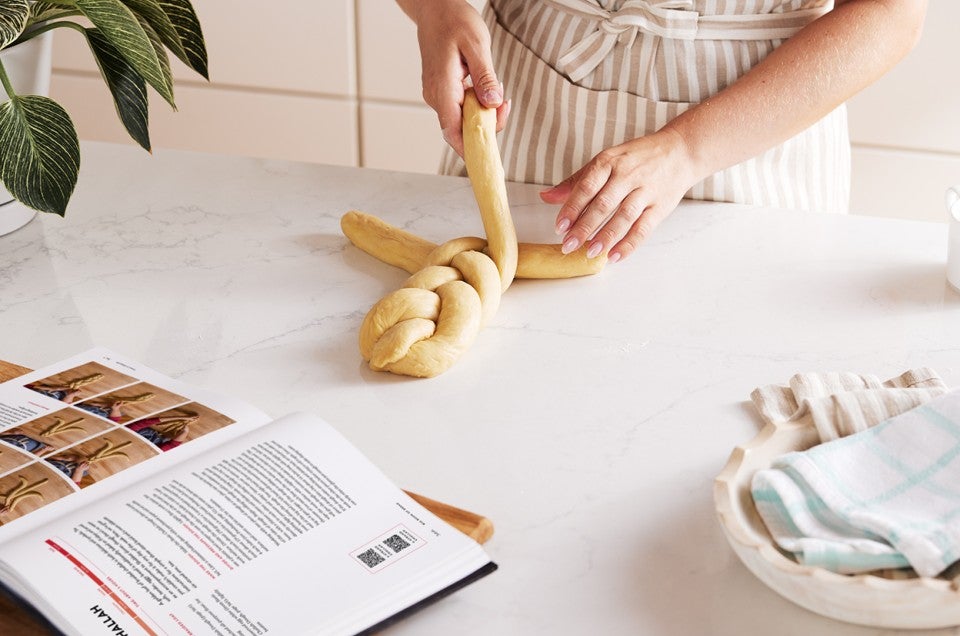
Place the 3 strands of dough vertically in front of you, spacing them so they are nearly but not quite touching. Beginning at the center, take the strand on the left and drape it over the strand in the middle. You don’t need to pull or create tension; you’re just draping one strand over the other. Next, take the strand on the right and drape it over the strand that is now in the middle. Continue braiding until you reach the end, then pinch the strands together. Flip the loaf over so that the surface is now on the counter and then rotate it 180° so the unbraided half is facing you. Repeat the braiding process as described until you reach the end, then pinch the strands together. If necessary, gently roll just the tips of the braid back and forth and tuck under to create clean-looking ends. Supporting the braid underneath with your hands and forearms, gently transfer it to the prepared baking sheet, setting it at an angle so it has room to grow.
-
Cover the challah and let it rise until noticeably puffy, about 45 minutes. Preheat the oven to 375°F.
-
To bake: Lightly beat the reserved egg white with a fork, then generously brush it all over the challah, taking care to brush some into the cracks of the braid. Bake the challah for about 30 minutes, until the crust is evenly deep golden brown (even where the strands cross) and the internal temperature reaches 190°F when measured with a digital thermometer. Remove the challah from the oven, then transfer to a wire rack to cool completely before slicing.
-
Storage information: Store leftover challah in an airtight container up to 3 days or freeze for longer storage.


