


Customer feedback is highly regarded at King Arthur Flour — really, it is. Suggestions aren’t brushed to the wayside but taken seriously. When new questions are posed, we put our baking brains to work finding the answer. So when readers began asking about bread baking in a cold Dutch oven, we started plotting. This topic deserves a full-on investigation!
In our initial exploration of bread baking in a Dutch oven, we investigated using a preheated pot to bake no-knead bread. The results of this method were impressive — loaves baked to crisp, crusty, golden-brown perfection.
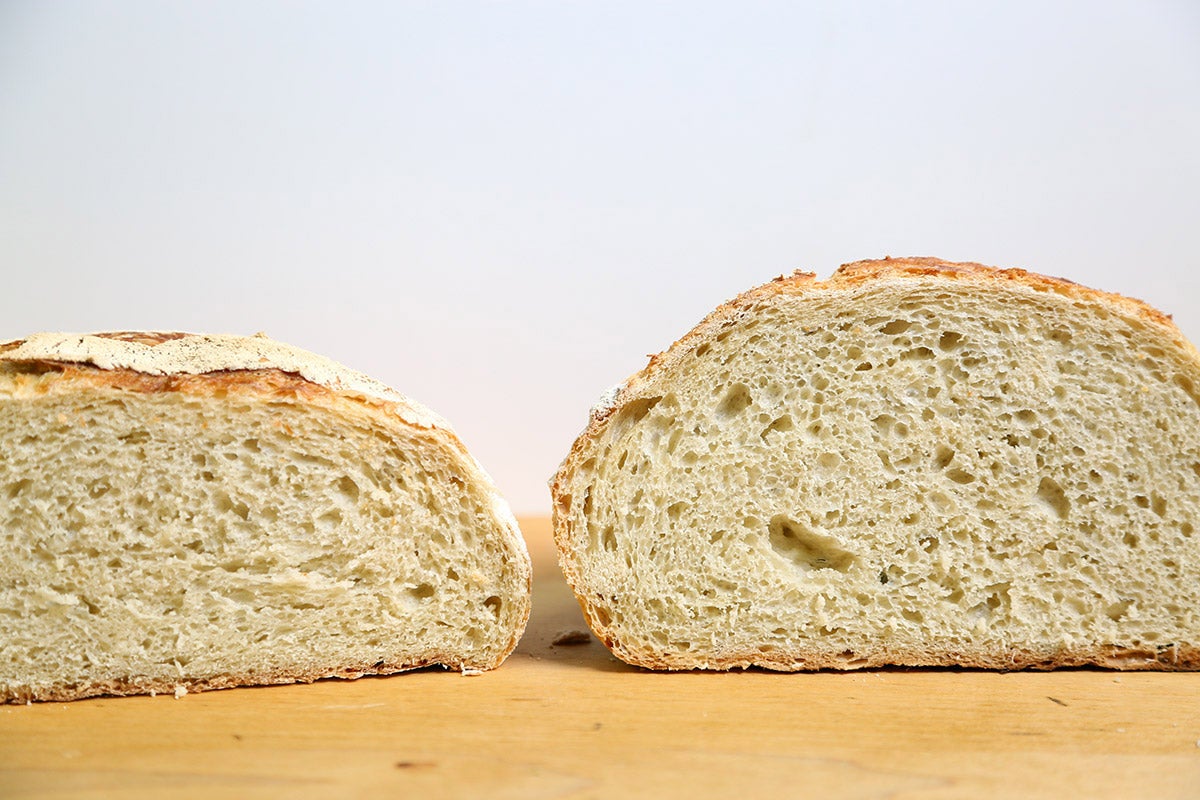
Here are loaves made in a preheated pot (right) with those baked on a sheet pan (left). The side-by-side comparison is stark.
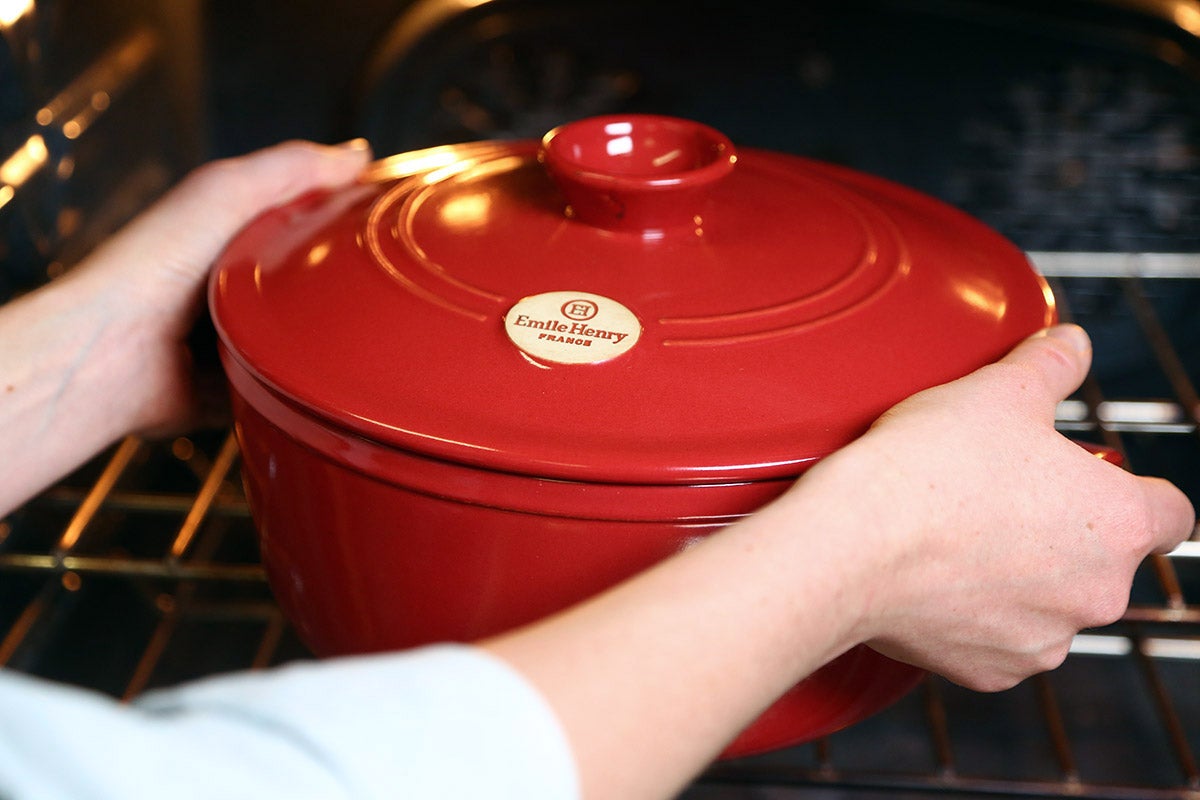
So if you’ve got a bread baking crock that can be preheated empty (like this Bread and Potato Pot), it’s certainly worth trying this method. But what about all the other Dutch ovens that can’t be preheated empty, for fear of damage?
This is when you might want to consider baking in a cold Dutch oven — the oven isn't cold the entire time, of course, but just at the start. Putting the pot into a cold oven allows it to warm slowly as the oven heats up. It prevents any sort of thermal damage that might occur to the pot if it's heated empty.
Some of our bread recipes call for baking in a cold Dutch oven, but you can use this approach to bake almost any crusty bread. There are just a few tricks to achieving fantastic results: You’ve got to know your oven and watch your dough closely as it rises.
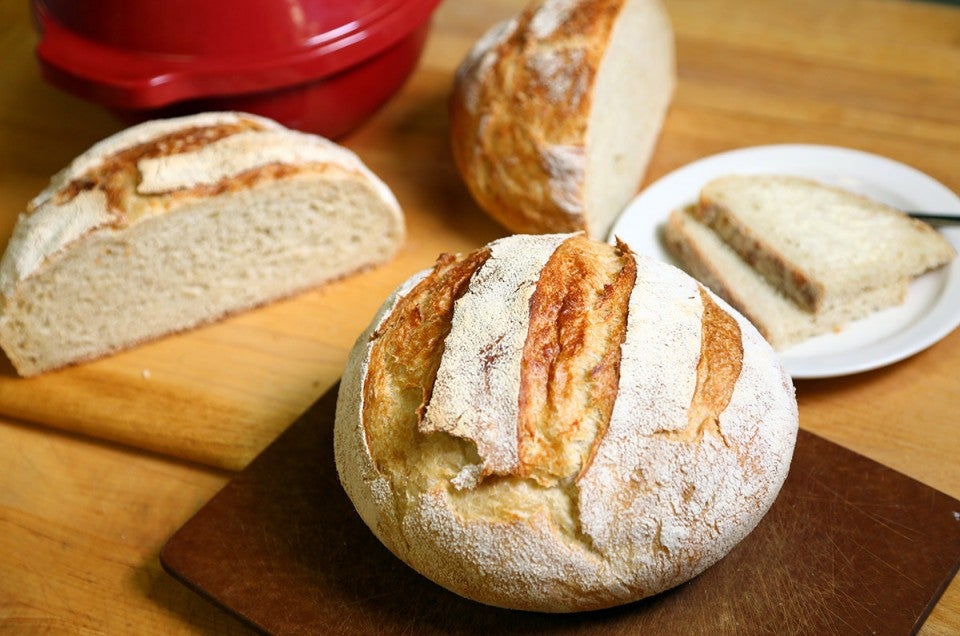
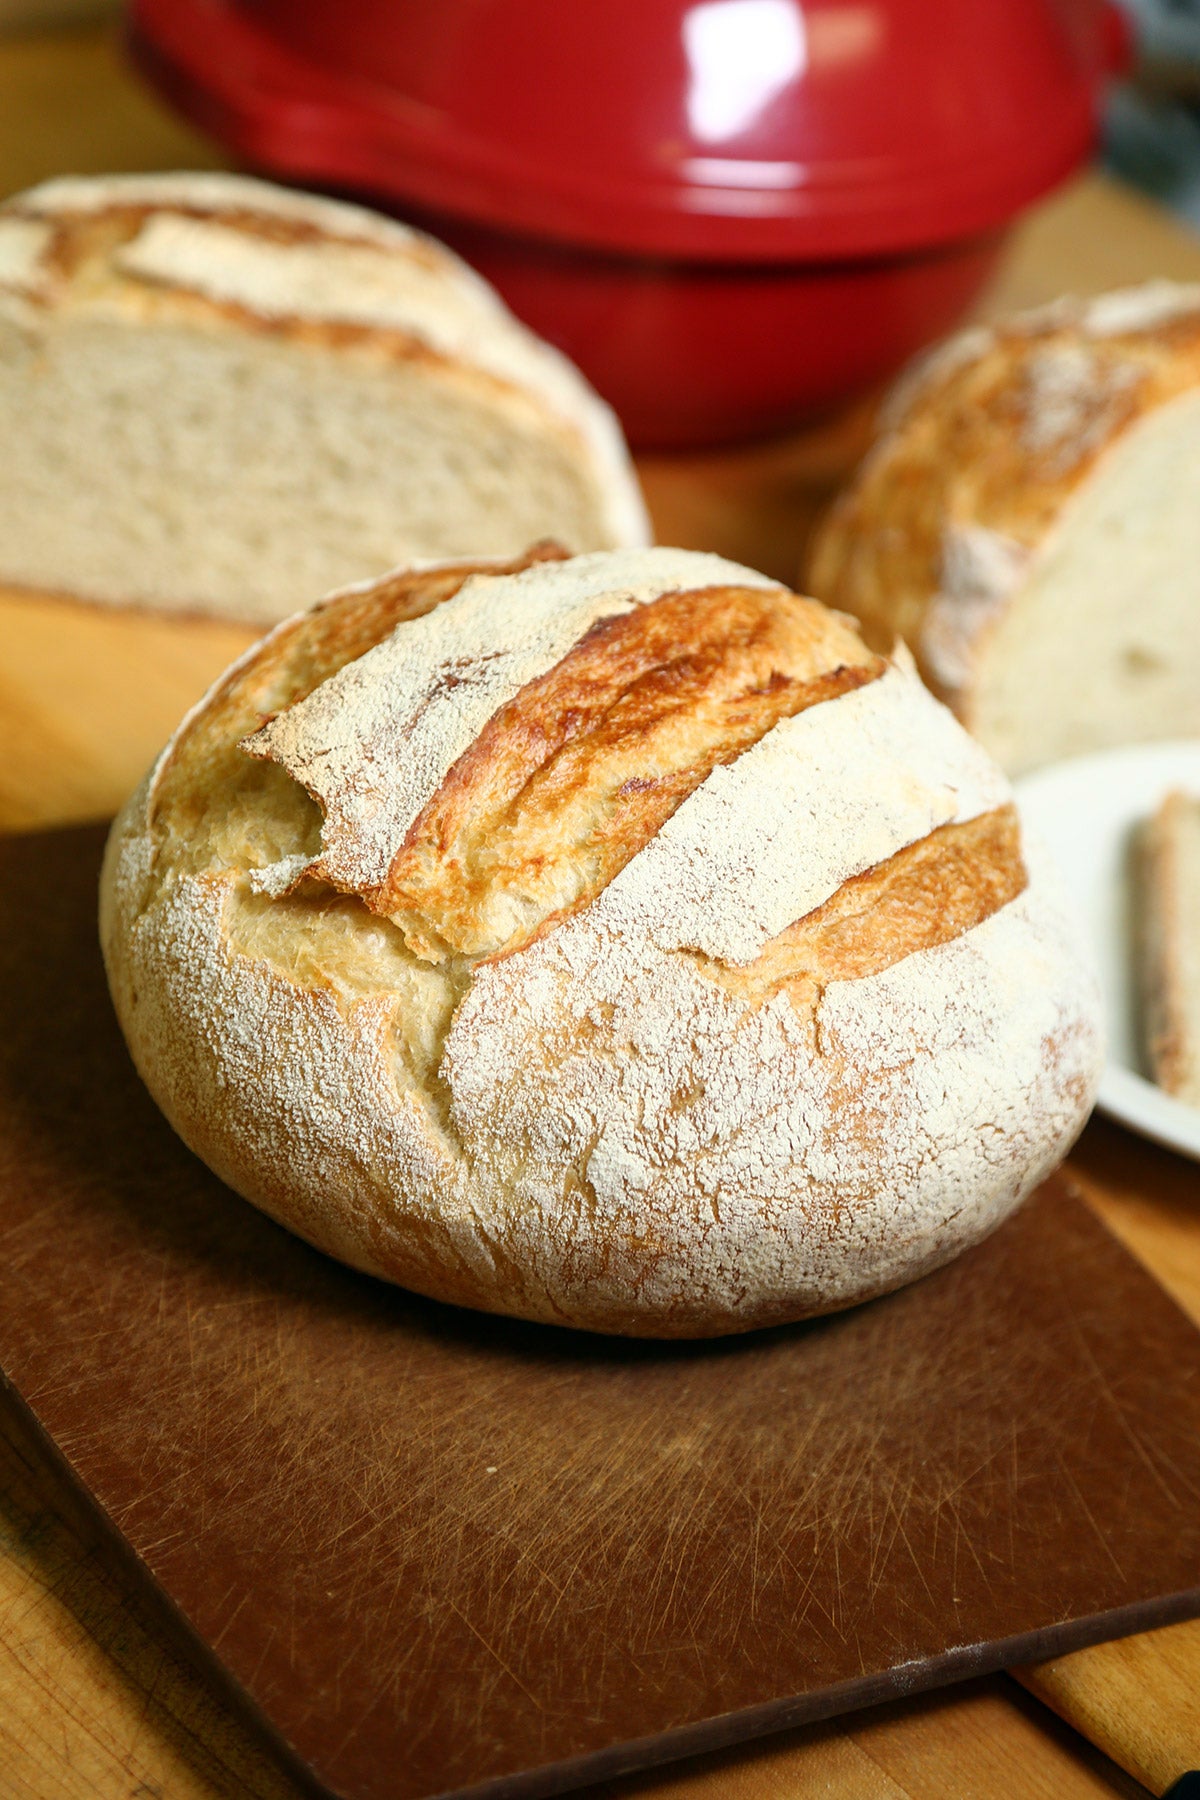
Start by preparing your dough as instructed in the recipe. (We like the No-Knead Crusty White Bread recipe for its ease and quintessential crusty bread texture.)
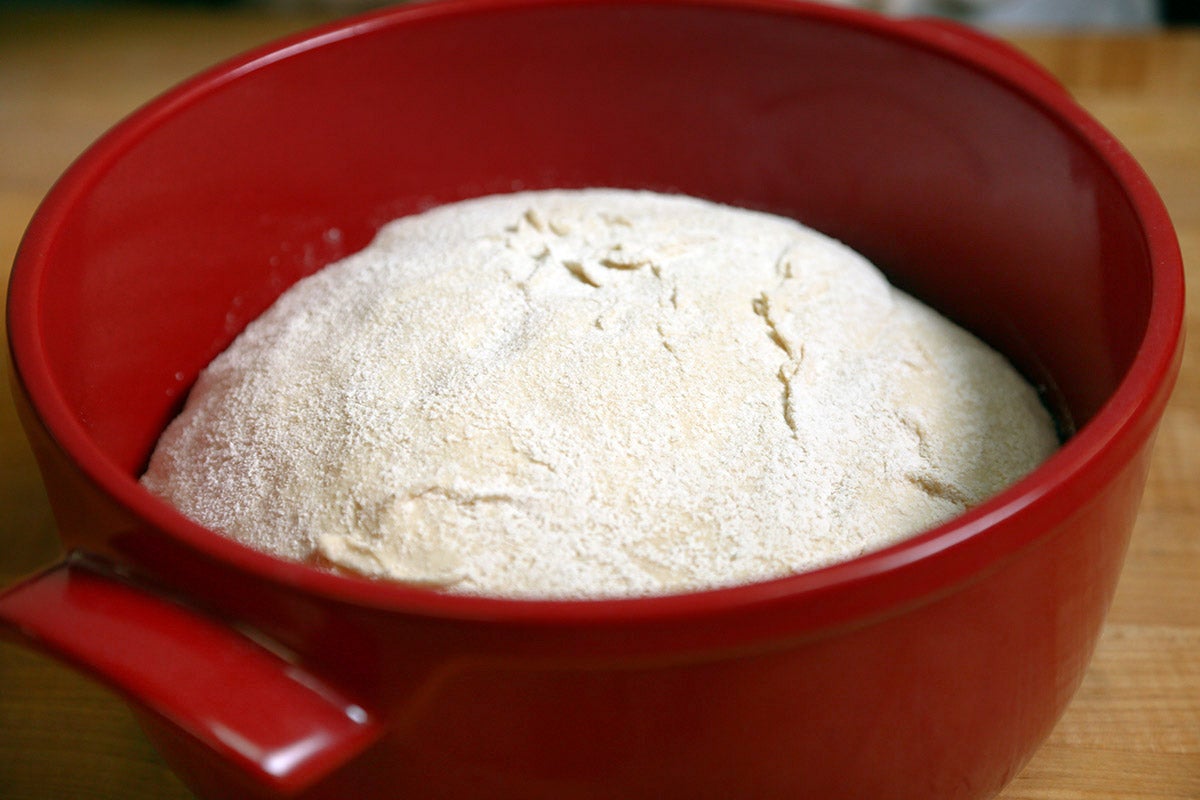
Let the dough rise once at room temperature and then shape into a boule, or whatever shape you like. Place the shaped dough into a lightly greased or parchment-lined Dutch oven, and let it rise for the second time.
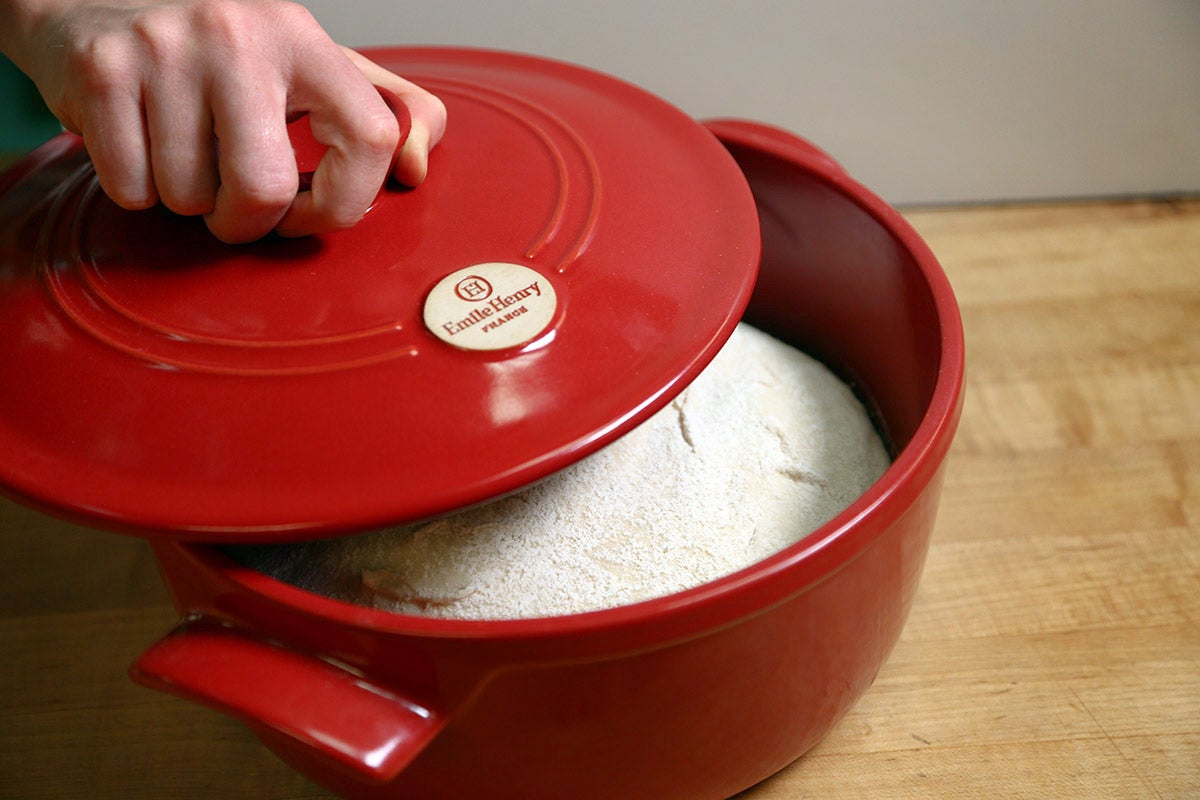
When the dough is almost finished rising, cover the pot with a lid. When you poke the dough with your finger, the indent should fill in slowly — this is how you’ll know it’s ready to go into the oven.
Place the pot with the almost-fully-risen dough into a cold oven. Set the oven to the baking temperature called for in the recipe, and let it go! Your goal is to have the dough finish rising when the oven and pot reach the full temperature.
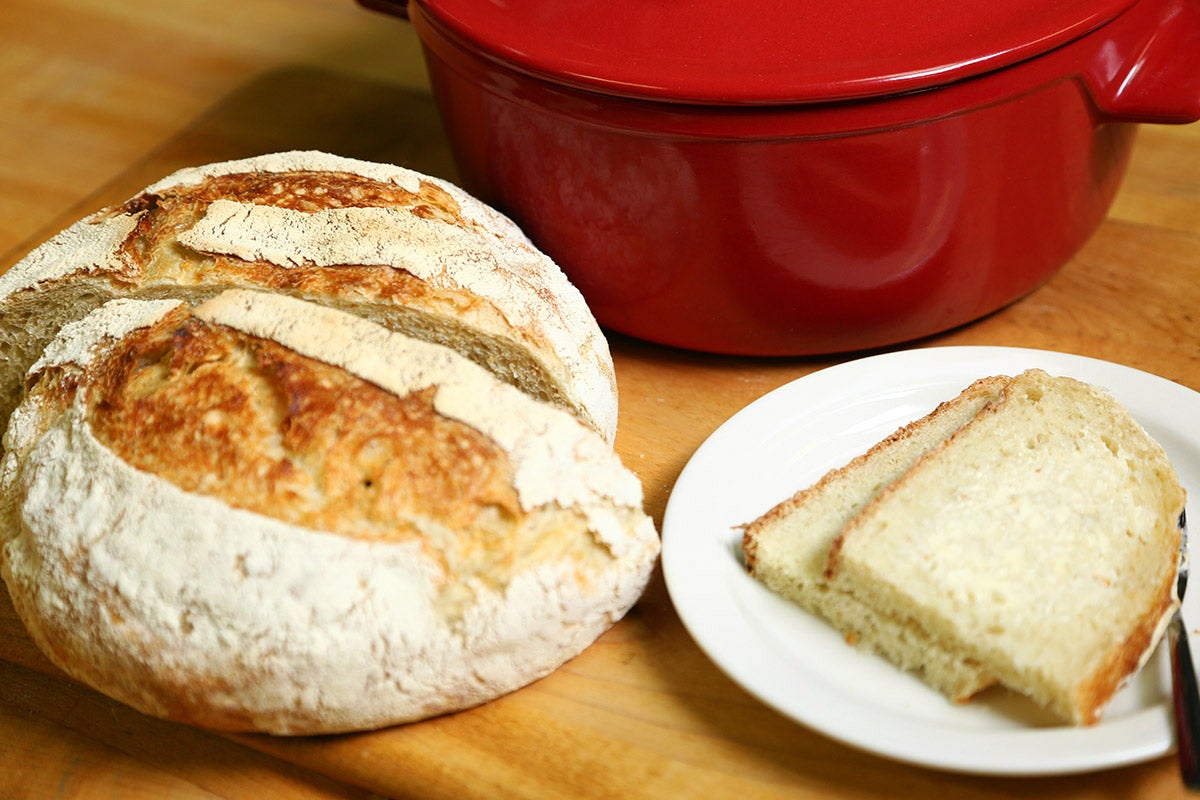
Once everything is fully preheated, start the baking time (usually about 25 to 35 minutes). If you want a nicely caramelized loaf, remove the lid when there are about 5 to 10 minutes left in the bake time to let the top brown.

The result? A decent loaf of homemade bread!
Baking in a cold Dutch oven doesn't only protect the integrity of your pots, it also helps capture steam. Steam is essential to baking crispy loaves of bread — you can see the wonders it does in this post by my fellow blogger and bread baker, Barb.
But just how much steam does the cold-start method capture? Is it as effective as putting your risen dough right into a hot pot?
There's only one way to find out!
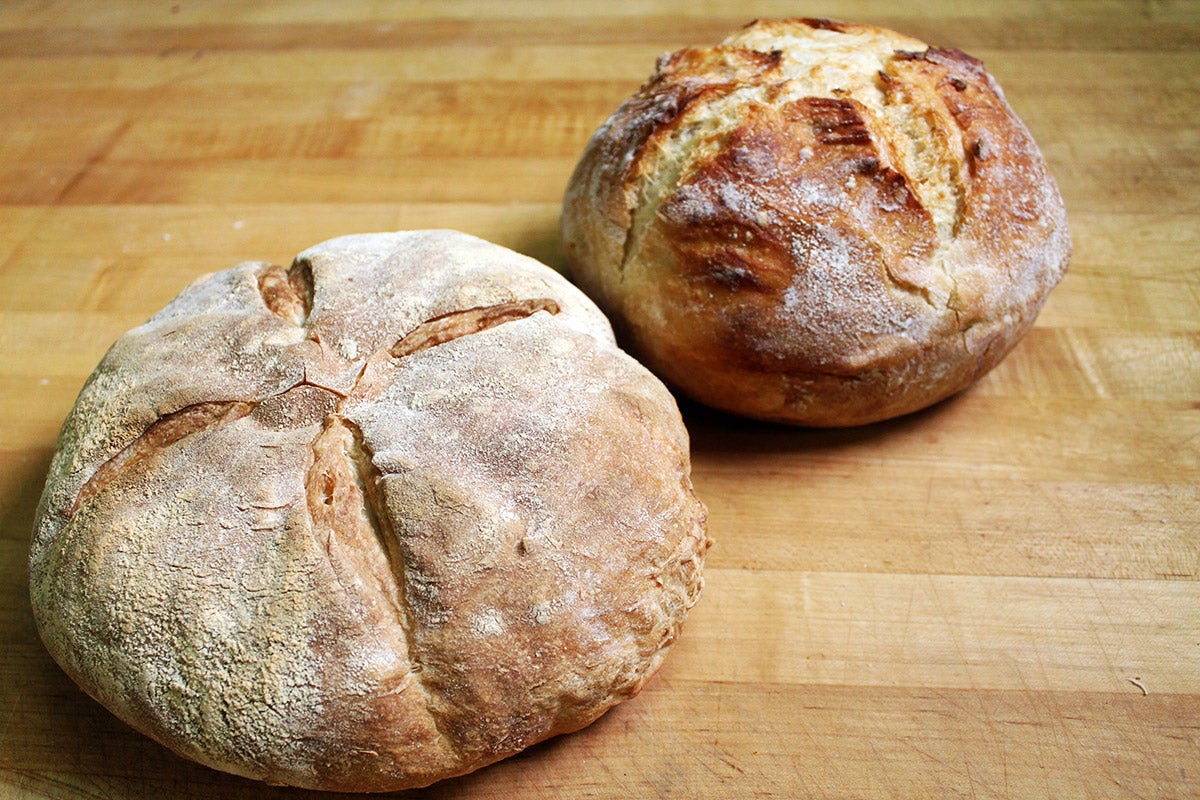
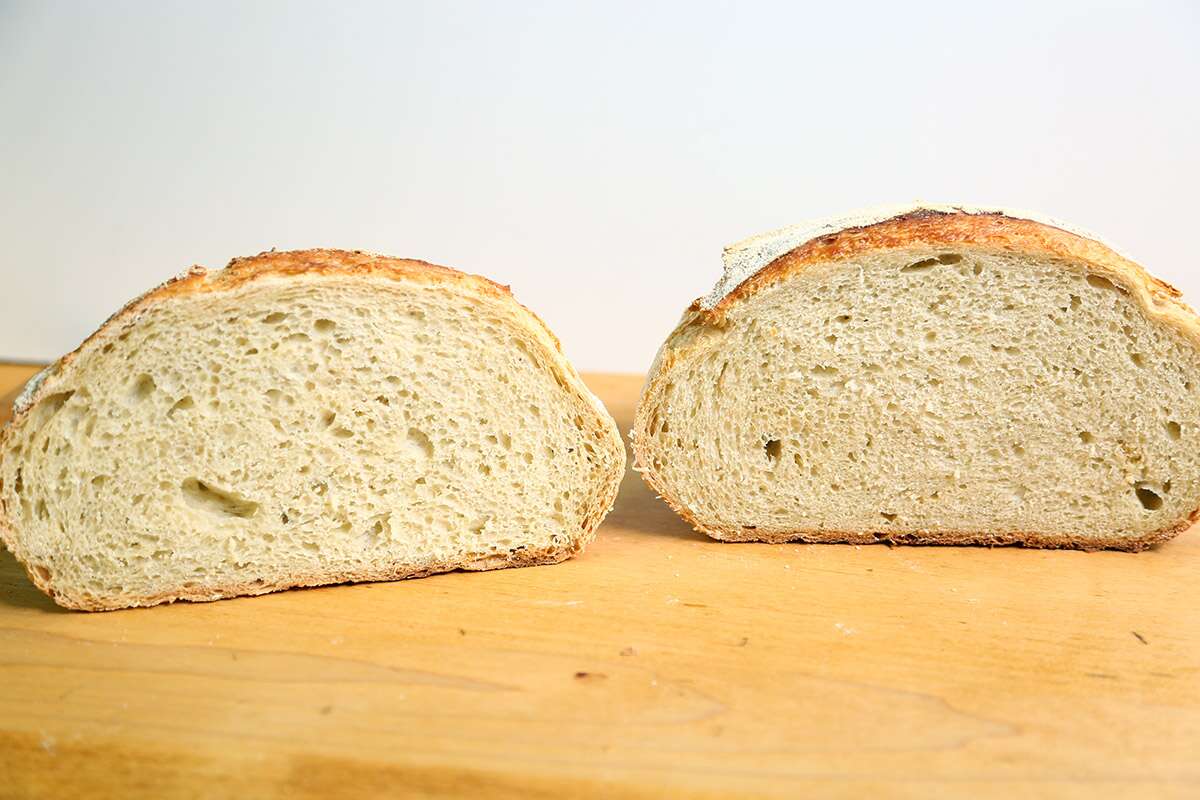
The loaf that's started in a cold oven looks pretty on its own. It has a nicely browned crust and the slashes open while it bakes, giving the loaf an artisan look.
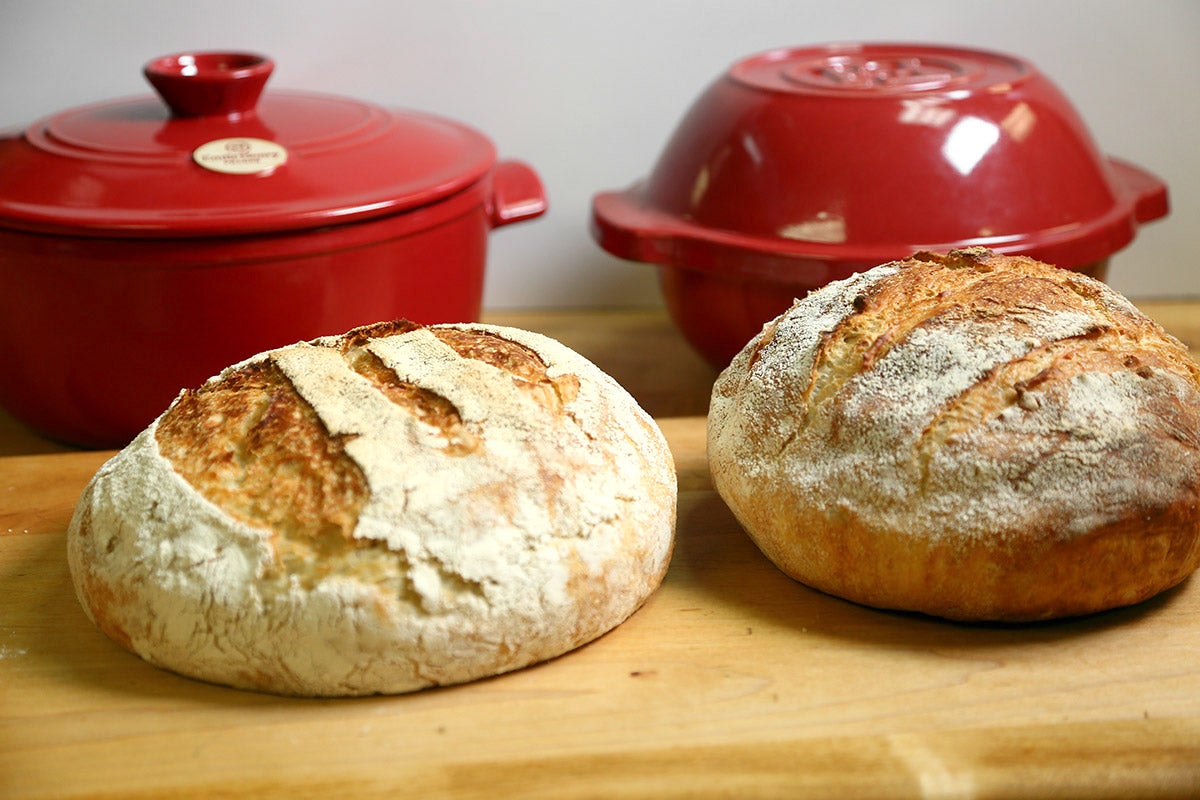
But when it's placed next to a loaf made in a preheated pot, it doesn’t look quite as glamorous or lofty. The dough made in the preheated pot has more oven spring, meaning it rose taller while it baked.
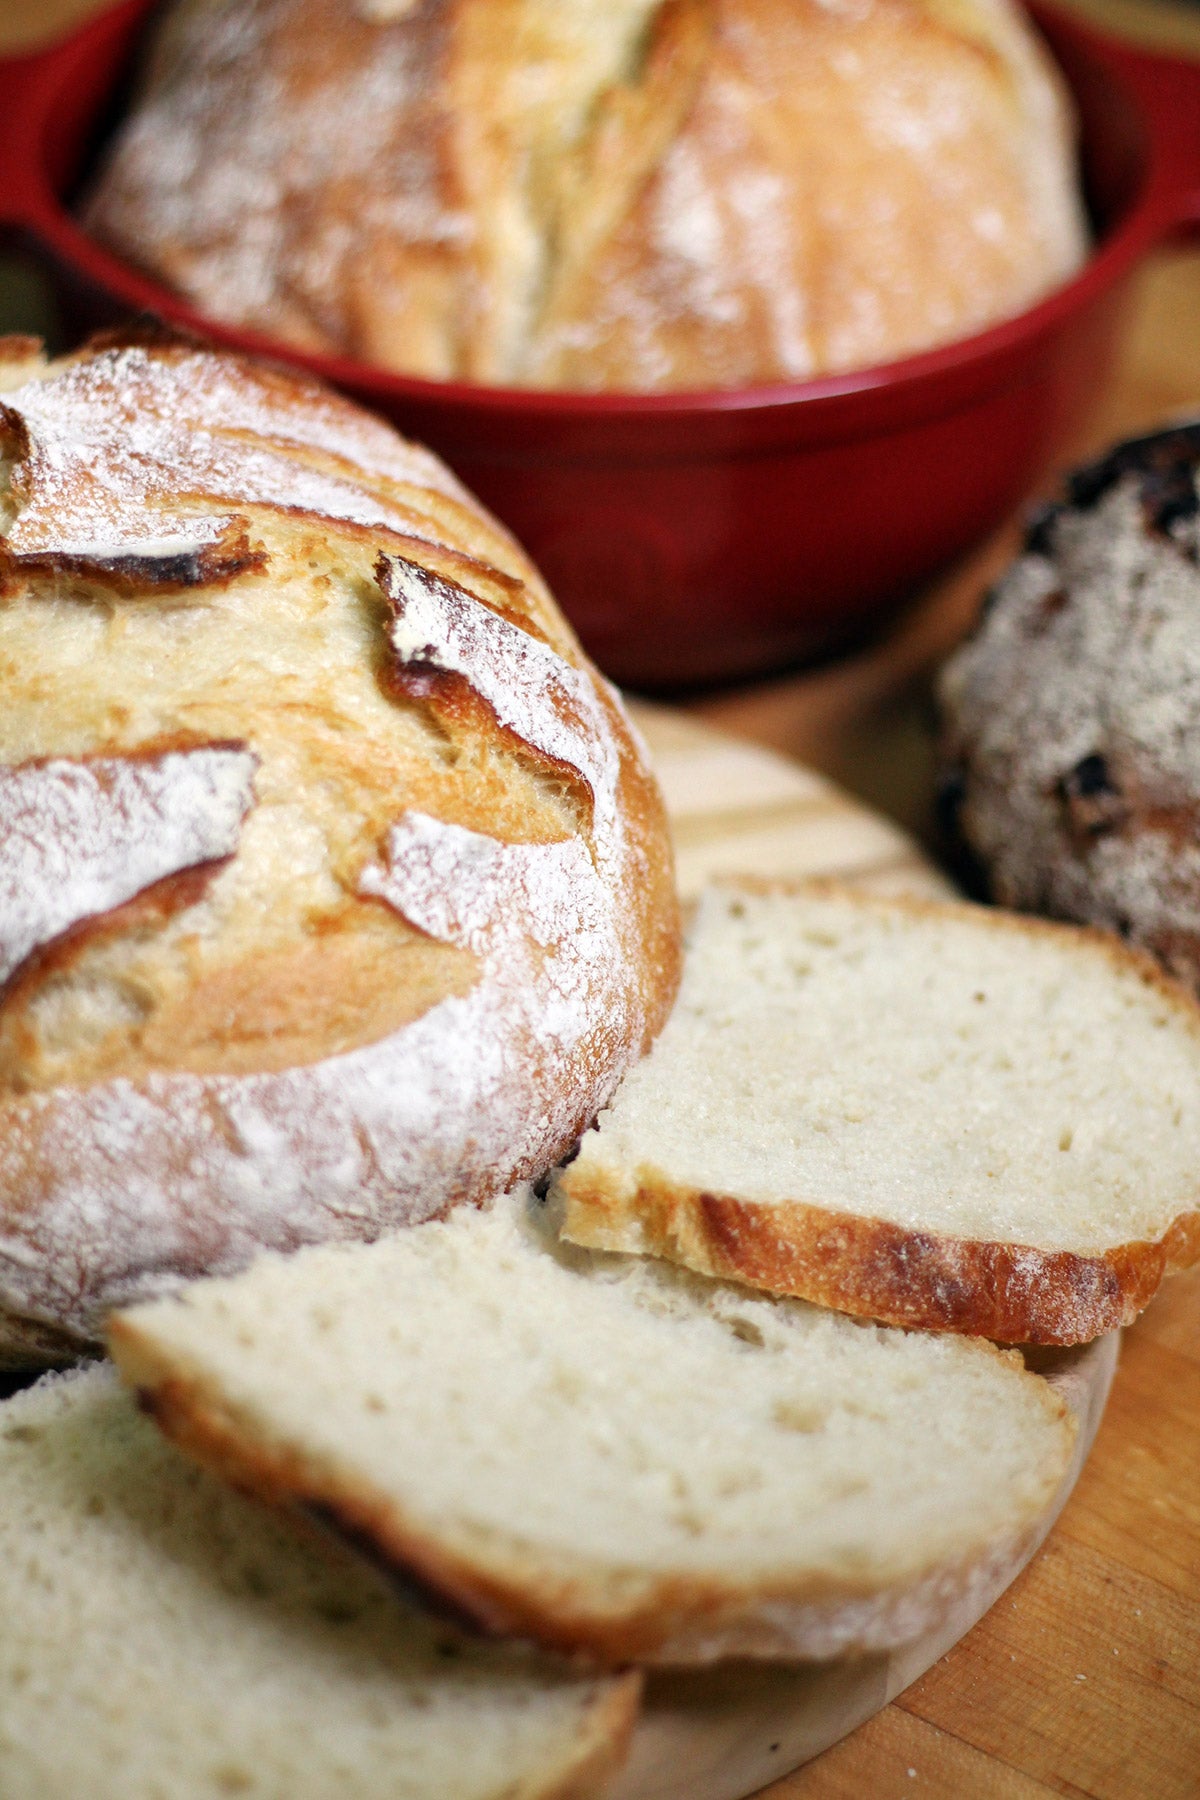
Even though the loaves look a bit different, the insides reveal a remarkably similar crumb structure. Both would make fantastic toast, I promise.
I stand back, admiring my handiwork, when a member of our merchandising team, Rosie, enters the test kitchen. She has a keen eye for details when it comes to baking pans and other kitchen tools, and she wonders if the difference between the two loaves could be a result of the different shape of the pots.
The Bread and Potato Pot has a smaller, more spherical bottom. In comparison, the Dutch oven has a wider, flatter bottom, which allows the dough to spread and flatten slightly.
Determined to give the cold-start method a fair chance, I repeat the experiment making both loaves in the Bread and Potato Pot — baking one in a preheated pot and starting the other in a cold oven.
And look what happens!
Both loaves are almost exactly the same height. I'm stunned when I lift the lid of the pot started in a cold oven, assuming the intensity of the preheated pot will have boosted the loaf to an unmatched height.
Lessons learned:

As my fellow blogger PJ likes to say, “There’s no baking police.” Neither method — starting in a cold oven, or starting in a preheated pot — is right or wrong, nor is one decidedly “better” than the other. We encourage you to use the approach that works best with your equipment and taste preferences.
Time to choose your bread-baking crock, and set the oven. You’ll soon be rewarded with alluring loaves of homemade bread. There’s nothing better than that!
What's your favorite bread-baking method? Are there other techniques you’d like to see us explore? Let us know in comments, below.
Thanks to fellow employee-owner Seann Cram for taking the photos for this blog post.


October 23, 2024 at 12:36pm
I've done the no-knead crusty white recipe using the cold oven method a couple of times now. I'm using a 4.5 qt Dutch oven in the middle of the oven with a cookie sheet on the bottom rack.
What's happening each time is a 1/2" layer of undercooked dough immediately above the bottom crust. The bottom crust (all of the crust, actually) is absolutely perfectly done.
The help chat says it's from using the cold method but my DO can't be preheated so I'm kind of stuck.
I'm considering only using the cookie sheet "barrier" for the last half of the bake. Any other suggestions?
I'm DETERMINED to make this work 😂 because everything about this recipe is coming out beautifully! I have little ears and everything!
(OK, so my ears are normal sized but the bread has little ears! 😁)
October 27, 2024 at 11:36am
In reply to I've done the no-knead… by Krista (not verified)
Hi Krista, there is another option for baking in your Dutch oven, which allows you to put the dough and pot together into a preheated oven. This should not harm your pot and may give you better results. For this method of baking, I would recommend removing the lid of the pot after 25 minutes of baking, and then continue baking until the bread is done. I'm not sure whether the cookie sheet is really helping your baking, so you might want to consider experimenting with baking without it. One more note: if you let the dough rise in the pot before baking, I'd recommend lining the pot with greased parchment paper. This will help prevent the dough from sticking to the pot, which is a little more likely to happen when you allow the shaped rise to occur in the pot.
June 14, 2024 at 5:13pm
What should the rise times be for the coming to room temperature before shaping and then once in the Dutch oven? If using the no knead white bread recipe?
June 15, 2024 at 10:56am
In reply to What should the rise times… by Hannah (not verified)
Hi Hannah, this is fairly flexible recipe. The recipe says to shape it right from the fridge and let it rise from an hour to several hours (if your house tends to be cool). My preference would be to loosely shape the dough into a disk and let it rest on a floured surface for about an hour after you take it out of the refrigerator (covered with greased plastic wrap so it doesn't dry out). This will allow the dough to warm up a bit before the final shape. I recommend lining the pot with greased parchment paper because when you let the dough rise in the pot it's a little more likely to stick. Once shaped and in the pot, you'll want to keep an eye on your dough. It won't double, but it should puff up and perhaps spread out a bit (depending on the size of your Dutch oven). With a cold start, you want to put the bread in the oven a tad earlier than you would if you were putting it directly into a hot oven. I'm guessing the rise time in the pot may take 1-3 hours, depending on how warm your house is.
March 11, 2024 at 7:08pm
What oven rack position do you recommend when baking with a bread crock/Dutch oven?
March 15, 2024 at 1:52pm
In reply to What oven rack position do… by Janis (not verified)
Hi Janis, it depends a little on where the heat is coming from in your oven, but I usually choose the middle or a bit lower in my gas oven.
March 11, 2024 at 7:02pm
For the past several years, I've been "perfecting" the artisan bread concept and still have much to learn. I've always used the preheated Dutch Ovens (Staub) for baking @ 440 degrees on convection bake setting for 32 minutes covered and three or four with the lid off. Typically, things are rather successful but the bottom of the bread tends to be over-baked compared to the rest of the bread. I've tried Dutch Ovens that have a thinner material and it really doesn't seem to make any difference. Would you have any suggestions?
I have removed the bread when I remove the lid, place three canning jar lids in the pot, and replace the bread (using parchment paper to prevent getting burned) and that doesn't seem to make a difference either.
Thanks ~ I enjoy your articles as well as all those that write questions and receive answers.
ted
March 15, 2024 at 12:11pm
In reply to For the past several years,… by ted hewlett (not verified)
Hi Ted, we don't normally recommend preheating the Staub Dutch oven empty, but if that is your practice, I would recommend removing the lid after 20 minutes of baking. When sticking the pot and bread in a preheated oven (without preheating the pot), remove the lid after 25 minutes. I would also consider baking on regular bake at 450°F rather than convection, since the convection won't have much impact on bread baked in a Dutch oven.
January 28, 2024 at 12:43pm
Thanks for this blog post! I am going to try this method today using the Vermont Sourdough recipe (but with all fed starter and 35 g extra water), no levain. I am going to try it in the KA Long Covered Baker we gave ourselves for Christmas. I would love to see a blog post sometime that highlights that baker and a cold start. I'm trying to find a great way to make sourdough sandwich bread on a Sunday for the week that requires only taking the starter out of the fridge the night before, feeding it, and then an all in a day process. (Our new year's resolution was to buy "no more bread" and here we are on January 28 not having bought any bread products! But, we are a busy family with full time jobs and two teens, so Saturday night is usually not for making bread dough!)
January 18, 2024 at 4:15pm
I started experimenting with this method a couple of months ago. I was tired of having my beautifully risen loaves lose some of their "pouf" when I plopped them into my hot Dutch oven, and/or getting burnt knuckles doing it. Every loaf I bake is a bit different--some have more whole wheat, some I use potato water, others whey from Greek yogurt. I also don't bake every week, so have devised a refreshing routine for my starter which doesn't involve throwing out half the batch before I use it. Sometimes I leave the lid on the whole time, sometimes I take it off halfway though. So far the result are very promising. And no more singed knuckles!