


What is more luxurious than a pool of perfectly smooth, perfectly ready-to-do-your-bidding chocolate? One that will coat whatever you want, and harden almost instantly to a shiny, firm-to-the-touch surface that snaps when you break it?
Our love affair with chocolate is never-ending, but as in all good relationships, there are some things that work and some that just... don't. The wise person knows all they can about their true love, and accepts that certain behaviors get better results. That's why knowing about tempering chocolate is important.
Sure, you can melt chocolate chips or those melting discs you see at the store and coat things, but the flavor and texture aren't quite what true chocolate apprecianados are looking for. Kind of like dating the brother of the guy you're really interested in.
The part of chocolate that allows it to melt so sumptuously in your mouth is cocoa butter, and it's made of a family of crystals (six types altogether). What makes working with chocolate tricky is each type of crystal forms or sets at a different temperature, and some of those forms aren't very stable; they can change over time and in storage.
When chocolate gets too warm, but not warm enough to melt, some of the cocoa butter crystals can migrate to the surface; this dusty-looking chocolate has "bloomed." It's fine to eat or bake with, but it's no longer "in temper."

Before we get to tempering, we need to explain what is and isn't chocolate.

To quote Chef Peter Greweling, CMB, from his excellent book Chocolates & Confections, "Simply put, the percentage listed on a label describes the portion of the chocolate that came from the cacao tree. The percentage of chocolate represents the combination of chocolate liquor [chocolate (cacao) solids] and cocoa butter, but fails to differentiate between them. As a result, two chocolates, each of them labeled 65%, can be radically different from each other."
Which brings us to:
There's more than one way to temper chocolate. One of them is called tabling.
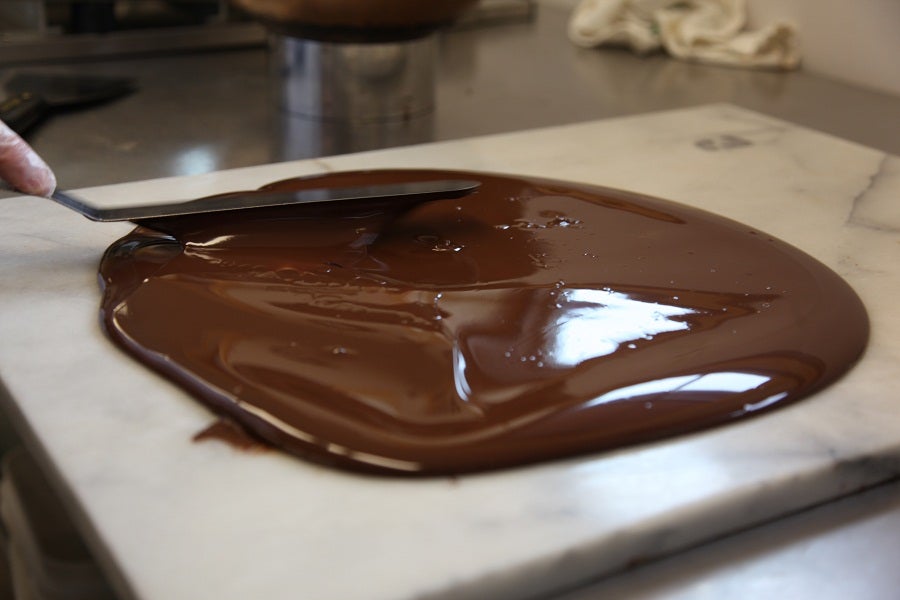
Chocolatiers like this method because it's efficient, and they get an immediate feel for how the chocolate is behaving. An amount of chocolate is melted, then 2/3 of it is spread on a clean marble slab and moved around to cool it until it starts to thicken. This paste is added back to the remaining melted chocolate to "seed" it; once tempered it's held between 86°F and 90°F and ready to use. Tabling is a wonderful method to use, provided you have lots of space and a large block of marble hanging around. Moving it around is kind of hypnotic.
There's also an approach typically reserved for those with lots of experience working with chocolate: it's called the direct melt method. By very carefully melting and stirring the chocolate and keeping it within specific temperature ranges, chocolate can be kept in temper the whole time. It's tricky to do, and takes some practice.
For many home bakers though, the most practical method of tempering chocolate is a process called seeding. Even the renowned pastry chef Roland Mesnier joked about the tabling method, saying "Who has time for that these days?" He used the seeding method when teaching a class at our Baking School, too, so don't think this method is inferior in the least.
Seeding is simple once you know the basic tenets and temperatures to guide your work. Let's dive in.
An accurate digital thermometer is important.
A bowl, a spatula to stir with, a saucepan with an inch of water in it, or a microwave to melt the chocolate. Parchment paper to place your cooling chocolates on. Depending on your project, you may want dipping tools, molds, parchment paper cones (for writing with melted chocolate), or an offset spatula for spreading tempered chocolate on the back of a baking sheet or transfer sheet.
In a nutshell, seeding can be shown and explained in just a few pictures and steps. The short version: Get the chocolate hot (but not too hot) and melted. Add chunks of unmelted chocolate. This is the seeding part. Stir and cool, take out the unmelted leftovers, test to see if it sets properly, then dip, dip, dip. The real key, though is in the details of the temperatures you need to achieve. For a full chart on specific melting temperatures for different kinds of chocolate, see our chocolate tempering temperatures table.
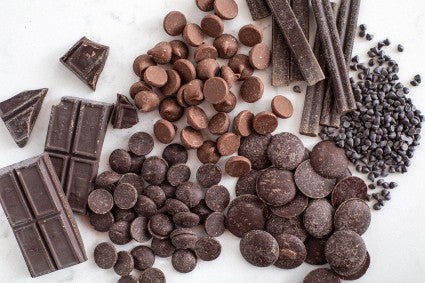
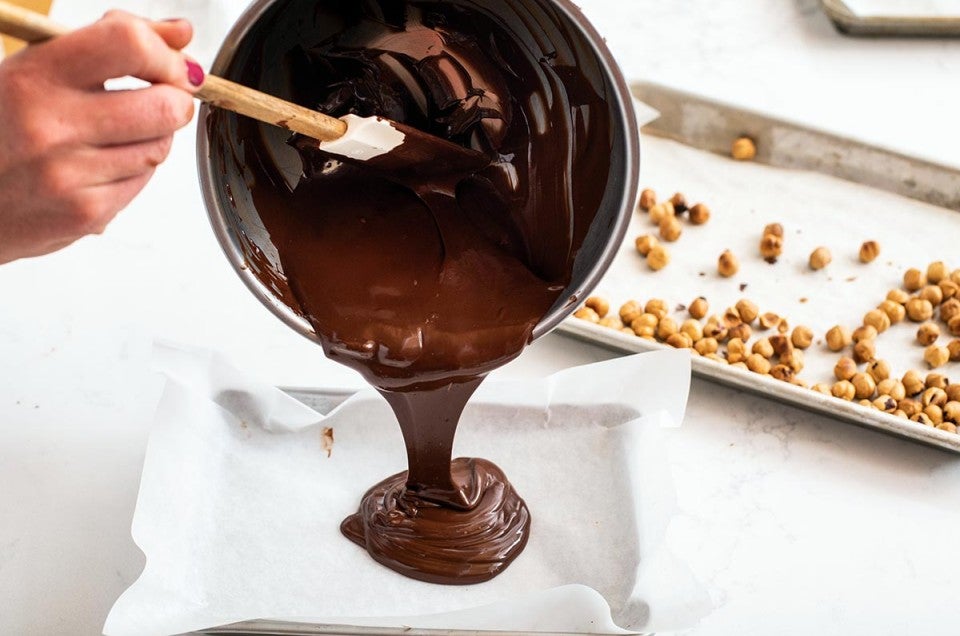
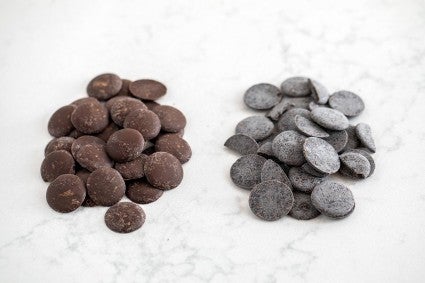
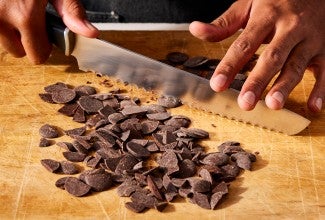
Melt the chocolate: Chop the chocolate with a knife or chocolate chipper. Or, use our disks, which are already in an easy-to-melt shape and don't need any chopping at all. It's best to have a pretty healthy amount: at least a pound to start with. Two is better. The more volume you have, the better it will hold the temperature where you need it to stay to be workable.

It's typical for chocolatiers to work with 10-pound batches at a time. Tempering a movie-size bar of Special Dark is possible, but it's going to be tricky, because its temperature is going to fluctuate wildly and, frankly, in this process, every single degree counts. There's not enough thermal mass in that small an amount to stay at one temperature for seconds, much less the minutes you'll want for working with it.
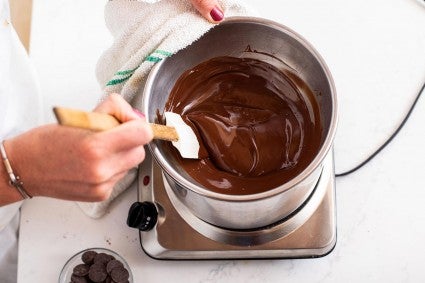
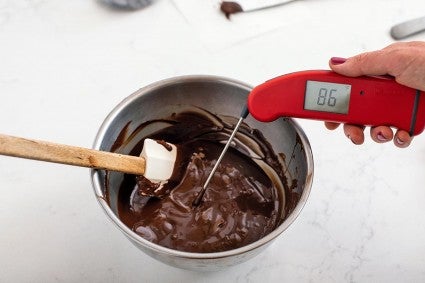
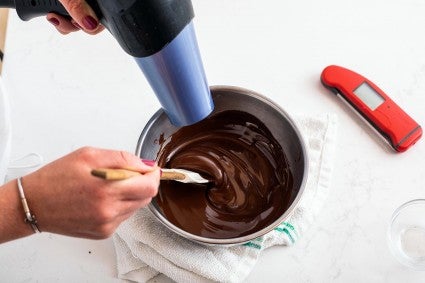
Place the chocolate in a bowl and put it over simmering water, or microwave it at half power in short (30-second) bursts, stirring in between. There will come a point where your chocolate is partly melted, with shiny-looking chunks that haven't lost their shape. That's about as far as you want to go, because you can melt it the rest of the way just by stirring. Your goal is to get all the different types of crystals melted and the chocolate to smooth liquid, with no lumps. Take the chocolate's temperature.

Two important things to avoid: Scorching (microwave); and getting any water in the chocolate (simmering water). Both of these things will ruin your chocolate and you'll have to start over. Water in melted chocolate "seizes" it, causing instant recrystallization – not in a good way. The chocolate will be unworkable.
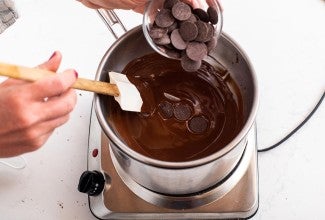
Seeding: Once your chocolate has reached the specified temperature, add a good-sized chunk of chocolate ("block seeding") or some more chopped chocolate to your lovely pool of melted chocolate. The stable crystals in this new addition encourage stable crystal formations in the melted chocolate. Stirring becomes very important here, because agitating the chocolate ensures smaller crystals will form and stay in suspension.

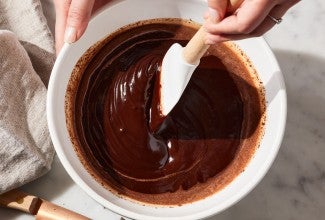
Cool: Stir continuously until the chocolate is at or below 90°F/32°C; as low as 86°F/30°C for dark chocolate or 84°F/28.9°C for milk or white. Every chocolate has its own "sweet spot" for this, and you almost have to learn the personality of individual brands and types. I'll tell you right now, it takes longer than you want it to. You have to be at peace with the process because it takes what it takes.
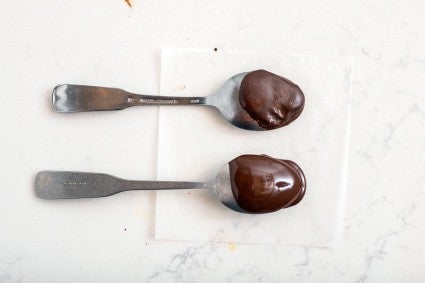
Test: Dip a knife, spoon, or spatula into the chocolate and set it down at cool room temperature (65°F to 70°F). If the chocolate is in temper it will harden quite quickly (within 3 to 5 minutes) and become firm and shiny. If you touch it, your finger will come away clean.

If the chocolate is too cool or out of temper, it will often set in streaks or look lumpy, like this:
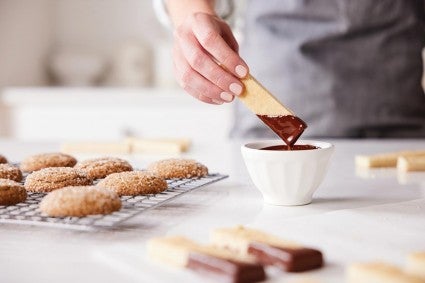
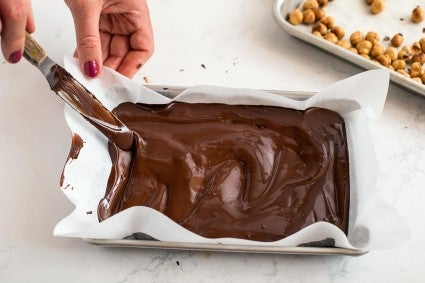
Hold at working temperature and dip away: Most chocolate is easiest to work with between 88°F to 90°F. You can put your bowl over another bowl of warm water, put it on a folded towel over a very low heating pad, or even try using a mug warmer. As you work with it, the chocolate may cool down; to bring it back up to a better working temperature, try grabbing your hair dryer and warming the chocolate with it, stirring the whole time. You'll have the best results if whatever you're dipping is close to the temperature of your working chocolate. As chocolate sets it contracts – which is one reason it pops out of molds easily.
Think of what you can do with your lovely, tempered chocolate. Envelop berries in a coat of dark chocolate.

Tempered chocolate can also be used to coat all kinds of cookies, including flaky, pastry-like rye palmiers.

It can also be used to dress up everyday cookies, like peanut butter chocolate chip.

Or use tempered chocolate to take an already decadent dessert over the top. Dunk chocolate desserts (like these Chocolate Peppermint Dips) into tempered chocolate to ensure a seal of approval from everyone.

When the chocolate is right and it's performing its miracle in front of your eyes, it's just the greatest feeling. If you're fascinated and want to give this a go, here are a few things to remember.
The next time you're gazing longingly at the case in a chocolate shop, give a nod to the patience, talent, and dedication of the people who made each of those beautiful chocolates by hand.
Do you have more questions about tempering chocolate? Ask away in the comments below!


February 16, 2025 at 4:31pm
Does adding a small amount of coconut oil to the chocolate when melting also “temper” the chocolate?
February 24, 2025 at 2:37pm
In reply to Does adding a small amount… by Bebe Watson (not verified)
Adding coconut or other oil to chocolate does not temper it. Doing this lowers the melting temperature and makes the chocolate easier to melt and pour.
February 15, 2025 at 10:40pm
I am not having any luck with tempering my chocolate. I have done a lot of research, but I guess I have a lot to learn. First off, I put my centers in the fridge to harden before I started dipping them---is this a mistake? I think I read that you said to have the centers at room temperature. Then after I dipped the centers, I put them in the fridge to harden--it seems like that is also a no-no.
Then when I took them out of the fridge when I removed them from the parchment, I noticed the chocolate would come off on the bottom and expose the filling. How do you keep that from happening? Is it less likely to happen if you let the chocolate set at room temperature?
I am not giving up and am going to keep trying, but at this point, I am a bit discouraged.
I did use the silk cocoa butter method in my tempering. Here is what I did--I first melted the chocolate in the microwave at 50% for 1 minute intervals heating to 120 degrees. Then I cooled it to 95 degrees and added the silk cocoa butter. I mixed the silk cocoa butter in and then stirred the chocolate until it cooled to 91 degrees and tried to keep it at that temperature while dipping the centers. I purchased an Ald chocolate melting pot to keep the chocolate warm while dipping.
Please help!
Joan
February 27, 2025 at 5:01pm
In reply to I am not having any luck… by Joan Bickel (not verified)
Hi Joan, if chocolate has been tempered it should set at room temp. It is also not necessary to chill the centers before coating. Your tempering sounds correct as long as you are bringing it down to the correct temperature before dipping. Hope this helps clarify!
February 11, 2025 at 8:08pm
I have seen suggestions for the seeding chocolate to be 5%, 10%, 20%, 25% and even 1/3 of the total. Why did KA choose 25%? What is the effect of using a lesser percentage of seeds (or more!)?
March 19, 2025 at 2:28pm
In reply to I have seen suggestions for… by Andrea (not verified)
Hi Andrea, using a smaller amount of seeds will typically take longer to bring your chocolate to temper, as there will be less chocolate seeds to help bring the temperature down. Hope this helps!
September 28, 2024 at 11:28pm
I chose to make my own chocolate using cocoa nibs.
By my calculations it should be roughly 70% dark
How do I know what is a good temperature to use for tampering the chocolate?
I really want to learn how to do this...
October 8, 2024 at 10:24am
In reply to I chose to make my own… by Lony Sellers (not verified)
Hi Lony, we recommend 84F-89F for dark chocolate. Hope this helps!
March 29, 2023 at 6:30am
For the chocolate stout cake, the frosting calls for heavy cream to be stirred into the chocolate. Does this mean the chocolate must be melted first, then add the cream? I did what the recipe called for (which is slowly pour simmered cream onto chocolate to melt) but it became a pool of greasy mess that seized the chocolate. Where did I go wrong?
March 31, 2023 at 10:45am
In reply to For the chocolate stout cake… by Isabeau (not verified)
Hi Isabeau, it sounds like you followed the directions correctly, but the type of chocolate you used might have caused the seizing. Check out this advice from the Notes From Our Bakers section of this recipe: For easiest melting, use chocolate wafers or disks. Chocolate chips can also work in a pinch, but be sure to melt them slowly and carefully to prevent burning or seizing. See our blog post, The best way to melt chocolate, for details. High quality chocolate wafers or disks are typically meant for melting and may work better for you in recipes like this.