


You make good bread. Here are 8 tips to make it great.
A baker’s favorite tools for better bread.
You make good bread. It’s crusty and flavorful, your shaping is improving, and the whole neighborhood knows what time to “drop by” for a loaf of your signature sourdough (Saturdays, 10:00 a.m.!).
But you want more. More crust color, better structure, more predictable fermentation, better scores — and you want all of this on a consistent basis. While many things do improve with time and practice, bread bakers often struggle with improving their loaves not because of a lack of skills, but because they aren’t using the right tools for the job. If you’re ready to take your bread baking up a notch, here are some worthwhile gear upgrades (don’t worry, I’m not suggesting new ovens or fancy mixers) that will significantly impact the quality of bread you make.

At the foundation of every bread is a ratio: the quantity of water to flour in a baguette, the amount of yeast or sugar to flour in brioche, and so forth. Too much of one, too little of another — these seemingly small items easily grow to become larger concerns if measured inaccurately. Inaccurate ingredient measurement is the number one cause of problems in breadmaking. When our Baker’s Hotline hears comments like “My loaf is dense” or “I never get holes like I want,” their first question is always scale-related. (“How are you measuring your ingredients?”). Our best measuring tool is a scale. Accurate to the gram, a scale ensures that if a recipe calls for 1 cup of all-purpose flour (120 grams), that’s exactly what goes into the bowl.

For the best bread, controlling the temperature of the dough is just as important as proper ingredient measurements or good scoring. A dough that is too cold won’t ferment at a rate that produces good volume, strength, or flavor. On the flip side, a dough that is too warm can overproof, collapsing and falling before it bakes. Reliably manage fermentation by using desired dough temperature, which relies on a digital probe thermometer to set the best possible course for fermentation. The digital probe is also a great tool for measuring the internal temperature of baking loaves.

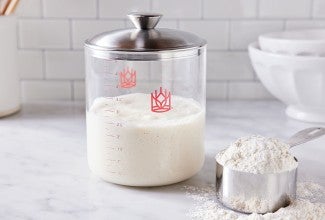
While a mixing bowl can work for rising doughs, there are several reasons to consider upgrading to a lidded container. First, a tight lid prevents rising doughs from drying out or crusting over. Any portion of a dough that dries or hardens during fermentation will not reincorporate later in the process, leaving bits of dried dough in the loaf during shaping. A tight lid that forms a moisture barrier eliminates this problem. Second, a clear 6-qt. container with volume markings on the side is our best tool to measure the exact level of rise.
Here’s how to use it: At the beginning of bulk fermentation, place your dough into the container and flatten slightly to evenly distribute. Next, mark the dough height with a small piece of tape on the outside of the container. If a recipe states that a dough should double during fermentation, you can wait until the proper level of rise is achieved, watching the dough and not the clock.

When cooler conditions cause bread doughs or loaves to move slowly, or whenever you want a stable environment for preferments or sourdough culture, a proofer can greatly improve the quality of loaves. How? A dough that is set to rise in a cold environment will often result in a loaf with poor volume and poor structure. But this doesn’t mean that hot is good, either. What we want is a “goldilocks” zone where the dough moves at a pace that supports a moderate, controlled rise — not too cold, not too hot. The proofer guarantees this even, controlled rate of rise for well-fermented dough — and ultimately, better baked loaves.
After mixing, place the dough (in your covered container) inside the proofing box and set the thermostat to a comfortable temperature (usually around 75°F). This eliminates some of the shuffling that’s required otherwise, in which you have to move doughs around the house trying to find the best possible ambient condition. The bread proofer can also be used to make yogurt, keep dishes warm before serving, and even as a slow cooker.

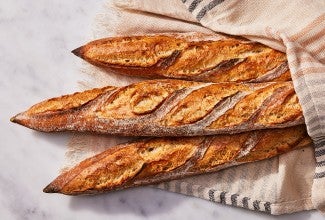
For many breads and rolls like baguettes, bagels, or ciabatta that benefit from a final rise on a floured surface, nothing beats baker’s linen, aka “couche.” The tight weave of the dusted linen holds a small amount of flour, helping loaves release easily while also not shedding bits of fabric as a tea towel might. Further, the stiff weave helps when moving loaves onto a baker’s peel or transfer board for loading. Shake out and store in the freezer between uses and the linen will last for many years.

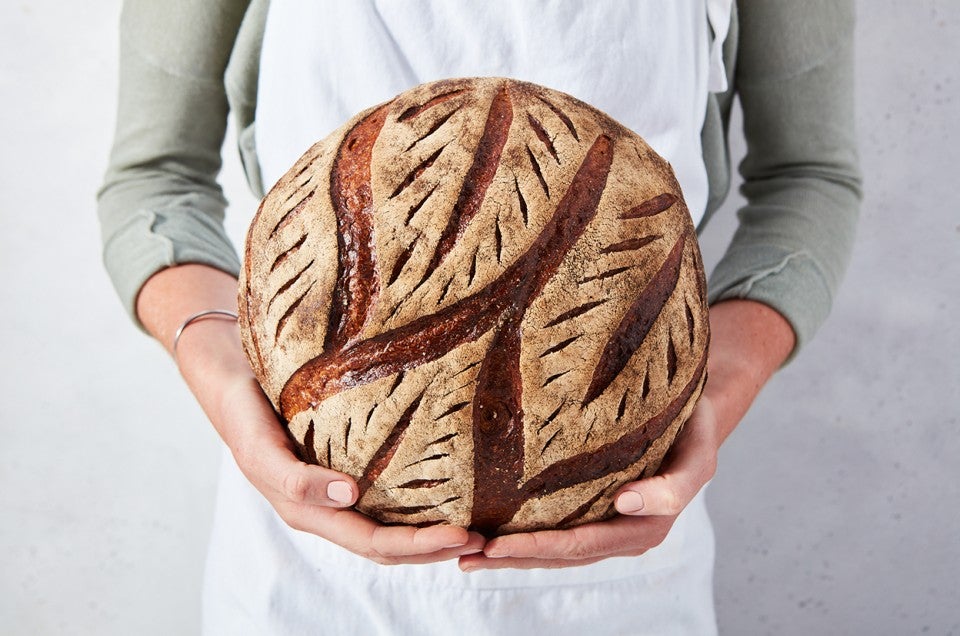
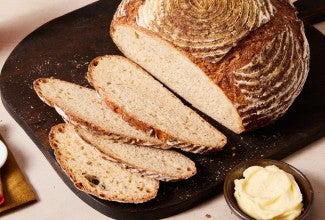
For proofing boules and batârds, there’s no substitute for a good banneton. Bannetons, also known as “brotforms,” are round or oval baskets that support loaves during proofing. In addition to guiding the shape of your bread, they also add a nice design to the exterior of the loaf if used unlined (as in our Boiled Cider Rye Bread, above). Further, bannetons improve crust quality: During sourdough loaves’ final proof, the woven banneton enables the crust to lose a small amount of moisture, firming the exterior of the loaf. That slight firming not only contributes to a sturdy crust but also makes for easier scoring.

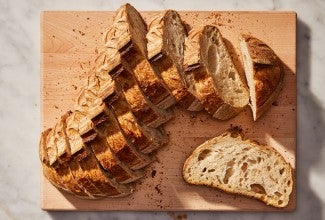
Scoring the exterior of proofed loaves before baking greatly affects the internal and external aspects of our bread. A well-placed score with proper depth enables bread to spring fully at the beginning of baking, producing an open interior structure in the process. A poorly scored loaf will not spring as well, resulting in a crumb that is tight and constricted. While a very sharp knife can produce a cut, a baker’s razor (lame) with its extremely sharp edge and thin blade enables consistency, precision, and a more controlled depth of cut.

One of the biggest game changers in hearth breads in recent years has been the advent of the covered baker, aka a “cloche” or Dutch oven. The benefit of these is two-fold: First, when loaves are placed into a preheated vessel to bake, they immediately spring as they do in professional ovens, growing significantly higher than they would on a baking tray. Second — and even more crucial — the closed baking system holds steam produced by the baking loaf. Baking in a steamy environment delays crust formation, enabling better oven spring, better crust color, better scores (remember to use a lame), and better eating (since steam helps with a crisp, thin crust).
With these tips (and tools) in hand we're confident that your loaves are headed for even higher heights. For further reading on hearth breads, have a look at some of our blogs on subjects like hydration and dough development, or, make some popcorn and enjoy the wide array of crusty content on our YouTube channel. Happy Baking!
Cover photo (Honey-Beer Miche) by Rick Holbrook.


March 16, 2023 at 2:40pm
Hi! I just tried the Sourdough Artisan Bread recipe on the back of the Gluten Free Bread Flour bag. It came out great! My question is this, can I make the recipe starter and keep on hand for my next bread baking attempt? And if so, how do I store it to ensure it stays good?
March 20, 2023 at 4:51pm
In reply to Hi! I just tried the… by Jamie Bateman (not verified)
Hi Jaime! Since this starter has yeast in it, I would not recommended storing it for longer than it instructs on the package (24 hours at room temperature). If you would like to be able to store it for longer, you could try lowering the amount of yeast to 1/8 teaspoon in the starter. This should allow the starter to be able to sit at room temperature for 24-48 hours. Happy baking!
February 28, 2023 at 8:08pm
I have a question about the cloche or Dutch oven. How do you get the proofed dough from the banneton into the preheated Dutch oven? Seems like a deft maneuver is required there. Also, do you add steam when using a covered vessel like a cloche or Dutch oven?
March 2, 2023 at 4:50pm
In reply to I have a question about the… by Rodger (not verified)
If you are uncomfortable working around your super molten hot dutch oven with your bare hands, Rodger, we suggest that you flip your boule out of the banneton and onto a long narrow piece of parchment that you can use as a sling to lower the dough into your vessel. And when using a covered baker of any kind you are trapping the steam coming out of the loaf with the lid, meaning you don't need to add extra steam! One less hot pan to worry about.
February 29, 2024 at 12:36pm
In reply to If you are uncomfortable… by mperry
I bought a 'bread sling.' It's made of silicon and safe up to 480F. I easily put loves in and out of their Dutch ovens.
February 21, 2023 at 12:41pm
When do you add Instant Sourdough Flavor? In starter? When doing dough?
February 21, 2023 at 12:48pm
In reply to When do you add Instant… by Jan M Oeltjen (not verified)
Add the sourdough flavor when making your dough, Jan!
February 17, 2023 at 10:55am
Good article, and I do all of the suggestions above when making bread. I would add a couple of suggestions: 1. Do an Autolyse, just mix only the flour and water until the water is absorbed and let it sit covered at room temp for at least an 1-1 1/2 hours. This helps the gluten development. 2. An overnight fermentation in the refrigerator really helps develop flavor and the texture turns out better. For sourdough, I put in bannetons, place in a plastic bag and ferment overnight in the fridge. Next day put in my proofer until ready to go into the oven. Other items like bagels, I overnight ferment in the fridge in my lidded containers and then proceed with shaping and proofing.
February 16, 2023 at 3:34pm
I've wanted to have more consistent results with, particularly, my sourdough breads--they all taste great but some rise better or have a better texture. In another publication, the author emphasizes Desired Dough Temp (DDT) and I've started checking that. Martin, you mention, here, that it's a measuring DDT can help make better, more consistent breads, but KAB doesn't give any. Please, would you consider doing that?
February 18, 2023 at 3:09pm
In reply to I've wanted to have more… by Sue (not verified)
Hi Sue, I will pass along your request that we include the DDT in our bread recipes! Until then, it's helpful to know that most bread recipes do well with a DDT of between 75-78°F, although Martin sometimes recommends aiming for a slightly lower dough temperature. His recipes, in particular, often include the DDT in the Tips From Our Bakers section. For example, his Honey Beer Miche recipe includes this tip: In warmer months (or when your indoor temperature is 70°F to 75°F), the liquid should be 80°F to 85°F. In cooler months (when your indoor temperature is around 65°F), use 100°F to 110°F liquid. The DDT (desired dough temperature) at the end of mixing is 74°F to 76°F.