

With all the recipes we have for decadent chocolate goodies, crusty artisan breads, delicious pies, and tender-tasty cakes, it's a recipe for humble whole wheat bread that gets the most clicks.
And it makes sense when you think about it. Many people want to eat healthy. There are a lot of bread bakers out there. And King Arthur whole wheat flour is the top-selling whole wheat flour in America.
So it stands to reason we'd have a recipe for the best 100% whole wheat sandwich bread you've ever tasted.
That's right - 100% WHOLE WHEAT sandwich bread. No white flour at all.
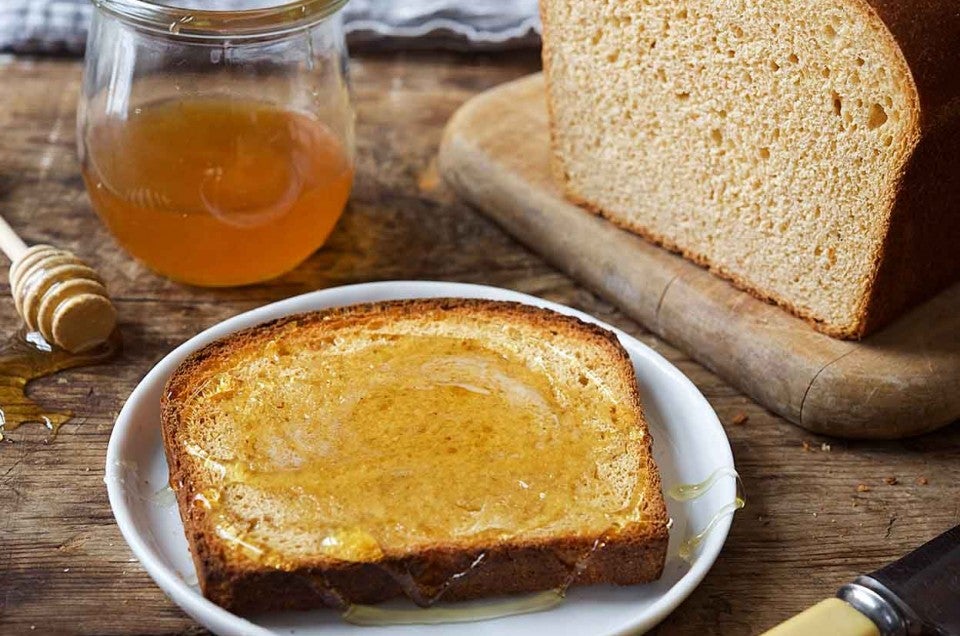
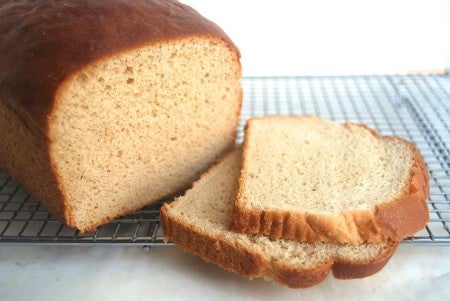
Yet it's moist, close-grained, slices like a dream... And, oh yeah, let's not forget the taste: slightly nutty, rich, barely sweet.
This is the perfect whole-grain sandwich and toasting bread. And YOU can make it at home. Honest!
What's the secret to great whole wheat bread? First, the flour. Yeah, as an employee-owner at King Arthur Flour, I'm patting myself on the back here; but we do buy and mill the BEST wheat in America. If you missed this video of the Kansas farms and farm families we work with from an earlier blog, take a look:
When you start with great flour, the rest falls into place easily. Yeast, water, salt, a sweetener; milk, for texture and nutrition; oil, to keep the bread fresh. And that's all it takes to successfully make whole wheat sandwich (and toasting) bread.
Those ingredients, plus one more: this recipe for Classic 100% Whole Wheat Bread, vetted and enthusiastically approved by your fellow bakers. (Don't just take my word for it; check the 5-star reviews!)

Put the following in a mixing bowl:
1 to 1 1/8 cups (227g to 255g) lukewarm water*
1/4 cup (50g) vegetable oil
1/4 cup (85g) honey, molasses, or maple syrup
3 1/2 cups (397g) King Arthur Premium 100% Whole Wheat Flour
2 1/2 teaspoons instant yeast, or 1 packet active dry yeast dissolved in 2 tablespoons of the water in the recipe
1/4 cup (28g) Baker's Special Dry Milk or nonfat dried milk
1 1/4 teaspoons (8g) salt
*Use the greater amount in winter or in a dry climate; the lesser amount in summer or a humid climate.

Combine all of the ingredients and mix till the dough starts to leave the sides of the bowl.

Knead the dough for 6 to 8 minutes, or until it begins to become smooth and supple. It should be soft, yet still firm enough to knead. Adjust its consistency with additional water or flour, if necessary.
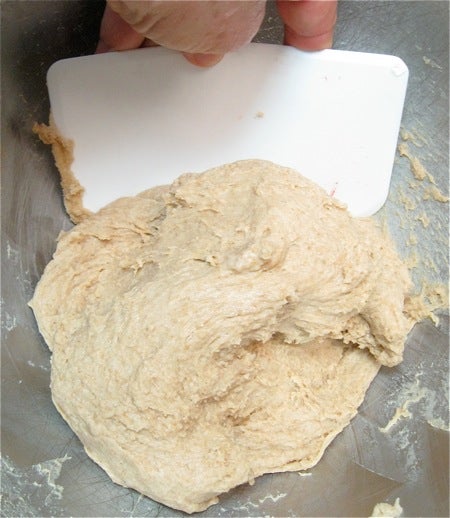
It was rainy and humid the day I made the bread for this blog; and the dough was kind of sticky.

So I stopped the mixer midway through the 7-minute knead I was giving it, and scraped the sticky dough into the center of the bowl.

Like this.

After kneading for a few more minutes, it was less sticky... though still quite soft.
That's OK. You know why? Up to a certain point, the stickier/softer your dough, the higher it'll rise. Resist the urge to keep adding flour to sticky dough; in the long run, you do yourself a favor by simply putting up with a certain amount of stickiness.
How sticky is TOO sticky? If you shape the dough into a log and it slowly starts to flatten into a pancake, that's too sticky. It can relax a bit, like someone settling into a chair; but it shouldn't flatten out.

Transfer the dough to a lightly greased bowl or large measuring cup, and cover the container.

Allow the dough to rise till very puffy – about 1 to 2 hours, depending on the warmth of your kitchen.

Transfer the dough to a lightly oiled work surface, and shape it into an 8” log. Place the log in a lightly greased 8 1/2” x 4 1/2” loaf pan, and cover the pan loosely with lightly greased plastic wrap. Or a handy-dandy shower cap from the dollar store, as I've done here.

Allow the bread to rise for about 1 to 2 hours, or till the center has crowned about 1” above the rim of the pan. WOW - that's quite a nice rise for whole wheat bread, isn't it?
Towards the end of the rising time, preheat the oven to 350°F.

Bake the bread for 20 minutes...

...and check to see how brown it is. If it's nearly as brown as you like...

...tent it lightly with aluminum foil. Continue to bake for 15 to 20 minutes, then remove it from the oven.

The finished loaf will register 190°F on an instant-read thermometer inserted into the center.

Turn the loaf out of the pan, and rub a stick of butter over the crust, if desired.

The butter will soak in, yielding a soft, flavorful crust, and a beautiful, satiny finish.

Slice when completely cool. Store the bread in a plastic bag at room temperature.
Accept your family's compliments on the best whole wheat sandwich bread you've ever made.
And what if your family doesn't like even this soft, moist, close-grained whole wheat loaf?

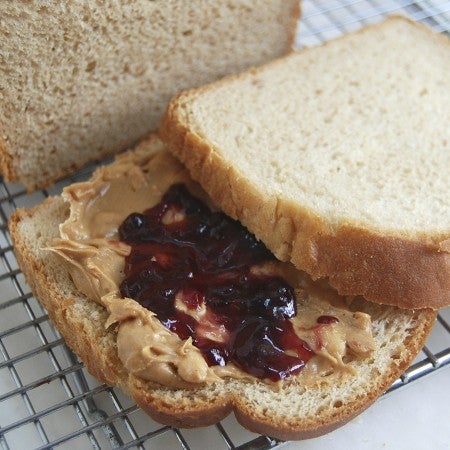
Try substituting 1 1/2 cups (6 1/4 ounces) King Arthur Unbleached All-Purpose Flour for 1 1/2 cups of the whole wheat. The bread will be just slightly lighter-colored; firmer/easier to slice; and less "wheaty" tasting.

Perfect for a PB&J!
And here's one more hint, for those of you who turn up your nose at whole wheat's "wheaty" flavor: try substituting 1/4 cup orange juice for 1/4 cup of the water in this recipe. The OJ tempers the wheat's assertive taste, without adding any orange flavor of its own.
Read, rate, and review (please) our recipe for Classic 100% Whole Wheat Sandwich Bread.
Happy baking!


July 9, 2022 at 2:36pm
In reply to Yesterday I made this for… by Newbie (not verified)
Hi Newbie, the sugar and milk powder will both contribute to more tenderness in the crumb, so omitting these ingredients may have contributed to your results, but I suspect your ragged/craggy crumb may still be related to bread that has risen a bit too much. Check out this article on desired dough temperature for some tips on how to gain a little more control over the rising process.
June 25, 2022 at 6:15pm
I didn’t get the rise of the bread in the pan it rose even with the top of the pan but I didn’t get the height. Could there be a reason for that the bread taste wonderful I just wish it looked a little better.I let it rise a full two hours
June 29, 2022 at 3:06pm
In reply to I didn’t get the rise of the… by Sharron Bechard (not verified)
Hi Sharron,
It's probably something that you'll be able to get better at as you make the loaf more often. It could be a matter of needing the dough to be slightly wetter, or perhaps a little more kneading for strong gluten. Of course, don't forget to double-check your pan size too, we've all been surprised by an off-sized pan now and then.
May 18, 2022 at 10:04pm
Love the taste, easy to make, but could not get a good rise
I discovered my Moms bread pans are too big, will try again tomorrow
February 27, 2022 at 1:55pm
This recipe makes a delicious loaf of whole wheat bread! I'd like to use it to make whole wheat dinner rolls. What do I need to do to adapt it?
February 27, 2022 at 3:52pm
In reply to This recipe makes a… by Annette Freund (not verified)
Hi Annette, most bread recipes work really well when made into rolls. We also have a really nice whole wheat roll recipe, if you'd like to go that route. If you want to try converting this recipe to rolls, I would suggest following the recommendations for using a tangzhong starter that appears in the Tips From Our Bakers section on the recipe page (which will help your rolls stay softer longer): Want to prolong the shelf life of this bread? Try the tangzhong technique, an Asian method for increasing the softness and shelf life of yeast bread. Begin by measuring out the flour and water you’ll be using in the recipe. Now take 3 tablespoons of the measured flour and 1/2 cup of the water; put them in a saucepan set over medium-high heat. Cook the mixture, whisking constantly, until it forms a thick slurry; this will take about 1 1/2 to 2 1/2 minutes. Transfer the cooked mixture to a bowl, let it cool to lukewarm, then combine it with the remaining flour, the remaining water (+ 2 additional tablespoons), and the other dough ingredients. Proceed with the recipe as directed. Well-wrapped and stored at room temperature, your finished loaf should stay soft and fresh at room temperature for at least several days. Most dinner rolls are scaled at about 1-2 ounces (28-57g). This entire recipe makes about 860g of dough, so you could make about 16 large rolls. Depending on if you want to make them as individual rolls or pull apart rolls, the baking time will vary, but for individual rolls I would bake them at 350 for about 15-20 minutes, they may take longer than this, but I would definitely check them at 15 minutes and then reset the timer from there. You can check the baking time and methods for the pull apart rolls in the recipe I linked above. You might also find this video on how to shape dinner rolls helpful. Happy Baking!
February 22, 2022 at 6:17pm
I have two of my grandmother's old Wear-Ever aluminum loaf pans - No. 101 - 9 1/4 inch x 5 1/4 inch x 2 3/4 inch.
What could I do to adjust this recipe to use those pans? I wasn't planning on buying any more pans for a while.
Thanks!
February 23, 2022 at 5:28pm
In reply to I have two of my grandmother… by Susan (not verified)
Hi Susan! Since your pan is about 25% larger than the pan called for in this recipe, you will want to increase the weights of each ingredient by 25% to account for this. Then, you can extend the bake time by about 10 minutes as well. I hope you find this helpful, happy baking!
January 8, 2022 at 2:16pm
I “lightly oiled” the bread pan—& loaf stuck! Any suggestions? I have A pyrex bread pan is that the problem? bread tastes great & has nice texture—it’s just a n message on one end.
January 9, 2022 at 4:09pm
In reply to I “lightly oiled” the bread… by Amy Hoffman (not verified)
Yes, you'll get better results from a metal pan for your breads Amy. But if you find yourself using the glass pan out of necessity again, simply be a bit more heavy handed with the grease and perhaps add a thin layer of cornmeal after greasing to help with release.
Pagination