


Ah, there you are at last – the rolls I've been dreaming of lo, these many years.
My lost buns.
My... oh, never mind the superlatives. Let's cut right to the chase.
Years ago Sue Gray, a long-time colleague here in the King Arthur Flour test kitchen, developed a recipe for light-textured, crisp-crusted, wonderfully flavorful, and truly elegant-looking hard rolls. They were featured on the cover of one of our catalogues; I remember the picture well, as it was one of those “I want that bread RIGHT NOW” shots.
Now, this was before online recipe boxes, or similar virtual storage methods. So I tore the recipe out of the paper catalogue and filed it... somewhere. Out of sight, out of mind. I made the rolls a few times, then forgot about them.
Until recently. In the process of having our office painted, the King Arthur Web team had to relocate for a few weeks; which entailed moving a whole bunch of stuff, including my collection of catalogues stretching back to the very first one, in September, 1990.
While trundling my catalogues down the hall to our temporary new home, I came across this one, from February, 2000:

There they are! Those rolls. The ones I loved so much.
But where's the recipe? I'd already torn the page out of the catalogue, and my days of keeping manila folders stuffed with paper recipes is long gone.
Luckily, I found it online. With over 2,000 recipes on our Web site, it took a bit of searching; but the word “crusty” turned up 8 recipes, and I was quickly able to identify the one for these rolls.
Eureka! Made ’em. Loved ’em. They're everything I remember.
And now, before I forget – I'm bookmarking this blog post!
Join me as I make Crusty European-Style Hard Rolls.

First, we'll make a starter. Put the ingredients below in a bowl. The same bowl you'll use the next day to make the dough is a good choice.
1/2 cup cool water
1 cup (4 1/4 ounces) King Arthur Unbleached All-Purpose Flour
1/8 teaspoon instant yeast

Mix until well combined. Cover and let rest at room temperature overnight.

Next day – see those bubbles? Yeast, flour, water, and time, hard at work!

Add the following ingredients to the starter in the bowl:
3 1/2 cups (14 3/4 ounces) King Arthur Unbleached All-Purpose Flour
1 cup lukewarm water
1 1/2 teaspoons salt
1/4 teaspoon instant yeast

Mix everything together until cohesive.

Then knead for about 7 minutes (at medium speed in a stand mixer). Knead about 10 minutes by hand.

Your goal is a soft, somewhat smooth dough; it should be cohesive, but the surface may still be a bit rough. It may also stick to the bowl just the tiniest bit.
Of course, you can also do this whole process (including the first rise) in the bread machine set on its dough setting.

Place the dough in a lightly greased bowl, or in an 8-cup measure, as I've done here. The measuring cup makes it easy to track the dough's rise.

After 1 hour, it will have barely risen – the 3/8 teaspoon yeast in the recipe is working slowly. But that's OK, we want it to, because we're giving this dough a long rise.
Gently deflate the dough, and return it to the cup or bowl.

Wait another hour; ah, that's better.
Deflate the dough again, and return it to the cup or bowl.
Wait 1 more hour (for a total of 3 hours since you started).

Better still. See those air pockets? Yeast at work.
Did you know that yeast doesn't reproduce in a low-oxygen environment – e.g., when it's in rising dough? It simply eats and releases CO2 (which makes the dough rise), and organic acids and alcohol (which give the bread flavor).

Turn the dough out onto a lightly greased work surface. Divide it into 12 pieces. Shape the pieces into balls, firming them up by rolling them under your lightly cupped fingers.

Place the rolls on a parchment-lined baking sheet, cover them, and let them rise for 1 to 2 hours, until they're puffy, though not doubled in size.
I was doing an experiment here, so divided the rolls between two baking sheets. You could crowd them onto one; but for best shape, six on a sheet is a good choice.

The rolls will flatten out a bit as they rise; that's OK.

Very gently cover the rolls with lightly greased plastic wrap, and refrigerate them for 2 to 3 hours.
This “cool rise” will increase the dough's output of acetic acid, which will give them the merest tang; their flavor won't be even close to that of sourdough, but will simply seem rich and more complex than that of the typical white roll.
Towards the end of the rolls’ chill, preheat the oven to 425°F.

Whisk together 1 large egg white and 1/2 cup cool water until frothy. Remove the rolls from the refrigerator, and brush them with the wash; you won't use it all up.
Again, don't be discouraged if the rolls seem a bit flat; they'll pick up when they hit the oven's heat.

Quickly and decisively slash the top of each roll.

Make the cut fairly deep; about 1/2” is good.

Immediately put the rolls into the oven.

Within minutes, they'll start to puff up. WHEW. It's always a scary moment when you slash risen bread dough and it starts to deflate...

Bake the rolls for 20 to 25 minutes, until they're a deep golden brown.
Remove them from the oven, and cool on a rack. Or, for best crunch, open the oven door, and allow the rolls to cool in the turned-off, open-door oven.

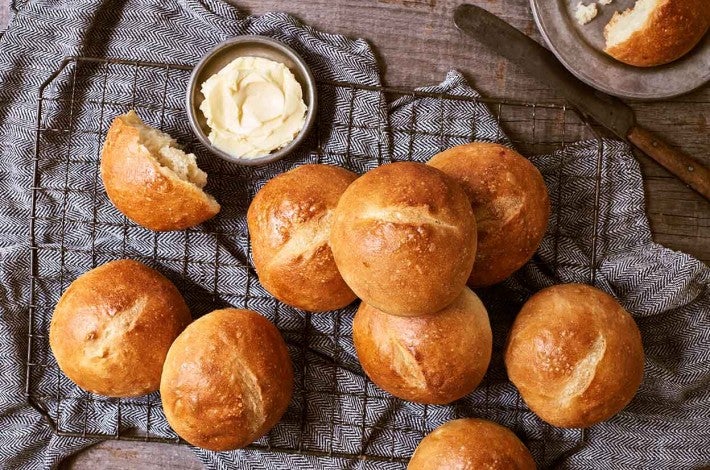
Is this not a thing of beauty?

As well as a joy forever.

Nice interior. And notice the thin crust – which by the way is crisp, not leathery.

What a difference a day makes... On the left, a roll baked after a 2 1/2-hour rest in the refrigerator. On the right, baked after an overnight (16-hour) rest in the fridge.
You may be tempted to think “more is better,” but my experimenting tells me that 2 to 3 hours in the fridge is just right.

A dip in flavored olive oil is a delicious final touch.
Read, rate, and review (please) our recipe for Crusty European-Style Hard Rolls.


May 22, 2023 at 9:14am
In reply to I made these rolls Friday… by Deborah Collins (not verified)
We're glad to hear this recipe is a keeper for you, Deborah!
November 3, 2022 at 9:15pm
Hi, when you say "Gently deflate the dough, and return it to the cup or bowl." are we supposed to take the dough out to deflate?
November 5, 2022 at 10:43am
In reply to Hi, when you say "Gently… by DaisyG (not verified)
Hi DaisyG, you can either give the dough a gentle fold in the bowl, or take it out and give it a fold on your lightly floured work surface (as illustrated in this brief video). Both methods of deflating the dough are perfectly acceptable.
January 28, 2022 at 7:07am
I've tried this recipe twice now and the results are simply not good. There not much rise to speak of and no oven spring whatsoever. The final product comes out looking like the photo showing the overnight refrigeration - pretty much like a hockey puck. The taste is OK, but the crunch is pretty weak for what's supposed to be a crusty roll.
February 5, 2022 at 12:18pm
In reply to I've tried this recipe twice… by Brian (not verified)
Hi Brian, we're sorry to hear that you're having trouble witht his recipe! If you're not getting much rise or oven spring I would consider reducing or eliminating the time the rolls spend in the refrigerator and perhaps extending the bulk rise in the bowl, if necessary. Because this recipe contains such a small amount of yeast, your dough temperature is going to make a big difference in how quickly the dough progresses, but a nice long rise at room temperature may allow you to guage the progress of the rolls more successfully, and allow for more oven spring at the end. Because this recipe also contains a preferment, I think you'll still get plenty of flavor, even if you omit the refrigeration step. For more help troubleshooting this recipe, please don't hesitate to give our Baker's Hotline a call at 855-371-2253. We're here M-F from 9am-9pm EST, and Saturday and Sunday from 9am-5pm EST.
December 25, 2021 at 4:03pm
Would there be much of a difference if I did the cold prove before cutting them into rolls?
January 5, 2022 at 12:48pm
In reply to Would there be much of a… by Amber (not verified)
Hi Amber,
While you could do that, the cold proof helps develop a crust all round the rolls, making them the crispy little treat balls that are different than standard dinner rolls.
December 22, 2021 at 5:15pm
My dough was never as smooth as yours looked. The finished rolls were crusty, but way too dense. Not light an airy at all. Any ideas?
January 5, 2022 at 12:26pm
In reply to My dough was never as smooth… by Renate Thomas (not verified)
Hi Renate,
It sounds like it may have had too much flour added, or it could be the way the flour was measured. This video may be helpful on our preferred way to measure flour: https://www.kingarthurbaking.com/videos/baking-skills/how-to-measure-flour
September 13, 2021 at 7:21pm
Tried making the rolls today. They rose beautifully after I shaped them but after I refrigerated them, they baked up like hockey puck. No rise at all. Very disappointed