


Wouldn't you love to pull a stunning freeze and bake fruit pie out of your oven in less than an hour, start to finish?
Impossible, you say?
Au contraire – your grandma could have done it. That is, if you had a grandma like mine, with a big chest freezer full of unbaked pies.
My grandma was born in 1894, in northern Wisconsin, in a house without what we'd consider amenities critical to daily life: running water, electricity, and central heating, for instance.
By the time I knew her, Grandma had worked her way up to a fully equipped kitchen: fridge, stove, sink. And in the pantry, a large freezer. I remember Grandma bending into the freezer, rummaging around a bit, and pulling out a frozen pie wrapped in waxed paper.
And shortly after that, taking a bubbling apple or blueberry or rhubarb pie out of the oven.
“Easy as pie” made sense to me back then. But once I started baking my own pie, “easy” was hardly how I'd describe the process.
After many years of practice, I can finally bake a pretty good pie. But getting the pastry just right, rolling it to the right size (without cracks), nestling it into the pan just so, making sure the filling is perfectly thickened, sealing and crimping the crust, and having the whole thing come out looking like a page out of “Saveur” – not so easy!
So when I DO take the time to make pie, I like to make a bunch of pies at once.
Sure, it's a lot of effort for pie #1, the single pie I bake the same day I make up a whole batch.
But pies #2, #3, #4 (however many I make), simply pulled from the freezer, thawed, and baked, are a piece of cake.
Figuratively speaking, of course.
I tried several methods, and have settled on the one I think works best. Read on...

The first thing I tried was making the crust, shaping it into disks, and freezing. Ditto the filling: preparing the fruit, adding the sugar, spice, and thickener, and freezing.
This method was OK. And it was the best way for a small freezer, as disks of crust and bags of filling are easier to store than entire pies.
But when you want fresh pie, you're only partway there; once you've thawed the crust and filling, you still have to roll, fill, seal, crimp... all that stuff.
I was after something that was absolutely painless, time- and effort-wise. And here's the method I chose:
Make the entire pie up to the point it's ready for the oven. Freeze it. When you're ready for pie, thaw overnight in the fridge, and bake.
Here's how –

Unless you have LOTS of pie pans lying around (or can settle for the undersized throwaway foil pans), you're going to want to make the pie, freeze it in the pan, then take it out so you can have your pan back.
First, grease your pan. I'm using a 9”, 1 1/2” deep pan.
Next, line it with parchment, and grease the parchment.

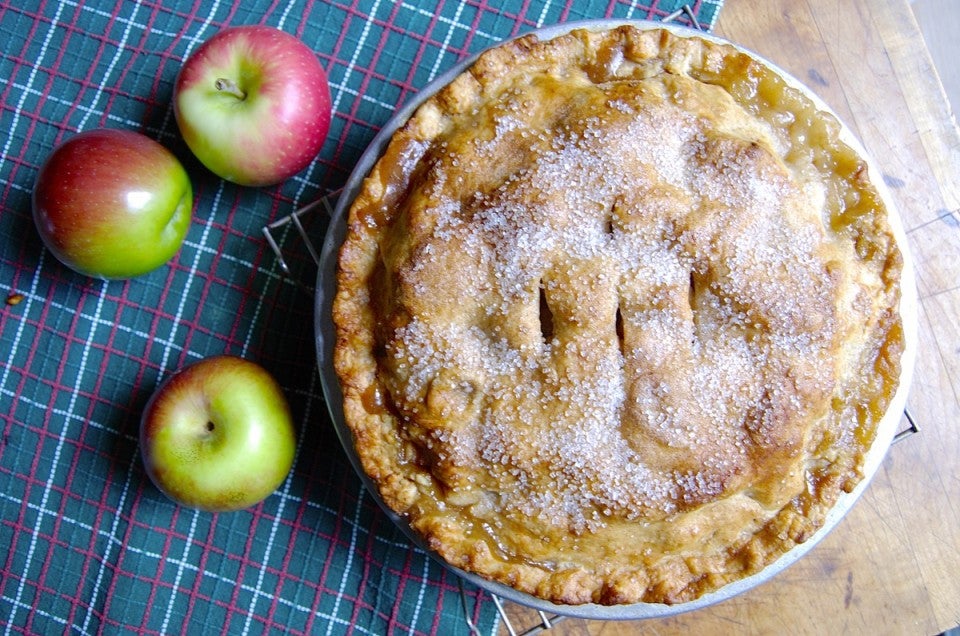
Prepare your pie. I've made an apple pie here.

Put the pie into a large plastic bag.
Into the freezer it goes. Freeze the pie for several hours, or until it's stiff enough to handle easily.
OK, time out. Since you're going to the effort with the dough and filling, you probably want to make more than one pie at a time, right?
However many pie pans you have (metal preferred; it freezes the pies faster), that's how many pies you can prepare at a time.
But that doesn't mean if you only have two pans, you can only make two pies. Make enough dough and filling for, say, four pies. Prepare two pies, leaving the extra filling and dough in the fridge. Once those first two pies are frozen and you have your pans back, prepare the remaining two pies, and freeze them.
OK, back to the frozen pie.
If you have a surfeit of available pie pans, you can certainly leave the pie in the pan in the freezer. But most of us don't have multiple pie pans. So, once the pie was frozen, I moved this pie from its pan to a plastic bag.

First step: set the pan in a slightly larger pan of warm water, to thaw the underside just a bit.
Parchment helps with the release. Peel it off now; you won't need it anymore.
Re-bag the pie, and stick it back in the freezer until you need it.
Fast forward 7 weeks. Time to think about Thanksgiving pies.
Take the pie out of the bag, and put it in the same size pan you originally made it in. Put pie and pan back in the plastic bag.

Tent the plastic bag up a bit, so it doesn't rest right on the pastry. A couple of toothpicks stuck into the center of the pie is holding my clear plastic shower cap up nicely.
Place the pie in the refrigerator overnight, to thaw.
Wait a minute - why not simply bake the pie right from the freezer? Isn't that what Mrs. Smith has you do?
I tried it. And found that by the time the filling had thawed and cooked completely, the crust was unpleasantly dry. Thawing first cuts back on baking time, and yields a moister, more tender pie.

Spray the crust with water and sprinkle with coarse sugar, if desired. I've done an under-layer of cinnamon-sugar here, followed by coarse sugar on top.

Now's the time to straighten up your crimp, if it's gotten a bit mashed with all the handling.

Follow your recipe to bake the pie.

Hint: for easiest cleanup, be sure to bake it on a baking sheet lined with parchment.

Ah, nicely juicy...

...VERY pretty...

...and totally tasty!
Pie without angst – it's love at first bite.
If you're interested in making this particular pie, check out our recipe for Guaranteed Apple Pie.
Words to the wise:
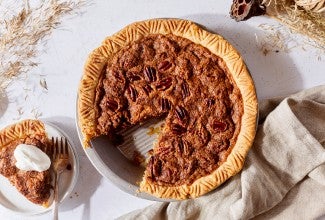
•This method is appropriate for fruit pies. Please don't try it with egg- and/or milk-based fillings (e.g., custard, pumpkin, pecan, lemon meringue, banana cream, etc.).
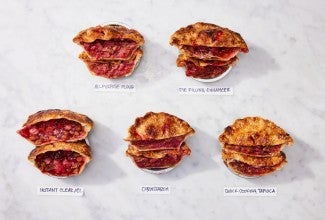
•I found that adding an extra 2 tablespoons flour to the filling helps soak up some of the extra juice the fruit may exude during the freezing/thawing process.
Finally, please let us know about your solution (or your mom's, or grandma's) for make-ahead pies. I know this isn't the only method that works; share your story in the comments section below. Thanks!
Want to read more about how to prepare and freeze just-in-time holiday treats?
•Read about drop cookies, sticky buns, scones, and flaky cheese twists.
•Read about cinnamon buns.
•Read about rollout cookies.


August 23, 2019 at 1:14pm
In reply to Hi Kaylee! Even if you've… by mmoss
Sorry just to clarify, does that mean I need to put a thickener in with the apples prior to freezing? Or can I just have the apples, sugar and spices in the frozen mixture so that I can reduce the liquid, then add the thickener when I assemble the pie and the apples have thawed?
August 24, 2019 at 12:03pm
In reply to Sorry just to clarify, does… by Kaylee (not verified)
Hello! As long as a thickener is added at some point, it'll be just fine. If you plan to reduce the apples just before assembling your pie, we'd probably recommend waiting until then to add your thickener. We hope this helps to clarify and apologize for any confusions. Happy baking!
August 3, 2019 at 11:34am
PJ... I can't wait to try your method. I had the EXACT grandma experience. Her cooking and baking drives me today. I hope that I can recapture those sweet memories. I also struggled with pies. My mother in-law's pies were always gorgeous and I had a hard time. Recently I believe I am starting to master them. I believe we are kindred souls.
June 12, 2019 at 9:48pm
June 13, 2019 at 11:47am
In reply to I want to make and freeze a rhubarb pie. However, I thicken my… by Deborah Hall (not verified)
December 8, 2018 at 5:58pm
December 10, 2018 at 10:40am
In reply to The bottom crust is not mushy from the filling sitting in there? by Louise Levesque (not verified)
December 8, 2018 at 11:26am
December 8, 2018 at 3:21pm
In reply to I made my first chocolate cream pie with the KA recipe. It was… by Kelly Andrews (not verified)
November 28, 2018 at 1:10pm