


Where to put bread dough to rise
How to make dough rise better? Put it in the right spot!
“Why do I have such trouble with bread dough rising?” Oh, how often we’ve heard this plaintive question on the Baker’s Hotline here at King Arthur! If you're wondering how to make dough rise better, there are several factors at play. Sometimes yeast dough not rising is an issue with the dough itself (too much sugar, salt, flour, fat; take your pick). But often it’s simply the environment in which you’ve placed your bowl of dough. Knowing where to put dough to rise, especially if you’re baking in a chilly winter kitchen, is key to how to make dough rise fully and consistently.
Luckily for all of us bread bakers, yeast will reliably grow, divide, and make bread dough rise except under extreme conditions of duress: high or low temperatures, old age, or a severe imbalance in the dough’s ingredients. Maybe your sweet dough rises with excruciating slowness but, sooner or later, yeast does its thing.
It’s just that most of us don't enjoy waiting around for bread dough to rise. Luckily, assuming you’ve made a “healthy” dough with the correct balance of ingredients, you can control the rising time of your dough pretty easily. It’s all in knowing where to put bread dough to rise.
The temperature at which dough rises has a direct effect on the flavor of your final product. The longer dough rises (up to a point), the more flavor it develops. Conversely, dough that rises too quickly produces bread with flat flavor. Nail the sweet spot — warm enough to rise at a decent rate, yet cool enough to develop flavor — and you're golden.
Studies have shown that the optimum temperature for yeast to grow and flavor to develop is 75°F to 78°F. (Interested in the science behind the data? See our blog post: Desired dough temperature.) This temperature range gives yeast dough enough time to develop flavor while still keeping the whole process within a manageable timeframe.
Unfortunately, an ambient temperature of 75°F to 78°F in your kitchen can be difficult to maintain. I don't know about you, but my winter kitchen is more like 62°F to 65°F. And even if you're down South, you might have trouble keeping your kitchen in the high 70s — whether because it's winter, or you've got the AC going.
Professional bakeries often use temperature-controlled “cabinets” called retarders to let shaped loaves and rolls rise first in a cool environment (often overnight) to develop flavor; then at warmer temperatures just before baking, to make dough rise efficiently. A retarder is obviously the best way to control your dough’s rising environment.
The home baker's version of the pro's retarder is an electric dough proofer, a countertop temperature/humidity-controlled proof box. This appliance lets you set whatever temperature you want and just walk away, knowing that the dough, bread, or rolls you’ve placed inside will rise without any cold drafts or temperature swings to upset the apple cart.
If you’re a passionate bread baker, I highly recommend this effective tool (which is also great for tempering chocolate, making yogurt, proofing sourdough starter, and even slow cooking). Bonus: It folds down for easy storage. Read all about it here: Yeast dough’s secret weapon.
Another handy tool to make dough rise better (especially in cold conditions) is this dough rising mat: Like an electric blanket for your bread dough, it provides steady, gentle heat to help your bread dough rise on even the coldest of days.
But handy though it is, you certainly don't need a countertop proofer to raise your yeast dough. There are plenty of other ways to provide your rising dough with the warm, humid environment yeast loves.
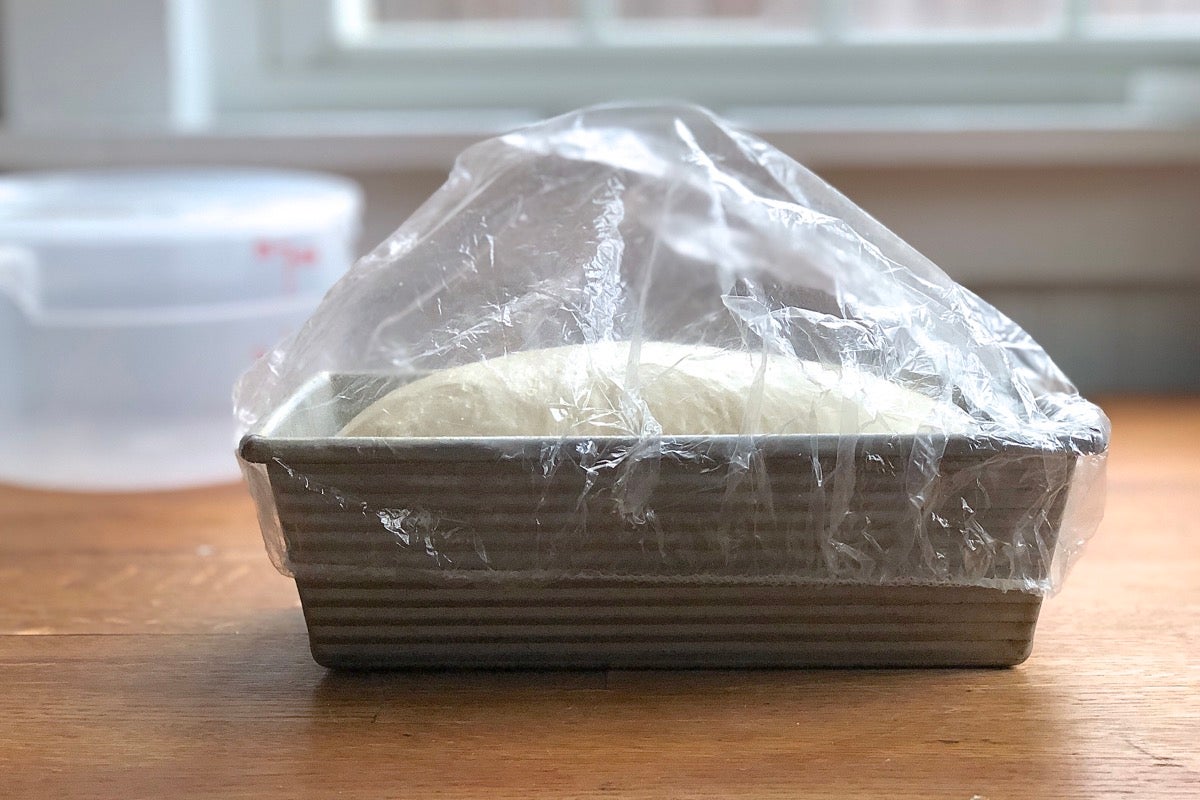
Why not just drape a towel over your bowl of rising dough, like your great-grandma did? Because your goal is to create an environment that's not only warm but humid. Why humid? Moisture keeps the skin of the dough supple and soft, promoting a better rise. A cotton towel allows moisture to escape; plastic (or even better, a snap-on lid) keeps moisture trapped.
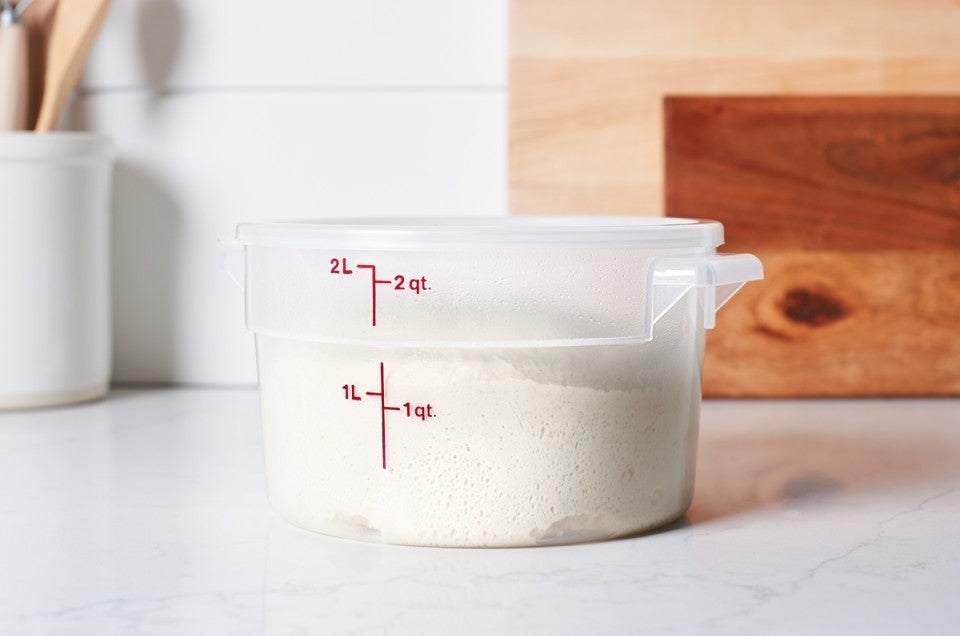
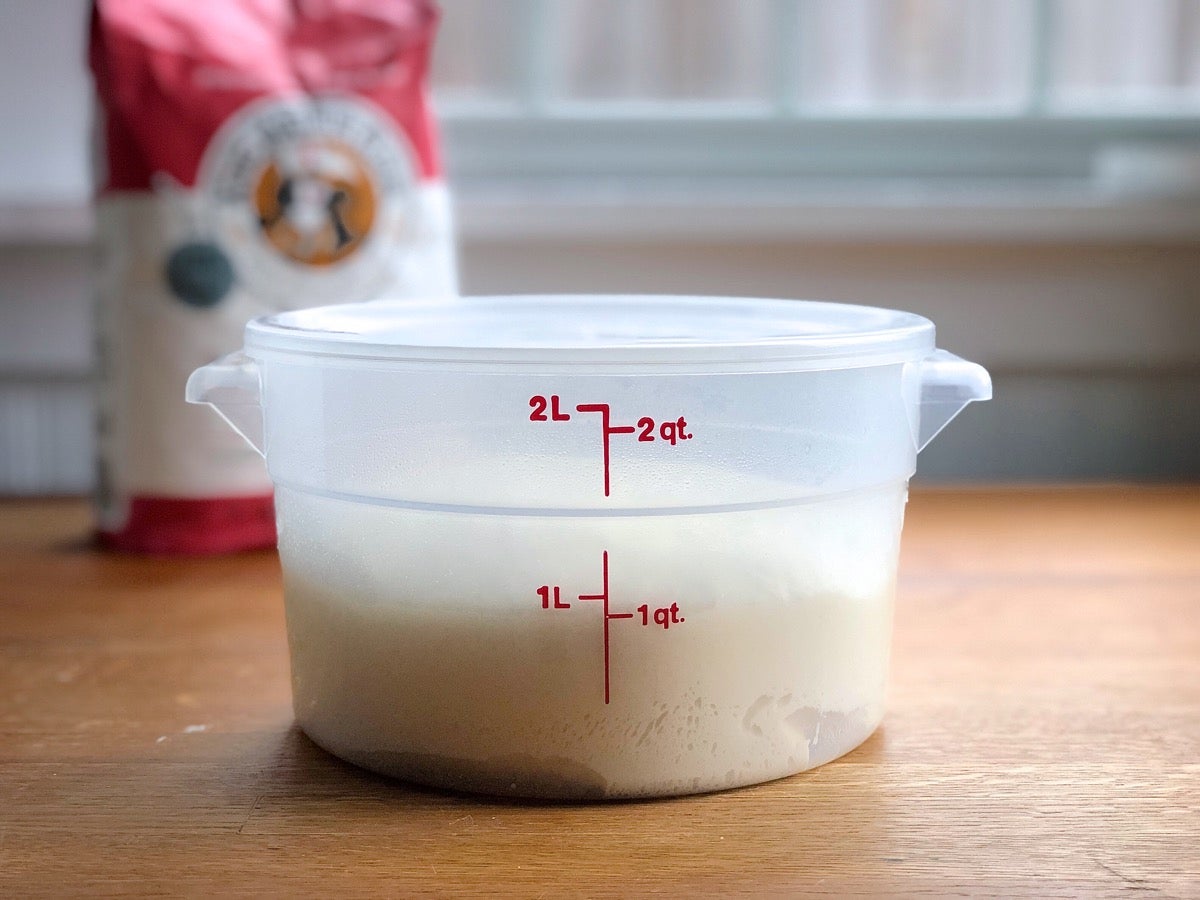
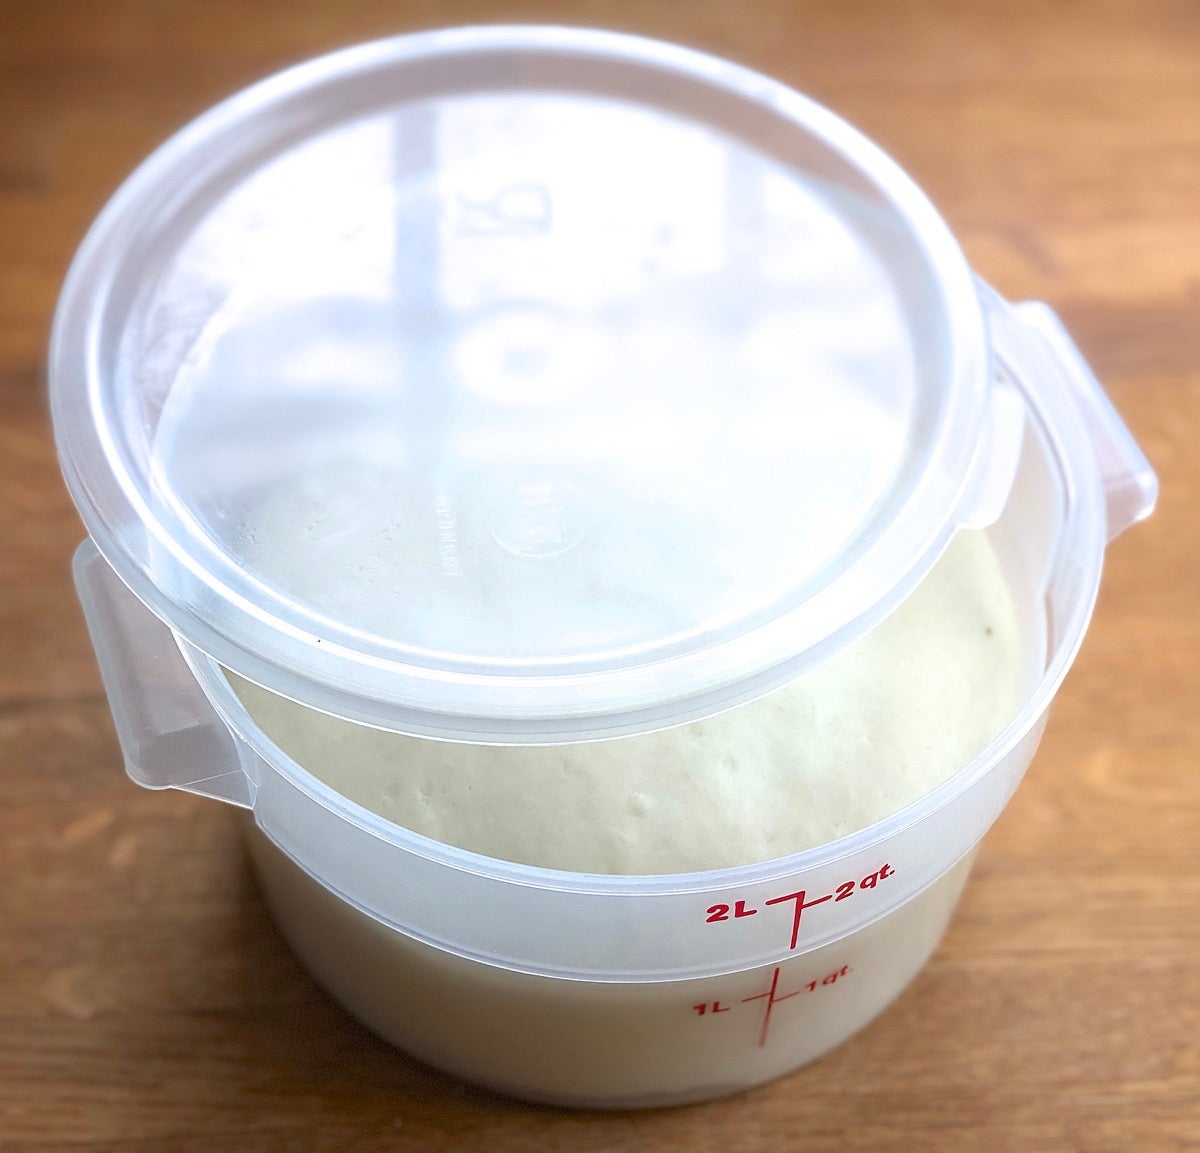
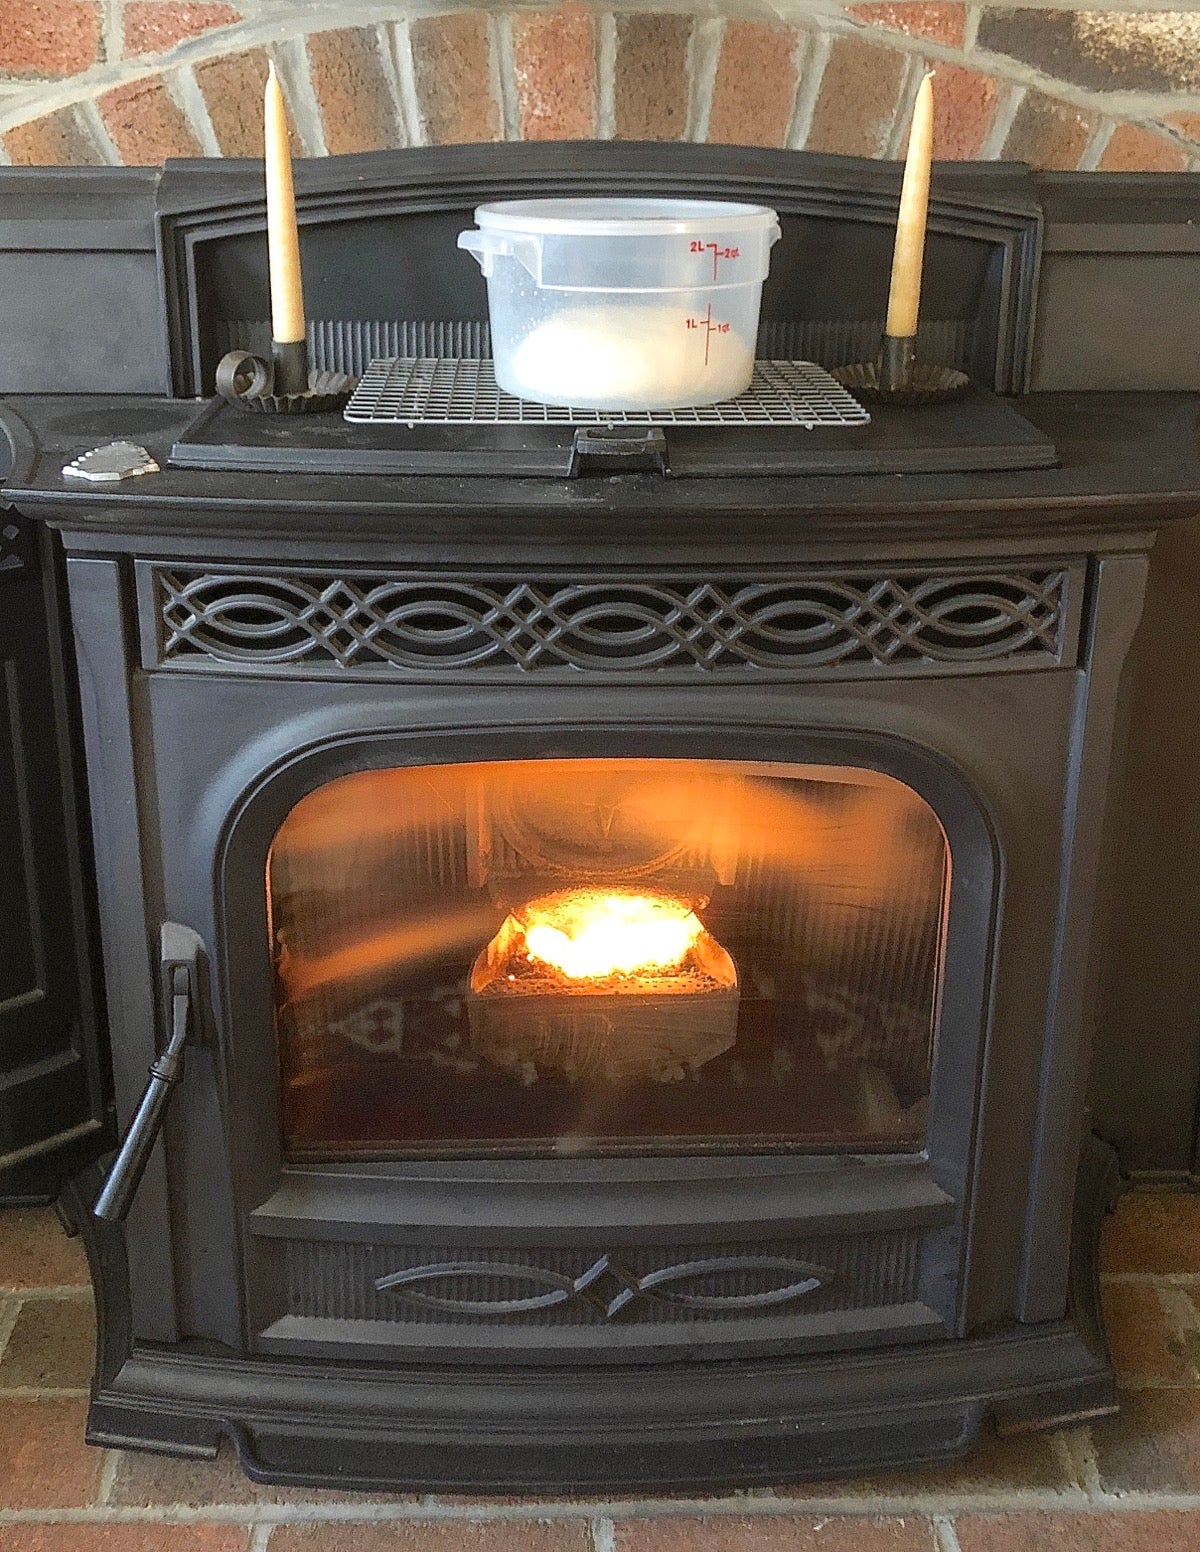
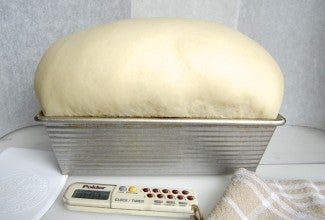
I like to use the food-safe plastic dough-rising bucket pictured above. Not only does it create a moisture-trapping environment, but its markings help me gauge when the dough has doubled in size.
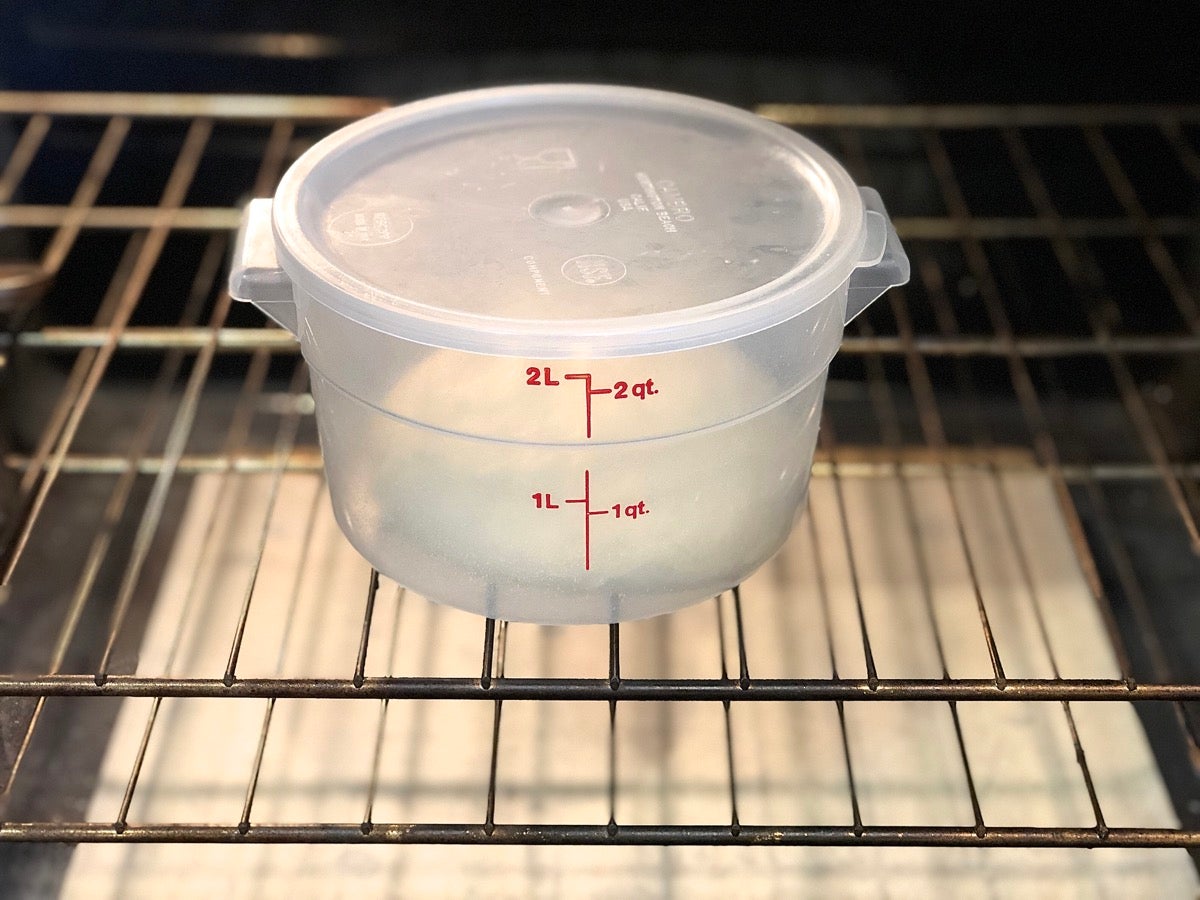
Many bakers like to preheat their oven briefly, turn it off, then place the bowl of dough within. My issue with this is, I usually forget and preheat the oven way beyond what’s necessary, and then have to wait for it to cool down.
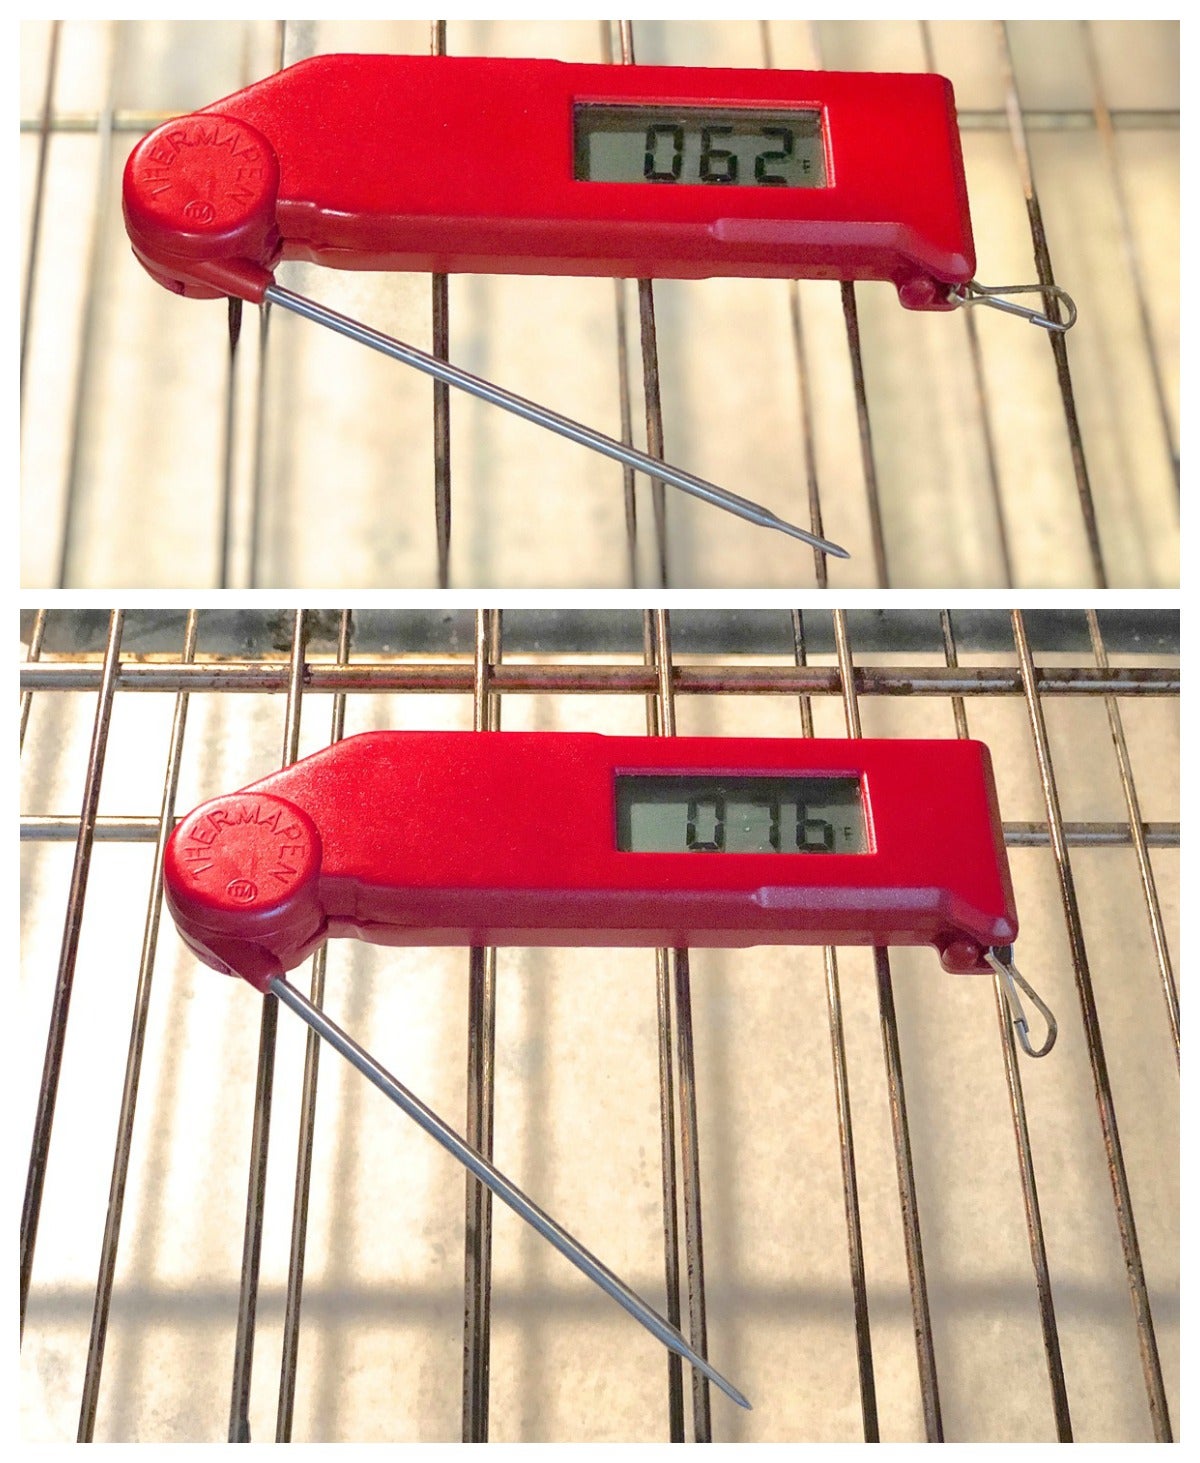
So instead, I simply turn on the oven light, and the temperature within gradually rises. I’ve learned that in the winter (when my kitchen is cold) if I turn the oven light on an hour ahead of adding the bowl of dough my oven temperature will be right around 76°F. I put the dough in, leave the light on for another 30 minutes or so, then turn the light off, allowing the temperature inside to reverse its course.
Of course, your oven and your kitchen will yield different results. But I urge you to take the time to see how effectively just a simple lightbulb can heat your oven, creating the perfect dough-rising environment.
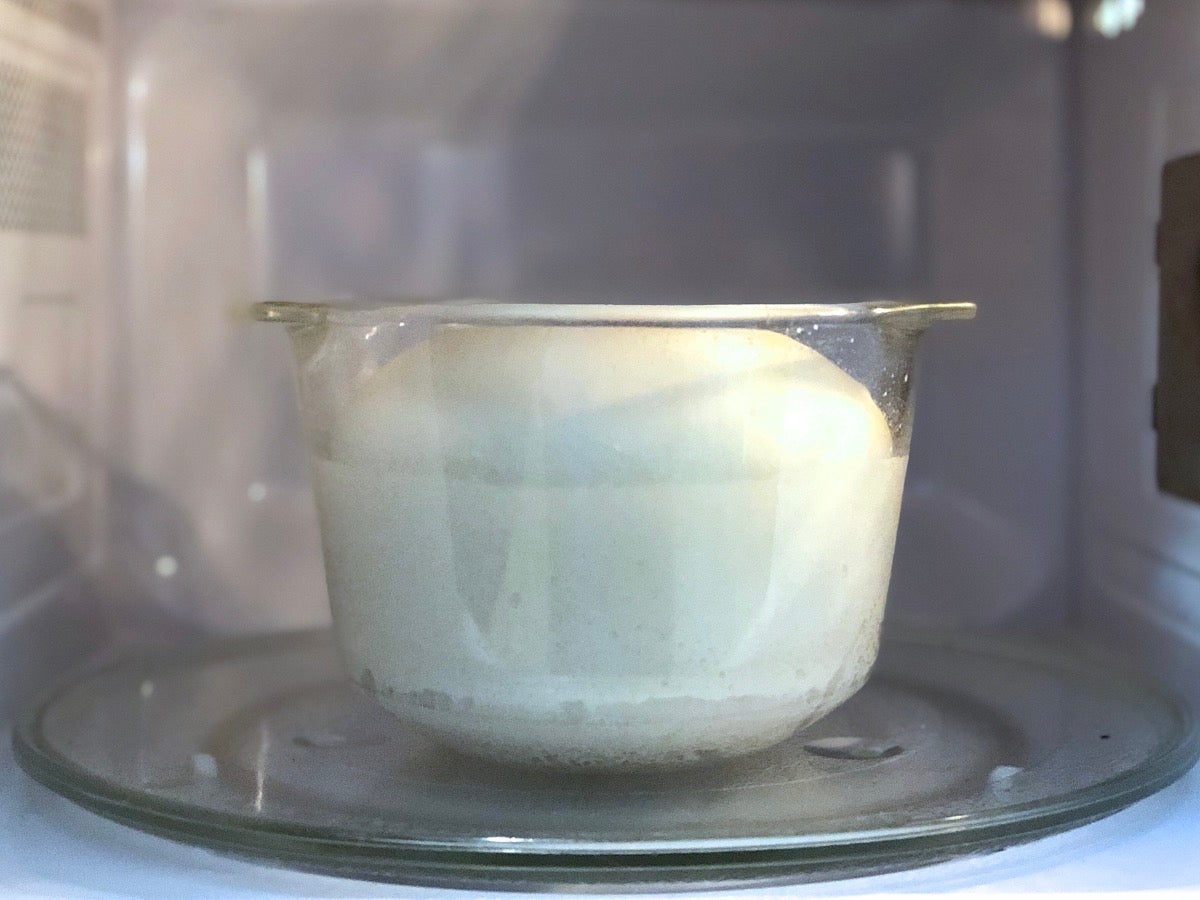
Here’s a technique savvy bakers have been using for years: Bring a couple of cups of water to a full rolling boil in your microwave oven; in my oven, this takes 3 minutes. Wait about 4 to 5 minutes (for the microwave's interior to gradually cool down some), and exchange the bowl of water for your (uncovered) bowl of dough; quickly close the door.
The interior temperature of your microwave will start out in the mid- to low-80s and will drop down through the 70s over the next hour or so, providing an ideal rising environment.
If you're in a hurry and forgot to boil the water ahead of time, just use a smaller amount of water and bring it barely to a boil. The microwave's temperature will drop more quickly into yeast's comfort zone (though it also won't linger in that zone as long, either).
Word to the wise: Boiling water can be dangerous, of course, so be very careful moving it out of the microwave. Don't decide to add a tea bag or otherwise disturb it until it's calmed down and stopped bubbling!
So far it's all been about dough's first rise in the bowl. What about once it's shaped and in its loaf pan?
Most methods work just as well for shaped dough as for dough in the bowl. The exception: your oven. Since you'll want to preheat your oven well before the bread is ready to bake, you don't want your loaf pan inside — even though you swear you won't forget and will take it out before turning the oven on. (Been there, done that... multiple times.)
So place your pan in some other warm spot you've identified. If it's not a humid environment (e.g., your microwave or a cooler), snap a clear elasticized shower cap (or bowl cover) onto the pan to trap moisture.
Let the dough rise, bake your bread, and enjoy the results!
What other “warm and cozy” ways have you discovered to help your yeast dough to rise in cooler conditions? Please share in “comments,” below.


January 14, 2023 at 2:00pm
I live in SW FL. I wet and wring out dish towel that I use to lay ontop of bowl of dough to rise. Grease bowl w butter first. Put it in car seat of anyone's car that did not fit in garage.
April 29, 2023 at 9:56am
In reply to I live in SW FL. I wet and… by Lin Math (not verified)
Have used the car sitting in the sun many times as well!
January 7, 2023 at 11:41am
My 88 year old mom bakes like her mom did…
Covers dough with a very damp towel, then sets it on an out-of-the-way floor heat register to rise. I remember as a girl, sneaking under the towel to pinch off a piece of raw dough to eat :) Couldn't wait for her delicious bread!
December 22, 2022 at 9:24am
I love the light in the oven method with one addition: I include a pan of water on the bottom rack during winter months since my home is very dry. This seem to do the trick to give me that slightly humid environment that yeast loves!
December 23, 2022 at 12:16pm
In reply to I love the light in the oven… by Anne | Simply2Moms (not verified)
Great idea, Anne! Can we just suggest that you use hot water so that the steam of the water helps to heat the oven too. Thanks again for sharing.
September 2, 2022 at 6:01pm
I live in Houston, Texas where temperatures in the winter can get into the 80s. Most of the year it's conciderably warmer than that. Since 80 is comfortable if it's dry enough that's what I usually keep my thermostat at. For Houston's notorious humidity I have a dehumidifier. Most of the time that works great for me; not so much for plants or pizza dough. I'm actually looking for a way to keep the dough from getting a dry crust on ton during the first rise. Like maybe a damp tea towel. After reading your article I've realized that once the initial prep is done I can just put the dough in a plastic container with a lid; like I do if I want to put it in the fridge for a day or two.
September 4, 2022 at 1:17pm
In reply to I live in Houston, Texas… by Thomas W Eaton (not verified)
Hi Thomas, yes, it will work fine to cover your dough container with a lid or plastic wrap to help prevent your dough from drying out on top.
August 7, 2022 at 5:33pm
With the heat wave thats going on, I just put the covered bowl on the porch outside. Works great!
May 15, 2022 at 6:52pm
My oven has a Proof setting. I have used it once. Did pretty well.
May 16, 2022 at 11:01am
In reply to My oven has a Proof setting… by Janice Cagan-Teuber (not verified)
Hi Janice, sometimes the proof setting on a an oven is a little higher than is ideal (some go as high as 100F). I would aim for something more in the 75-82F range for most breads. If your proof setting runs high you might want to turn it off and let it cool down a bit before you put the bread in there to rise, and monitor the temperature of the dough.