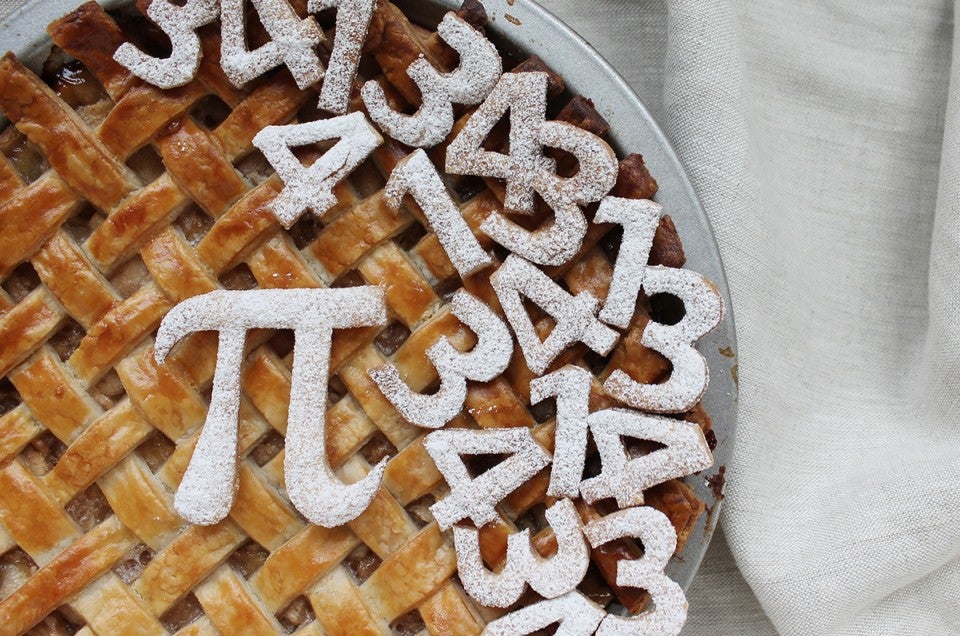


It's time to serve up a tasty slice of Pi Day pie.
Maybe it's been a few months since your last pie and you're looking for an excuse to get out the old rolling pin. Or maybe you love math and are dying to pay homage to this constant – the ratio of the circumference of a circle to its diameter. Or maybe you just appreciate a good homophone. Whatever the reason ... TOMORROW IS Pi DAY!
Pi (Greek letter “π”) is the mathematical symbol used to represent the ratio of the circumference of a circle to its diameter, which is approximately 3.14159. Pi has been calculated to over one trillion digits beyond its decimal point. As an irrational and transcendental number, it will continue infinitely (like our love of pie) without repetition or pattern.
Our Decorative Pie Crust Tips post blew us and our readers away with its detail. So again, we turned to expert Toronto baker Samantha Chiu (of Instagram fame) for inspiration and her best tips on Pi(e) Day crust perfection.
And she did not disappoint! This pie-tastic masterpiece has us excited to celebrate. Come along with us to see how she does it!
Make a batch of your favorite Double Crust Pie dough, divide it into two pieces, flatten each into a disc, and refrigerate for 30 minutes.
Stir together the ingredients for your favorite fruit filling, like apple, blueberry, or cherry.
On a well-floured surface, use a rolling pin to roll one disc into a circle large enough to properly fill the pie pan; typically we suggest 13". Transfer the dough to a 9" pie pan. Watch this video for tips on how to move your rolled dough.
Spoon the prepared fruit filling into the crust-lined pan.
Roll the second dough disc into a circle. Make sure the dough is chilled; cutting lattice strips is much easier with cool dough than warm.
Use a knife and ruler (optional, but helpful) to cut 1/2"-wide strips — you'll need 17 strips.
Start weaving by placing dough strips under and over each other. Once all the dough strips are woven and their edges trimmed, the pie should look like this:
Brush the crust with egg wash (1 large egg beaten with 1 tablespoon water). Top with sparkling sugar, if you like. Bake the pie for the recommended time and temperature in the recipe.
Make numbers using leftover pie dough scraps.
Create a paper template by tracing an outline of the numbers onto a piece of paper and cutting out the shape. Use a knife to trace the paper template onto the pie dough. Alternatively, use number cookie cutters.
Bake your cutout numbers on a parchment-lined baking sheet for about 15 to 18 minutes, until they're golden brown. Baking numbers separate from the pie ensures they won't over-bake, as they need less time in the oven than the pie.
Remove the numbers from the oven. Once cooled, sprinkle them with confectioners' sugar, for visual pop.
Arrange the numbers atop the cooled pie. If you're going to be moving the pie around quite a bit and need the numbers to stay in place, add just enough water to some confectioners' sugar to make a soft paste; "glue" the numbers to the crust with this sugar paste.
Serve Pi Day pie with vanilla ice cream!
There you have it, a Pi Day pie stunning enough to grace any table on 3/14.
Try it yourself: Use our Pie Crust Guide for helpful hints and recipes (our Complete Guide to Pie Baking and How to: pie playlist have even more inspiration!). Then share your results with us on Facebook, Twitter, or Instagram, using #kingarthurflour.


