

Though chocolate-dipped foods might usually be associated with mid-February, I find that logic flawed. You should be making, eating, and thinking about chocolate all year! And as for using chocolate to express love and affection? Let's all make a note to do that all year, too. After all, it's always a good time to whip up a batch of homemade chocolate-dipped strawberries.
Today I'll show you how to make simple chocolate-dipped fruit, cookies, candies, and more. (Warning: The hard, cold truth is that most foods are improved upon by a quick dip in silky, rich chocolate. Nothing in your kitchen will be safe after this.)
In the from-scratch chocolate desserts realm of difficulty, dipped chocolate sweets fall somewhere in between quick one-bowl brownies and chocolate truffles.
To dip with chocolate perfectly, you'll need to temper your chocolate. Don't be intimidated! This is nowhere near as intense as it sounds, but it does require a bit more care and attention than making cookie dough.
Why temper chocolate instead of just melting it? Tempering chocolate is a fancier method of melting and cooling chocolate that aligns the crystals in the chocolate, resulting in shiny cooled chocolate with a crisp snap.
We have some excellent resources to teach you how to temper chocolate, step-by-step. Start by reading Susan Reid's detailed article, and follow up with our tempering chocolate guide.
To properly temper chocolate like a pro, you should invest in a good thermometer (our test kitchen favorite is the top-of-the-line Thermapen).
But what if you don't have a thermometer? Don't despair! Chocolate perfection is still within reach. I often use a cheater's method to temper my chocolate when I'm planning to use it for dipping. Follow along, and then get inspired to dip.
All chocolate is not created equal. The ideal chocolate for melting and dipping is called "couverture" chocolate. (Find it here and here.)
Couverture chocolate has a higher ratio of cocoa butter to cocoa, which helps it melt more smoothly. If you can't find couverture, use the best quality chocolate that you can find. Higher quality chocolate will taste the best.
Also, make sure you're using enough chocolate! If you use a very small amount (say, less than two cups), it will go cool too quickly and you'll have to keep starting over.
Tempering chocolate the "cheater's way" requires a gentle hand and lots of care. Begin by bringing a pot of water to a simmer. Once it simmers, turn off the heat. Place two-thirds of your chocolate into a heat-proof bowl, and place it over the pot of water (most of the bowl should touch the water).
 Don't touch or stir the chocolate. Let it sit until it's more than halfway melted. Once it's melted enough, stir it very gently to help it finish melting.
(If you are using a thermometer and tempering your chocolate the classic way, you'll want the melted chocolate to reach 122°F for dark chocolate and 105°F for milk or white chocolate.)
When the chocolate is fully melted, remove the bowl from the pot of water. Add the remaining one-third of the chocolate and stir gently until melted.
Very important: Do not let any water get into the chocolate. This will cause the chocolate to seize up. Seized chocolate is not pretty.
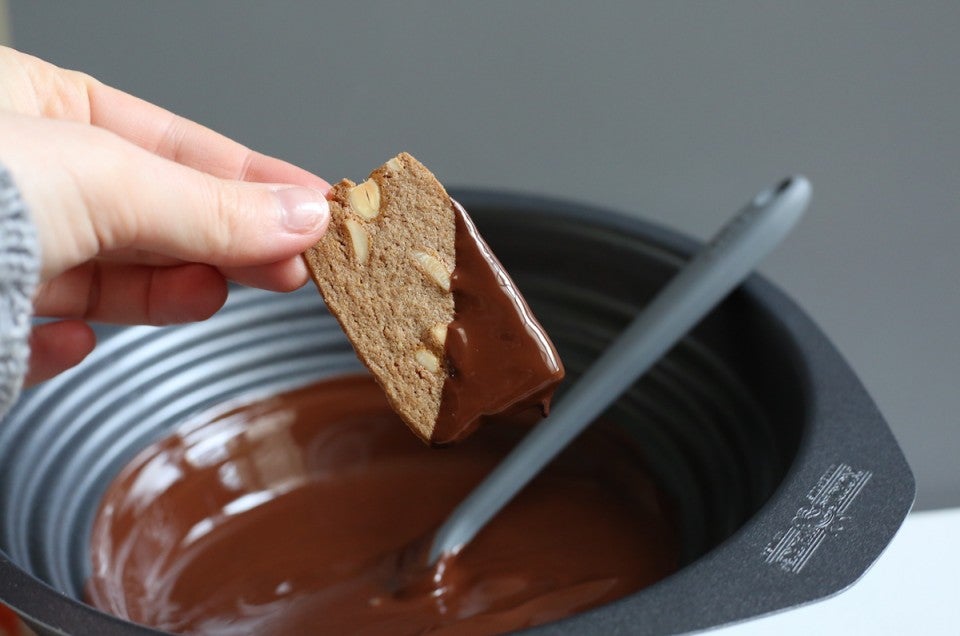
Once your chocolate is melted, you can start dipping. This is the fun part: Think about foods you like, and dip them! Delicate cookies, fruits like strawberries and dried figs, and candies like nougat or halvah work beautifully.
To keep your chocolate at the proper consistency while you work, you can hold it over the pan of still-warm water from the first step. Just make sure the water isn't simmering anymore, and pour out some of the water so there is some air space between the chocolate bowl and the water.
If you're planning to give your confections as a gift, consider something pretty, eye-catching, and easy to wrap up: crimson-hued cherries on the stem, airy meringue puffs, homemade peppermint-streaked marshmallows.
Place a sheet of parchment paper on a baking sheet to catch any drips. Let your sweets rest on the parchment to cool. If you want to coat something in chocolate entirely (like a truffle or a marshmallow), use some nifty chocolate dipping tools; the long handles and delicate tines let you swirl your food in the melted chocolate, creating a polished finished look.
Once your chocolate cools, you'll have a satiny coating that will break with a crunchy, satisfying snap when you bite into it.
Now you have all the tools and tips to make professional-quality chocolate confections. What are you going to dip first? Let us know in the comments below!


