


How to make the most successful loaves in your bread machine
5 bread tips for home bakers.
Editor's note, June 2023: We've slightly updated this post, including photography, to provide even more guidance for readers. Time to get baking!
Do you bake bread in a bread machine?
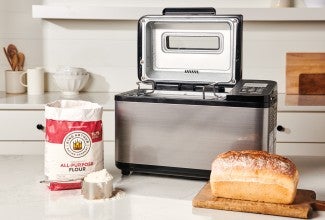
Many bakers do, judging by the popularity of our bread machine recipes. And for good reason: The bread machine is a great way for first-time bread bakers to get started. And for seasoned bread bakers, it can be a welcome shortcut when you simply don't have time to bake bread the standard way: Simply pop ingredients into a machine like the Zojirushi Virtuoso and let it do all the work, from mixing to kneading to rising to baking.
It would be great if the bread machine's chief product — sandwich loaves — would come out perfect every time. Beautifully risen, symmetrically domed, a lovely crust with no floury spots. But honestly? That's not the reality of bread machine baking. What you save in time and effort, you often lose in quality, including mishappen loaves or bread with those dreaded holes in the bottom from the bread machine's paddles.
But with just a minimal amount of effort, you can step in and help your bread machine as it kneads and shapes and bakes — thus ensuring yourself a higher percentage of perfect (or nearly so) loaves. You just need to be willing to touch the dough.
(Fair warning: If you're someone who likes to "set it and forget it" — add the ingredients, press Start, and come back 3 hours later — then this post isn't for you.)
Let's make some bread. We'll go with our most popular bread machine recipe: Bread Machine Bread — Easy As Can Be.
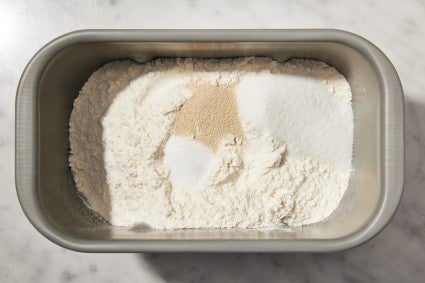
Begin by putting everything into the bucket of your bread machine. Putting the liquids in first makes the dough (and baked bread) less prone to floury spots.
So many people seem afraid to "interfere" with their bread machine as it works. But honestly, nothing bad will happen if you open the lid and poke at the dough.
Start watching the dough about 10 minutes into its kneading cycle; it shouldn't be viscous and liquid-like, nor dry, stiff, and "gnarly." As fellow blogger Susan Reid says, "If you touch the dough and your finger comes back coated, the dough is too wet. If you touch the dough and it feels like poking a beach ball, it’s too dry."
The dough should have formed a cohesive unit and, if not "smooth as a baby's bottom" yet, should be headed in that direction. If it's not, add more flour (if it's too soft), or water (if it's dry).
This step takes just a few seconds and will help prevent floury spots on the baked loaf's crust.
The timing for this can be a bit tricky; but once you figure it out, you're good to go forever.
Get out your kitchen timer, and put it in count-up (stopwatch) mode. Start your timer when you press "Start" on your bread machine (even if your machine has a "rest" or "preheat" mode right at the beginning); you're simply trying to gauge the amount of time between when you press start, and when the final rise begins.
You want to be around when your bread starts its final rise. Most bread machine manuals show a timeline of steps: e.g., preheat 31 minutes, knead 19 minutes, first rise 35 minutes, second rise 20 minutes, etc. A little simple arithmetic will give you an idea of when the final rise will start.
Hang around the kitchen when you figure that final rise is imminent. You'll hear the machine start up momentarily; it'll be knocking down the dough, which means the final rise is about to begin. When you hear that happen, stop your timer and check the time. (On our Zojirushi Virtuoso, it's 1 hour, 45 minutes).
So there you have it: You now know, for the next time you bake bread, that 1 hour, 45 minutes (or whatever) will elapse between the time you press "Start" and when the final rise begins. So whenever you make bread-machine bread and want to remove the paddles before the loaf bakes — pull out your timer and put it to good use.
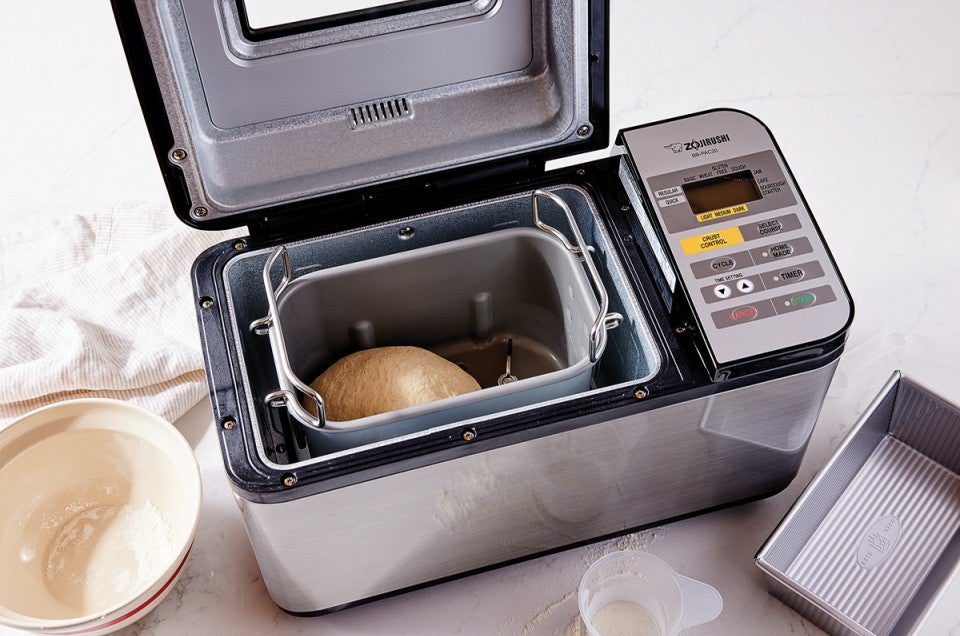
Reach into the bucket, move the dough aside, and lift out the paddles.
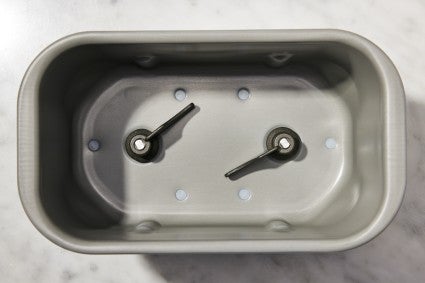
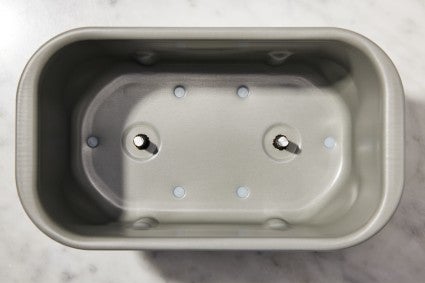
This step will result in loaves of bread without that noticeable divot at the bottom.
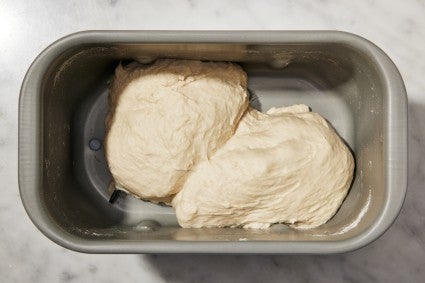
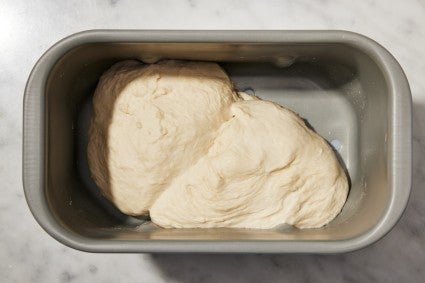
This is where you prevent ski-slope loaves — unevenly shaped bread that's much higher on one end than the other. When you open the lid of the machine to remove the bucket's paddles, check out the shape of the loaf. It might be just fine, filling the pan from end to end. Or it might look like this:
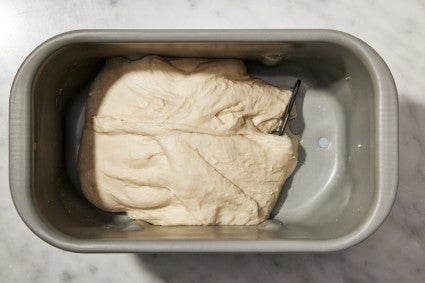
If the dough isn't in an acceptable loaf shape, take it out of the bucket, shape it into a nice, symmetrical log, and put it back into the bucket.
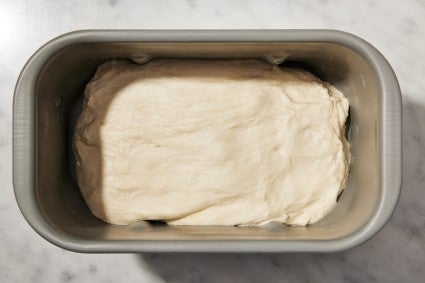
It will rise nice and evenly and bake into a lovely loaf.
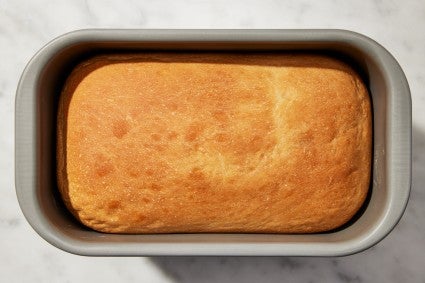
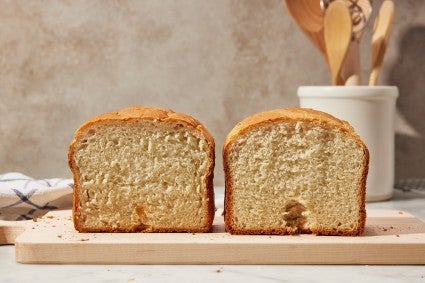
Isn't it annoying when you've done everything right, and your loaf still comes out looking ... well, not as good as it could?
You've pulled your gorgeous loaf out of the pan, and within minutes it develops a crust as wrinkled as Yoda. What's up with that? And how do you prevent it?
As soon as your bread is done, remove the bucket from the machine, take out the bread (which will be easy, since the paddles aren't there to impede its progress), and gently set the loaf back into the machine, sans bucket. Note: While setting the loaf back into the machine without its bucket is a reasonable option with our Zojirushi machines, it may not work well in other brands' machines. Let experience with your own machine be your guide here.
Crack the lid open an inch or so, and let the bread cool right in the turned-off machine. The still-warm (but gradually cooling) air helps prevent moisture from condensing on your loaf's surface — no wrinkles!
So, what's the baking science behind this? If your loaf hits the cooler air outside the machine, any moisture migrating from inside reaches the top surface and condenses, forming water droplets that cause the crust to shrink unevenly — in other words, to wrinkle.

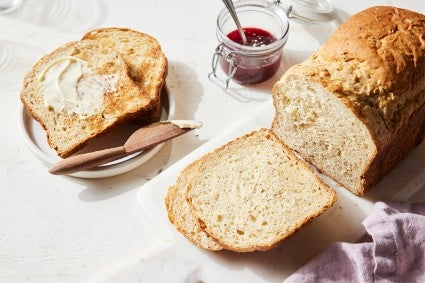
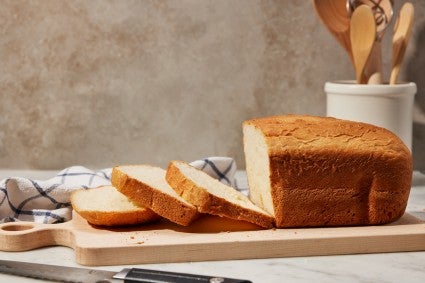
Final step: Enjoy your wonderful homemade bread. Who says you can't bake a perfectly acceptable loaf right in your bread machine?
If you're looking for a great bread machine, our Zojirushi Home Bakery Virtuoso Plus Bread Machine has over 300 five-star reviews and is a beloved appliance for many King Arthur employee-owners.
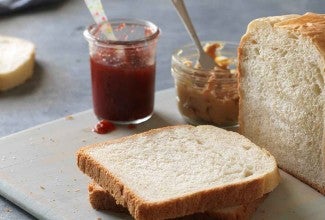
Cover photo by Kristin Teig; food styling by Liz Neily.


February 7, 2022 at 11:09am
In reply to I answered incorrectly the… by Janet (not verified)
No worries, Janet! We appreciate your feedback!
February 1, 2022 at 4:54pm
I love King Arthur flour and other products. I have an old Westbend, and am giving it another try. I used this recipe, and finally have a finish load that is a success. I did use more yeast than it said...the whole package. It rose quite high with no bad effect. Thanks
January 9, 2022 at 4:34pm
That's in interesting idea -putting the bread into the machine without the pan. I'd advise people to be really sure their machine will tolerate that and they're up for the cleanup they'll need to do before the next back. My machine is definitely not made to have anything in it other than the pan.
I took a survey about whether or not I'd be more likely to use KA flour after reading this, but the choices when I said "no" were irrelevant. When I could eat modern wheat, I used KA, but your GF isn't the best on the market. When are you going to start carrying flours from ancient and heirloom wheats, like organic einkorn, spelt, red fife and turkey? I'd love to buy if from you because I know you'll have great advice on how to work with it.
January 9, 2022 at 4:57pm
In reply to That's in interesting idea … by Melody (not verified)
Sorry for any confusion Melody, but we don't recommend putting your dough into a bread machine without the pan. You can take the paddles out after the kneading process, but the dough should still be in the pan. If you have any other questions don't hesitate to reach out to our Baker's Hotline! We're available 7 days a week at (855) 371-2253 (BAKE)!
January 23, 2022 at 11:46am
In reply to Sorry for any confusion… by mperry
Thank you for clearing that up. It is worded differently in the tips.
February 6, 2022 at 6:07pm
In reply to Sorry for any confusion… by mperry
Excuse me tip 5 is exactly a recommendation to put back sans bucket. That won’t work out well in mine give heat element.
“ As soon as your bread is done, remove the bucket from the machine, take out the bread (which will be easy, since the paddles aren't there to impede its progress), and gently set the loaf back into the machine, sans bucket.”
February 26, 2022 at 1:13pm
In reply to Sorry for any confusion… by mperry
I was confused by that too, how could you put the dough back in the machine without the bread pan. Thanks for clearing it up.
February 26, 2022 at 2:39pm
In reply to I was confused by that too,… by Dale (not verified)
Hi Dale, actually, I double-checked with PJ about whether the loaf is meant to be in or out of the pan when you place it back in the machine to cool because the text didn't really seem to match up with Maggie's reply. PJ said that she has found that it works fine to put the loaf back in the machine without the pan in a Zojirushi bread machine, but if you are at all concerned about doing this with the type of bread machine you have, then you should use your best judgment. She has changed the text to include this advice. Happy baking!
January 1, 2022 at 11:05am
I would like to make the sourdough bread machine recipe from KAF. Normally I follow the zojirushi order for placing ingredients in the bowl. When should I put the sourdough starter in the bowl? It is usually, water, flour, sugar, salt, yeast. Thanks for your help. It’s nice to know that you are there for help.
January 5, 2022 at 3:57pm
In reply to I would like to make the… by Debbie Scanlon (not verified)
Hi Debbie,
You can add your starter with the water and mix it together well, then add the other ingredients in that same order. Happy baking!