-
To build the levain: Combine all the ingredients in a tall jar or medium bowl. Cover and leave in a warm place (72°F to 75°F) for 3 to 4 hours, or until doubled in size. You can use your levain immediately or refrigerate it up to 12 hours (or overnight) to use the next day.
-
To make the dough: In a large bowl or the bowl of your stand mixer combine the water and salt, stirring until the salt’s completely dissolved.
-
Stir in a scant cup (200g) of the levain you built. You’ll have some left over; discard or save for another use. Slowly incorporate the flours; adding flour a bit at a time allows it to hydrate fully, shortening the rest (or autolyse) before you start kneading.
-
Once you’ve added all the flour, cover the bowl and let the dough rest for 10 minutes.
-
To knead the dough by hand: Place the dough on a clean unfloured work surface and use the palm of your hand to push it in a forward motion to the point that it’s almost tearing. Pull the dough back onto itself, rotate it, and push with your palm again.
-
Once you get to the point where the dough is coming together and getting tight, you may need to let it rest for 5 minutes before continuing to work it. Remember that the key to making dough is to watch it. If you feel you need to add more water or flour, add a tablespoon at a time.
-
You'll know your dough is ready once it’s smooth and bouncy. You should be able to squeeze it and pull it without any tearing. This will take about 20 minutes.
-
To knead the dough in a stand mixer: Fit your mixer with the dough hook attachment and turn the mixer to medium-low speed. Knead until the dough becomes smooth and bouncy, about 10 minutes.
-
Let the dough rest (bulk ferment) until nearly doubled, about 4 hours.
-
To make pizzas: Divide the dough into 4 pieces (225g to 235g each) and use your palms to round them into balls. Place the balls on a parchment-lined tray, baking sheet, or into a large lidded container. Cover the balls loosely and let them rest (proof) at room temperature for about an hour.
-
Wrap the balls of dough well with plastic, or put the lid on the container. Place the dough in the refrigerator for 24 to 48 hours.
-
About 2 hours before you’re ready to bake pizza, remove the dough from the refrigerator and leave it at room temperature.
-
About 1 hour before you’re ready to bake pizza, place a rack with a baking or pizza stone in the top third of your oven and preheat the oven to 500°F.
-
Flour your work surface liberally (semolina is a good choice here, but any flour will work) and place one of your dough rounds in the center. With your fingertips, push from the middle to the outer edge of the dough. There are various techniques you can use after you've done a preshaping on the work surface. The simplest is to take the dough and hold the edge with your fingertips. Gently press toward the outer edge and rotate in a circle, making sure you’re stretching it out as you go along, until the circle is 10" to 12" in diameter.
-
Place the shaped pizza onto a piece of parchment, or a semolina or cornmeal-dusted baking peel.
-
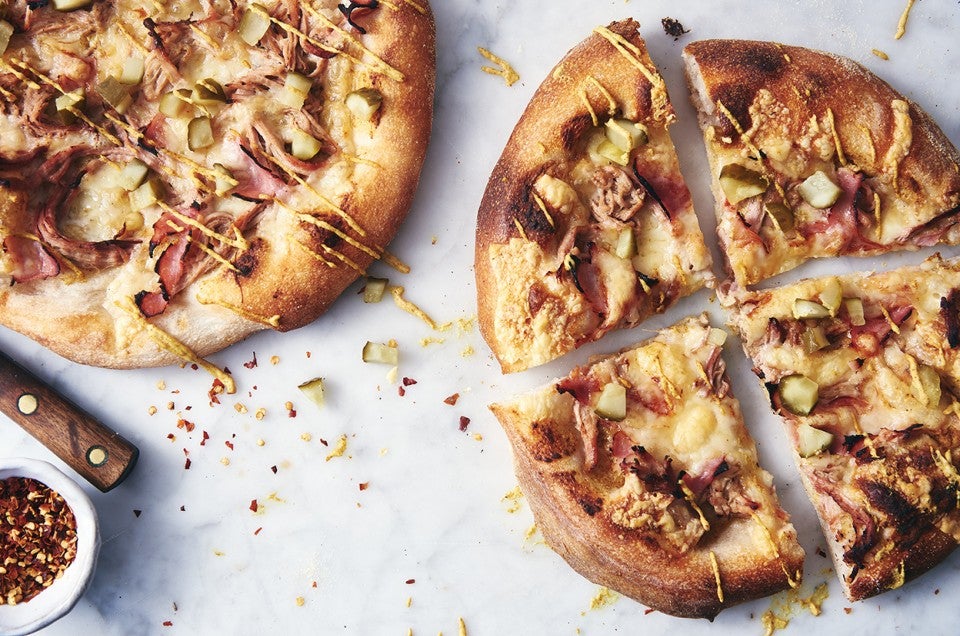
Spread a thin layer of mustard onto the center of the pizza, avoiding the outer crust, then add the cheese, followed by the pork and ham.
-
Transfer the pizza to the hot stone and bake until the crust is as dark as you like and the cheese is bubbling, 10 to 15 minutes.
-
Remove the pizza from the oven, top with the pickles, and enjoy.
-
Alternatively, bake the topped pizzas for 5 minutes, remove them from the oven, and allow to cool completely before wrapping well and storing in the freezer.


