Potato Bread

Recipe by PJ Hamel

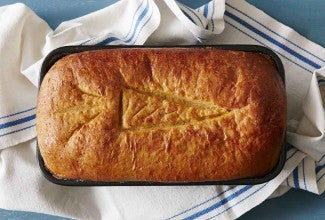
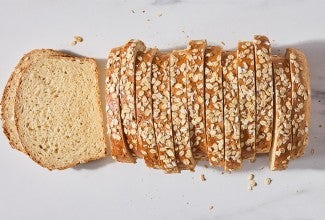
If you think of bland flavors when you think of potatoes — think again! This recipe produces probably the most flavorful "white" bread we've ever had. Moist and very sliceable, it's wonderful for sandwiches and toast; it has that "spongy" texture, perfect for spreading peanut butter or loading on tuna salad without crumbling. An overnight rise in the fridge is the key here. The longer a batch of dough rises, the better its flavor will be; and the taste of this bread is superb. Somehow, the combination of potato, butter, and eggs produces an elusive hint of cheese in the final loaf.
Prep
10 mins
Bake
40 to 45 mins
Total
10 hrs 50 mins
Yield
2 loaves
Potato Bread

Instructions

Prevent your screen from going dark as you follow along.
  1. Weigh your flour; or measure it by gently spooning it into a cup, then sweeping off any excess. Beat together all of the dough ingredients, using the flat beater paddle of your stand mixer, or your bread machine set on the dough cycle. If you're using a stand mixer, beat the mixture for 4 to 5 minutes at medium-high speed, stopping the mixer to scrape down the sides and bottom of the bowl twice. The mixture should start to become smooth and a bit shiny.

  2. Switch to the dough hook, and knead the dough at medium speed for 7 minute, stopping to scrape the dough into a ball twice; it may or may not start to clear the sides of the bowl on its own. If you're using a bread machine, let it go through its entire kneading cycle, but don't let it rise; continue with step 3, below.

  3. Scrape the dough into a ball, and place it in a lightly greased bowl or large (greased) plastic bag. Refrigerate overnight, or for up to 24 hours.

  4. Remove the dough from the refrigerator, divide it in half, and shape it into two 9" logs. Place them each in a lightly greased 9" x 5" loaf pan.

  5. Cover the pans with clear shower caps (first choice) or lightly greased plastic wrap, and allow the dough to rise until it's crowned about 1" over the rim of the pan. Since the dough is cold, this will take anywhere from 2 to 4 hours. Towards the end of the rising time, preheat the oven to 350°F.

  6. Bake the loaves for 25 minutes. Tent with aluminum foil, and bake for an additional 15 to 20 minutes, until the bread is a deep golden brown, and a digital thermometer inserted into the center of one of the loaves registers at least 190°F.

  7. Remove the bread from the oven, and place the pans on a rack. After 5 minutes, gently turn the loaves out onto the rack to cool completely.

  8. Store, tightly wrapped, at room temperature for several days, or up to a week in cool/dry weather; for longer storage, wrap well and freeze.

Tips from our Bakers

  • Want to make just a single loaf? Halve all the ingredients except the yeast; use 2 teaspoons instant yeast.
  • We don't advise kneading this dough by hand; it's extremely sticky. If you don't have a stand mixer or bread machine, make enough dough for just one loaf, and try beating the dough with a hand mixer.
  • Want to make this bread with the help of your bread machine? Place the dough ingredients into your machine in the order listed and choose the dough or manual cycle. When the cycle is done, remove the risen dough and shape and bake as directed in the recipe above. Note: Due to the many brands of bread machines on the market and their different features, we can’t guarantee you can bake this bread start to finish in your own machine; please use the dough or manual cycle instead.