-
To clarify the butter: Melt the butter over low heat in a large pan until the foam rises, watching closely so that the butter doesn’t burn or bubble over the top of the pan. Skim off and discard the foam, then remove the pan from the heat.
-
Cool the butter slightly, skim and discard the foam again, then pour the butter into a bowl, being careful to prevent the milky liquid at the bottom of the pan from pouring into the bowl; you want only the clarified butter (clear fat).
-
Cool the clarified butter to lukewarm before using. If you're not making katah right away, cover and refrigerate the clarified butter until you need it; you'll need to rewarm it before using.
-
To make the dough: Weigh your flour; or measure it by gently spooning it into a cup, then sweeping off any excess. In a large mixing bowl or the bowl of a stand mixer, combine 4 3/4 cups (570g) of the flour, the salt, sugar, and yeast. Make a well in the center and add the water, milk, eggs, and 1/2 cup (113g) clarified butter to the bowl, incorporating by hand or mixer to form a sticky dough.
-
Gradually add the rest of the flour and knead — by hand or mixer set to medium-low speed — until the dough is smooth and elastic. Shape the dough into a smooth ball and place it back in the mixing bowl. Cover and let the dough rise in a warm place until doubled in size, about 1 1 /2 hours.
-
Transfer the dough to a lightly floured work surface, gently deflate it, and divide it in half. Shape each piece into a ball and place on a lightly floured or parchment-lined baking sheet. Cover the balls with plastic and a dish towel and allow them to rest for 20 minutes.
-
To roll out the dough: Working with one piece of dough at a time, flatten it gently with your hands on a well-floured work surface large enough to hold a 28”-diameter dough circle. Sprinkle a little flour on top of the dough, then roll the dough into a circle using a rolling pin.
-
Once the dough’s diameter is as long as your rolling pin, it’s easiest to use an okhlavoo (or long food-safe dowel) to finish rolling the dough into a thin circle about 28” in diameter; it will be thin enough to be semi-transparent. You can also continue to use a rolling pin (a straight one is preferred), but you’ll need to move it around to ensure the dough is rolled out uniformly.
-
Pour a scant 1/2 cup (100g) of the remaining clarified butter over the dough and use your hands to spread the butter over the entire surface.
-
Starting with the section of dough that’s closest to you, fold 4" of the dough toward the center of the circle. Continue to fold the dough in 4” increments until you reach the opposite side of the circle and you have a roughly 4” x 28” strip of dough.
-
Spread a little more clarified butter evenly over the dough.
-
Starting at one 4” end, fold over about 6" of dough. Continue to fold the dough in 6” increments until you reach the opposite side, and you’ve formed a roughly 4” x 6” rectangle with the seam on the bottom.
-
Cover the katah and set it aside while you roll out and fold the remaining ball of dough; you want the butter to have a chance to firm up before working the dough again.
-
Brush a little of the clarified butter into the bottom and onto the sides of two 8” or 9” round cake pans.
-
Roll or pat the katahs into 8” or 9” circles and place them into the prepared pans, patting them gently so that they fill the pans. Pierce the surface of the katahs with the tines of a fork to create a design, then pierce them a few more times all the way through to the bottom to help release any air bubbles as they bake.
-
Cover the katahs with plastic and dish towels and let them rest in a warm place until the dough rises to the top of the pan, 1 to 2 hours depending on the warmth of your kitchen.
-
Toward the end of the rising time, position a rack in the center of the oven and preheat the oven to 350°F.
-
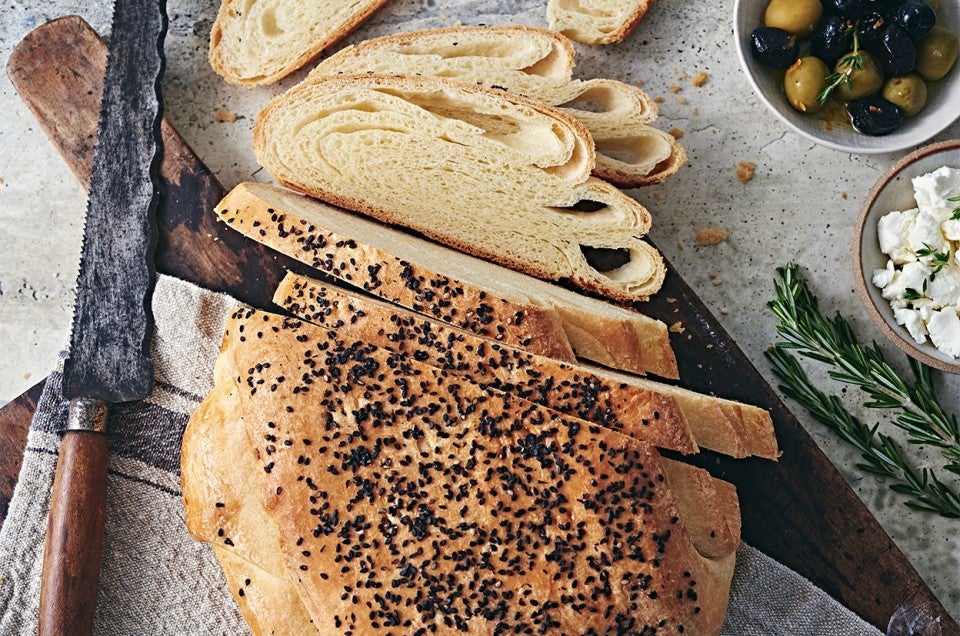
Brush the tops of the katahs with the beaten egg and sprinkle with the nigella or sesame seeds. Bake the katahs, one at a time if necessary, until the tops and bottoms are nicely golden brown, 35 to 45 minutes; a digital thermometer inserted into the center of the loaves will read about 200°F.
-
Remove the pans from the oven and allow the katahs to cool slightly before transferring them to paper towels to cool completely.
-
Katahs are best enjoyed freshly baked; serve with olives and cheese (a goat’s milk cheese would be traditional).
-
Store any leftovers, well wrapped, at room temperature for a day or so; or freeze for up to one month.


