-
To prepare the roasted garlic paste: Cut the root end off an entire head of garlic. In a small microwave-safe bowl, place the garlic head cut-side down, then add the olive oil and water.
-
Microwave the garlic for 3 to 5 minutes at 50% power, until the cloves are soft and cooked through. Reserve the cooking liquid. (See “tips,” below, for details on how to prepare the garlic on the stovetop.)
-
Remove the cloves from their skins by squeezing on the stem end, releasing the garlic into a small bowl. Add the reserved cooking liquid and mash with a fork until smooth and paste-like. Set aside.
-
To prepare the dough: Weigh your flour; or measure it by gently spooning it into a cup, then sweeping off any excess.
-
In the bowl of your stand mixer or a medium-large bowl, add the flour, water, yeast, salt, and garlic paste.
-
Stir everything together to make a shaggy, sticky dough with no dry, floury patches. This should take 30 to 45 seconds in a mixer using the flat beater; or about 1 minute by hand, using a spoon or spatula. Scrape down the sides of the bowl to gather the dough into a rough ball; cover the bowl.
-
After 30 minutes, uncover the bowl and use a bowl scraper or your wet hand to grab a section of dough from one side, lift it up, and press it down to the middle to seal. Repeat three more times, turning the bowl 90° each time. This process of four stretches, which replaces kneading, is called a fold.
-
Cover the bowl and let the dough rest, undisturbed, for at least 30 minutes or for up to three hours. This forgiving dough will be fine with more or less time; a longer rise will make shaping the rolls easier.
-
To shape the rolls: Place the dough on a lightly floured surface and roll it into an 18" x 8" rectangle, roughly 1/4” thick. For rolls with consistent shape, try to pat the dough into a precise rectangle (with corners), rather than an oval.
-
To add the filling: Brush the oil evenly over the dough, covering all but a 1/2” strip along one long side.
-
Sprinkle on the cheeses and Pizza Seasoning, leaving the same 1/2" strip uncovered.
-
Starting with the filling-covered long side, roll the dough into a tight log, pressing to seal. Be sure the dough is rolled tightly; the rolls need to be able to hold their shape when skewered.
-
Cut the log into eighteen 1” slices. Gently press both cut surfaces of each slice into the semolina or cornmeal, applying some pressure so that the coating adheres; this will help prevent sticking during grilling or baking. (See “tips,” below for details on how to bake these rolls in an oven.)
-
Sprinkle a light layer of semolina or cornmeal (about 1 tablespoon) onto a parchment-lined baking sheet.
-
Thread the rolls onto 10” to 12” metal or bamboo skewers, poking them through the center of their sidewalls. Use three rolls per skewer, leaving about 1 1/2" of empty space between each.
-
Set the skewers on the prepared baking sheet and allow the rolls to rest, covered, for 20 to 30 minutes while you preheat the grill to 350°F.
-
To prepare the topping: In a small bowl, whisk together the olive oil and garlic. Set aside.
-
To grill the rolls: Lay the skewers on the preheated grill, cooking the rolls for 4 to 5 minutes per side. Adjust the grill heat or move the rolls as necessary so they both brown and crisp evenly and cook all the way through (see “tips,” below for additional details on our recommended grilling method). Baste occasionally (both sides) with the topping. Grill until well baked; a digital thermometer will read 190°F when inserted into the center of a fully cooked roll.
-
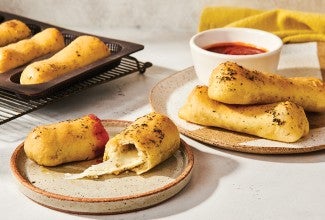
Remove the rolls from the grill and garnish with additional garlic oil, Parmesan, and chopped basil or parsley. Serve warm.
-
Storage information: Store leftover rolls, well wrapped, at room temperature for several days. Reheat leftover rolls, well-wrapped in foil, for about 5 minutes in a toaster oven or your oven set to 300°F before enjoying.


