


How to use a scone pan for picture-perfect pastries
A scone pan is the quick and easy solution for perfectly shaped and baked scones.

Date
August 21, 2024


Sure, you can bake scones freeform on a baking sheet. And they’ll turn out great! But a specialized scone pan yields perfectly baked, beautifully shaped scones with a minimum of time, skill, and effort — which is why we love to use one when baking up a batch of our favorite teatime treats (like these Fresh Apple Cinnamon Scones).
So how exactly do you use a scone pan? The following tips, tricks, and techniques will help you impress friends and family with scones that are just as professional-looking as they are delicious.
A standard scone pan will bake eight 4"-long triangular scones. A mini scone pan, meanwhile, will make 16 smaller scones. If you're baking with a metal pan, look for one that's dark on the outside, so it absorbs heat quickly, and has a light-colored (preferably nonstick) interior to avoid overbrowned crusts. It should be sturdy enough to withstand normal to heavy use, yet still lightweight enough to handle easily. Our Standard Scone Pan fits the bill in all of these particulars.
A ceramic scone pan, meanwhile, is a decorative option that can go straight from the oven to the serving table. It also heats evenly and releases scones easily — our Ceramic Scone Pan is a fan favorite.
If your pan has a good-quality nonstick interior, you shouldn’t need to grease it; otherwise, grease it lightly with nonstick pan spray.

What’s the best recipe to bake in a scone pan? Any one that’ll fit! Your scone pan is suitable for both stiff and sticky doughs, as well as super-slack drop scones. The only thing you need to be mindful of is the recipe’s size: 3 cups (up to 360 grams) of flour and 2 cups of add-ins (nuts, chopped chocolate, dried or fresh fruit) yield the maximum amount of dough a standard-sized pan can hold. (If you're making a larger recipe, stash the extra dough in the fridge, then bake a second batch of scones in the cooled-off pan. Or simply shape, cut, and bake extra scones freeform, on a baking sheet.)
Assess the dough’s consistency: Is it fairly dry and stiff, very soft and sticky, or somewhere in between? This will determine how you transfer it from the bowl to the pan.
For soft, sticky scone dough (such as drop scones), we recommend dividing the dough by weighing it with a scale and portioning it into the number of pieces you need: one for each well in the pan. (If you don’t have a scale, eyeball the process.)
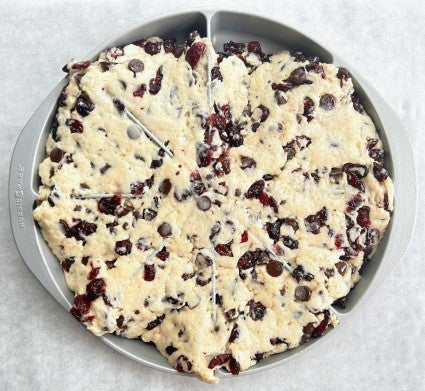
For stiff to moderately soft scone dough (you can work it fairly easily without it sticking to your hands), use a plastic bowl scraper to pick up the dough in one piece, then lay it atop the pan and flatten it into the wells. Run the scraper across the top to even it out, using the excess dough to fill in any gaps. If your pan has a hole in the center, simply poke out any dough caught in there.
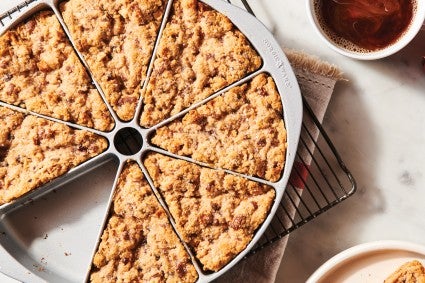
Sprinkle the scones with sparkling sugar or cinnamon sugar, if desired, and bake as directed. If your pan has a dark exterior, start checking for doneness at the shorter end of the time suggested by the recipe.
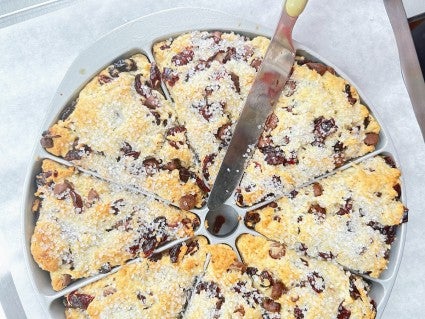
Let the scones cool in the pan for several minutes, then separate their edges from the pan and each other (if necessary) with a table knife. Lift each scone out of its well and transfer it to a rack to cool.
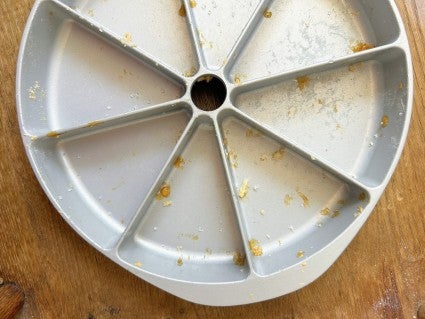
If there appears to be any stuck-on residue, soak the pan in warm water with gentle dish detergent. Use your kitchen sink’s spray attachment to rinse it out; if necessary, gently wipe off any lingering crumbs with a sponge. Using a harsh scrubber will harm the pan’s nonstick surface over time — so don’t go there!
Your objective is to preserve the pan’s nonstick finish, so store it where it won’t get banged up by other pans above or around it.
Are your scones often a bit drier than you’d like? See how to prevent dry scones.
Cover photo (Carrot Cake Scones with Cream Cheese Frosting) by Rick Holbrook; food styling by Kaitlin Wayne.